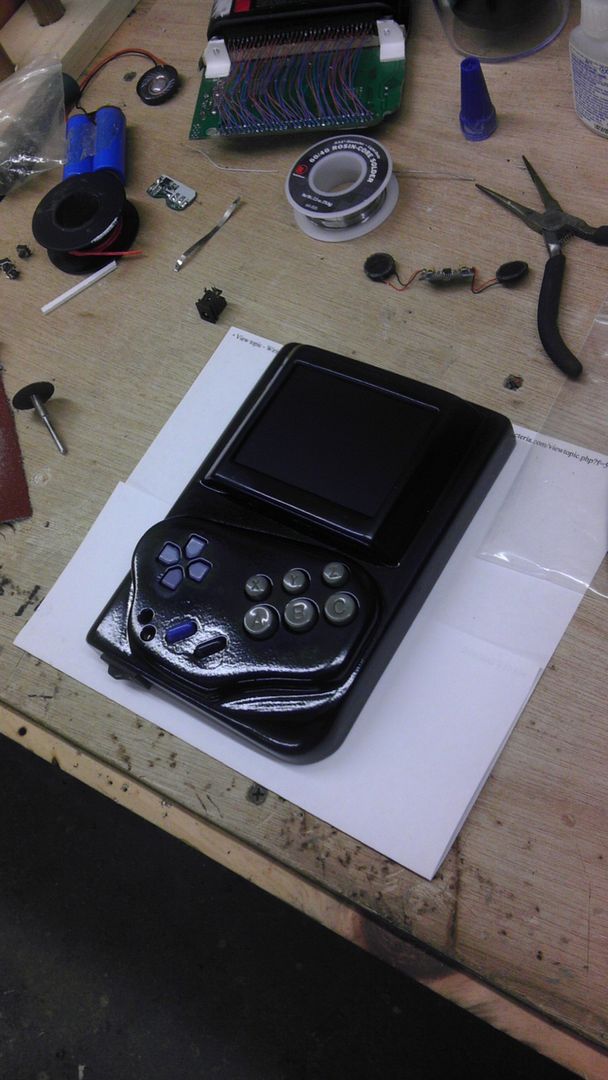
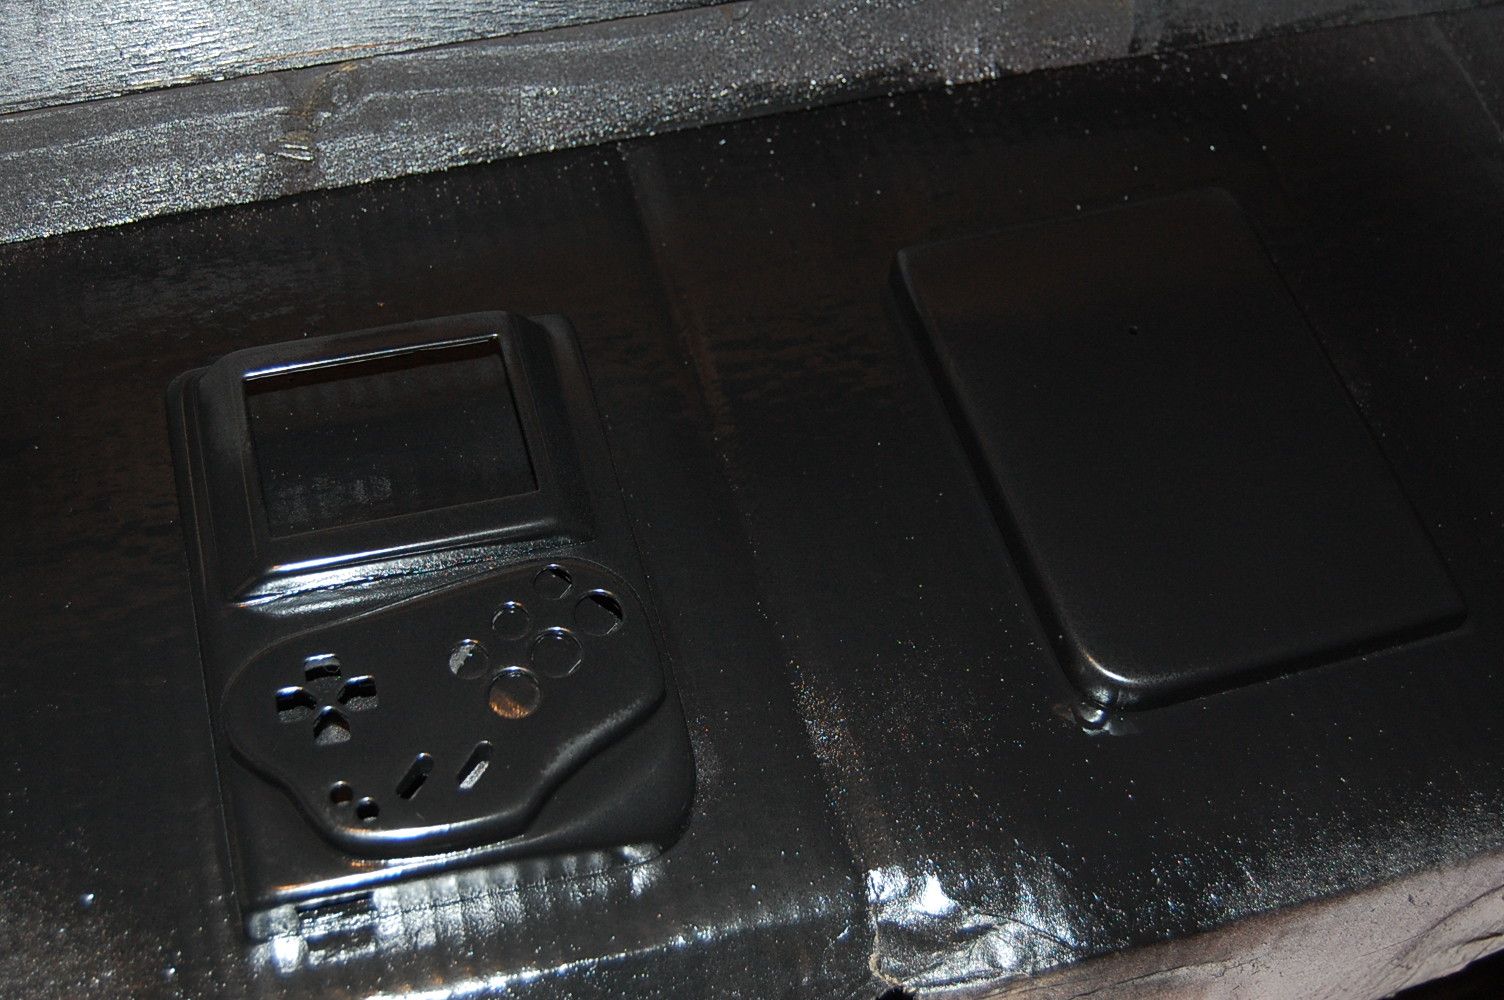
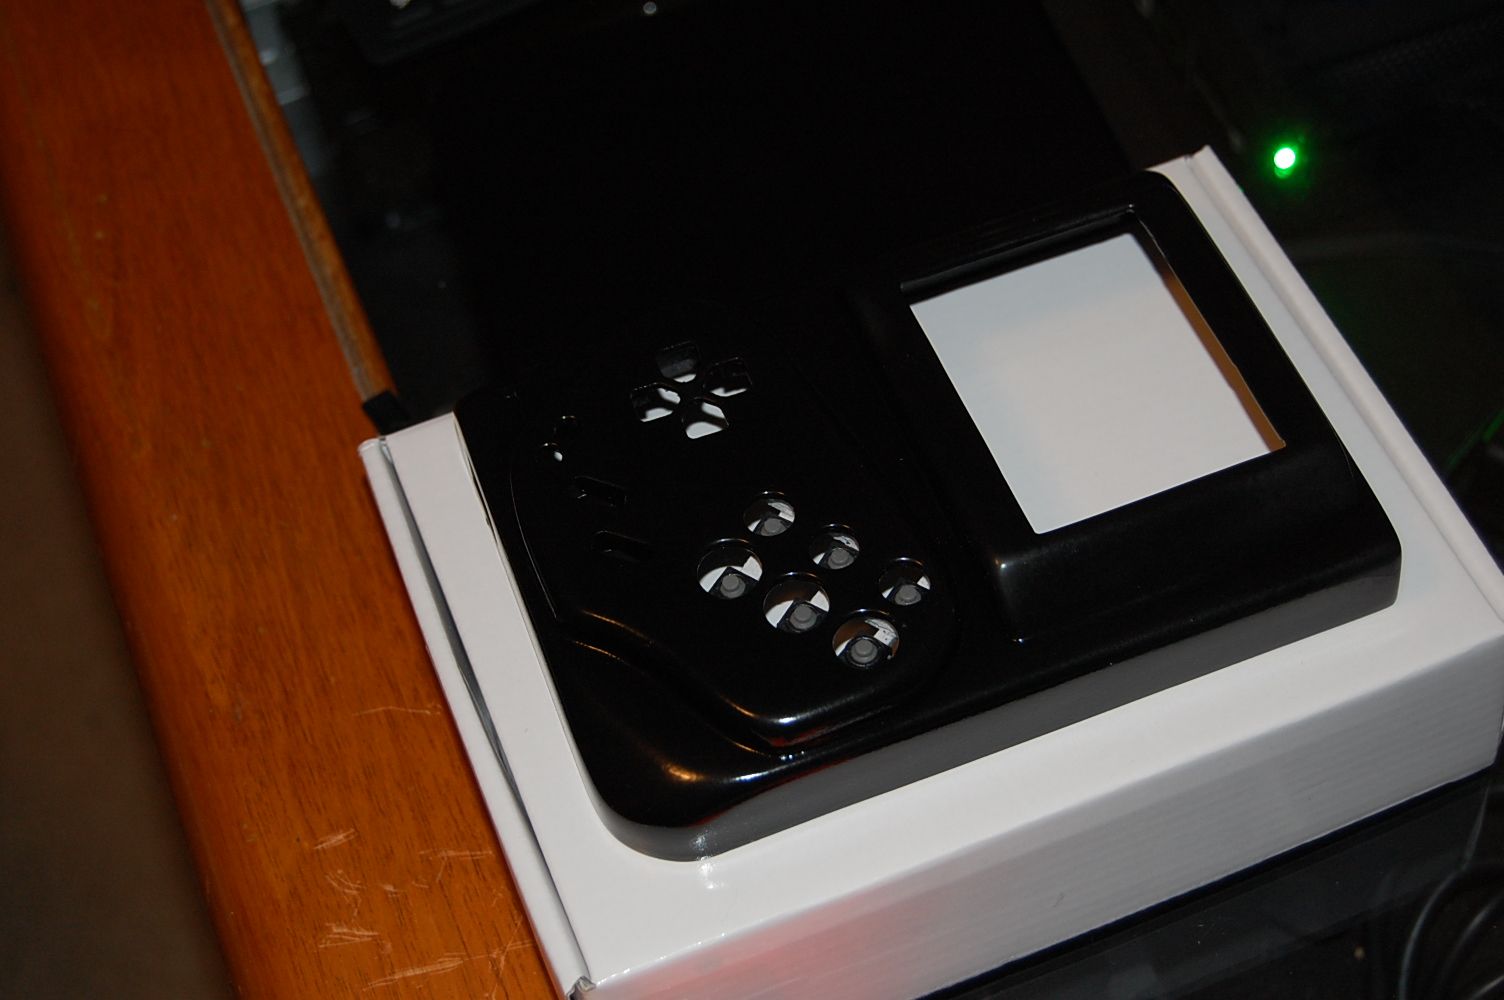
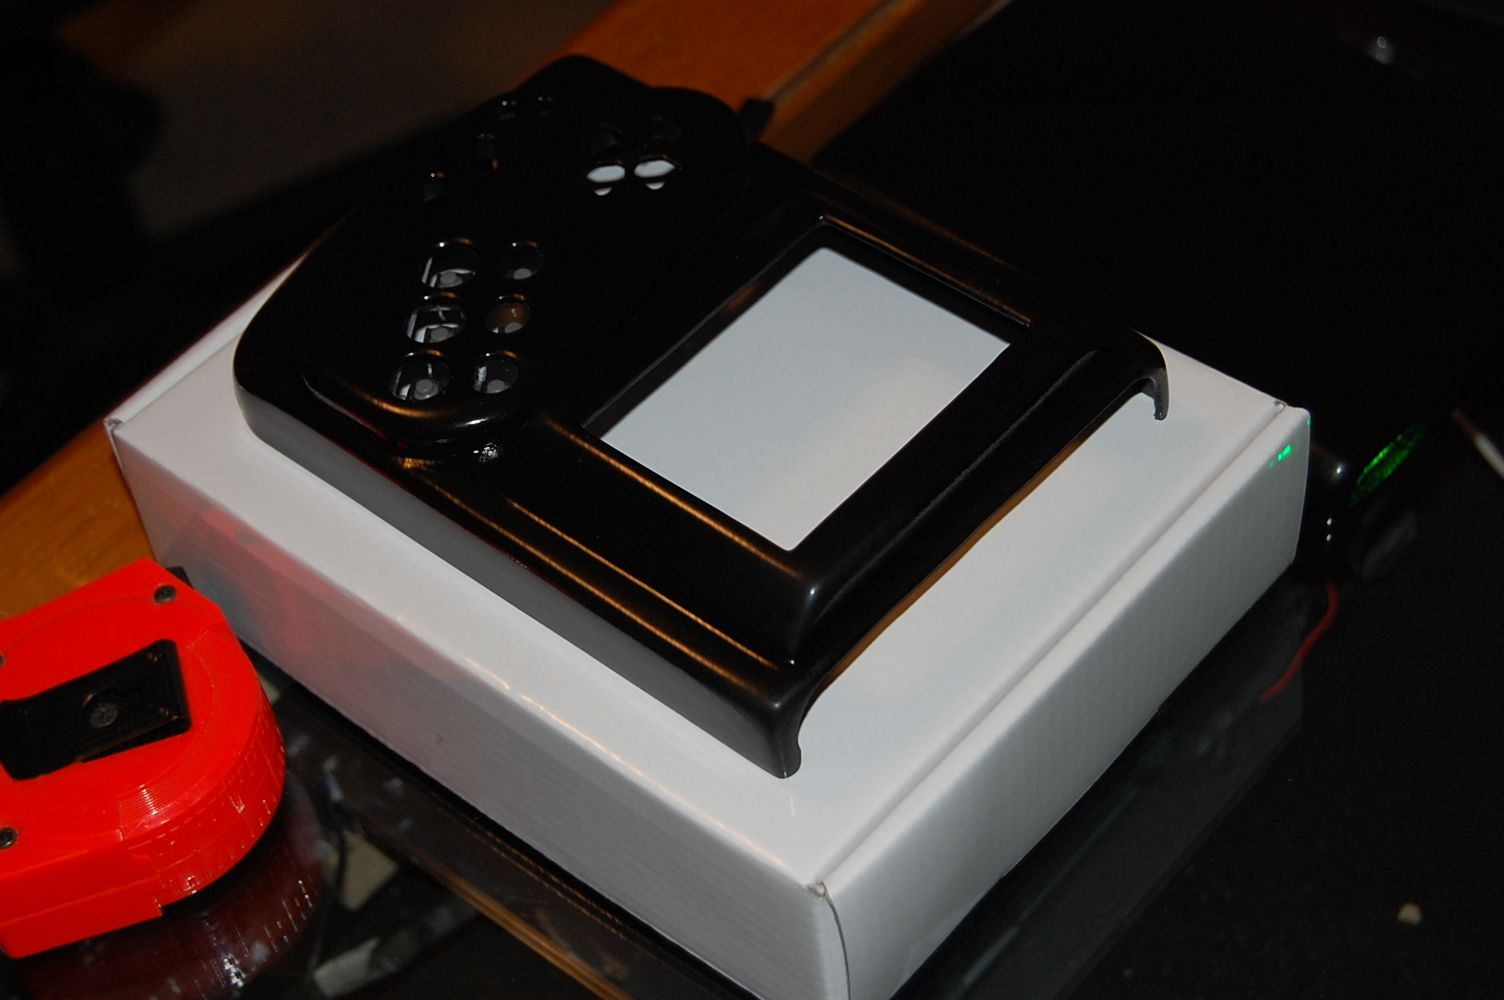
OK! So after a very very productive weekend, the casing is finished and the clear coat is hardening nicely. Though I'll admit that I still don't have the painting/finishing skills of others, I'm quite happy with how this has turned out regardless. Yes you can still see some scratches and component outlines, but this is the most beautiful case I've done to date so things are improving.
Anyway, I'll tell the rest through a picture log.
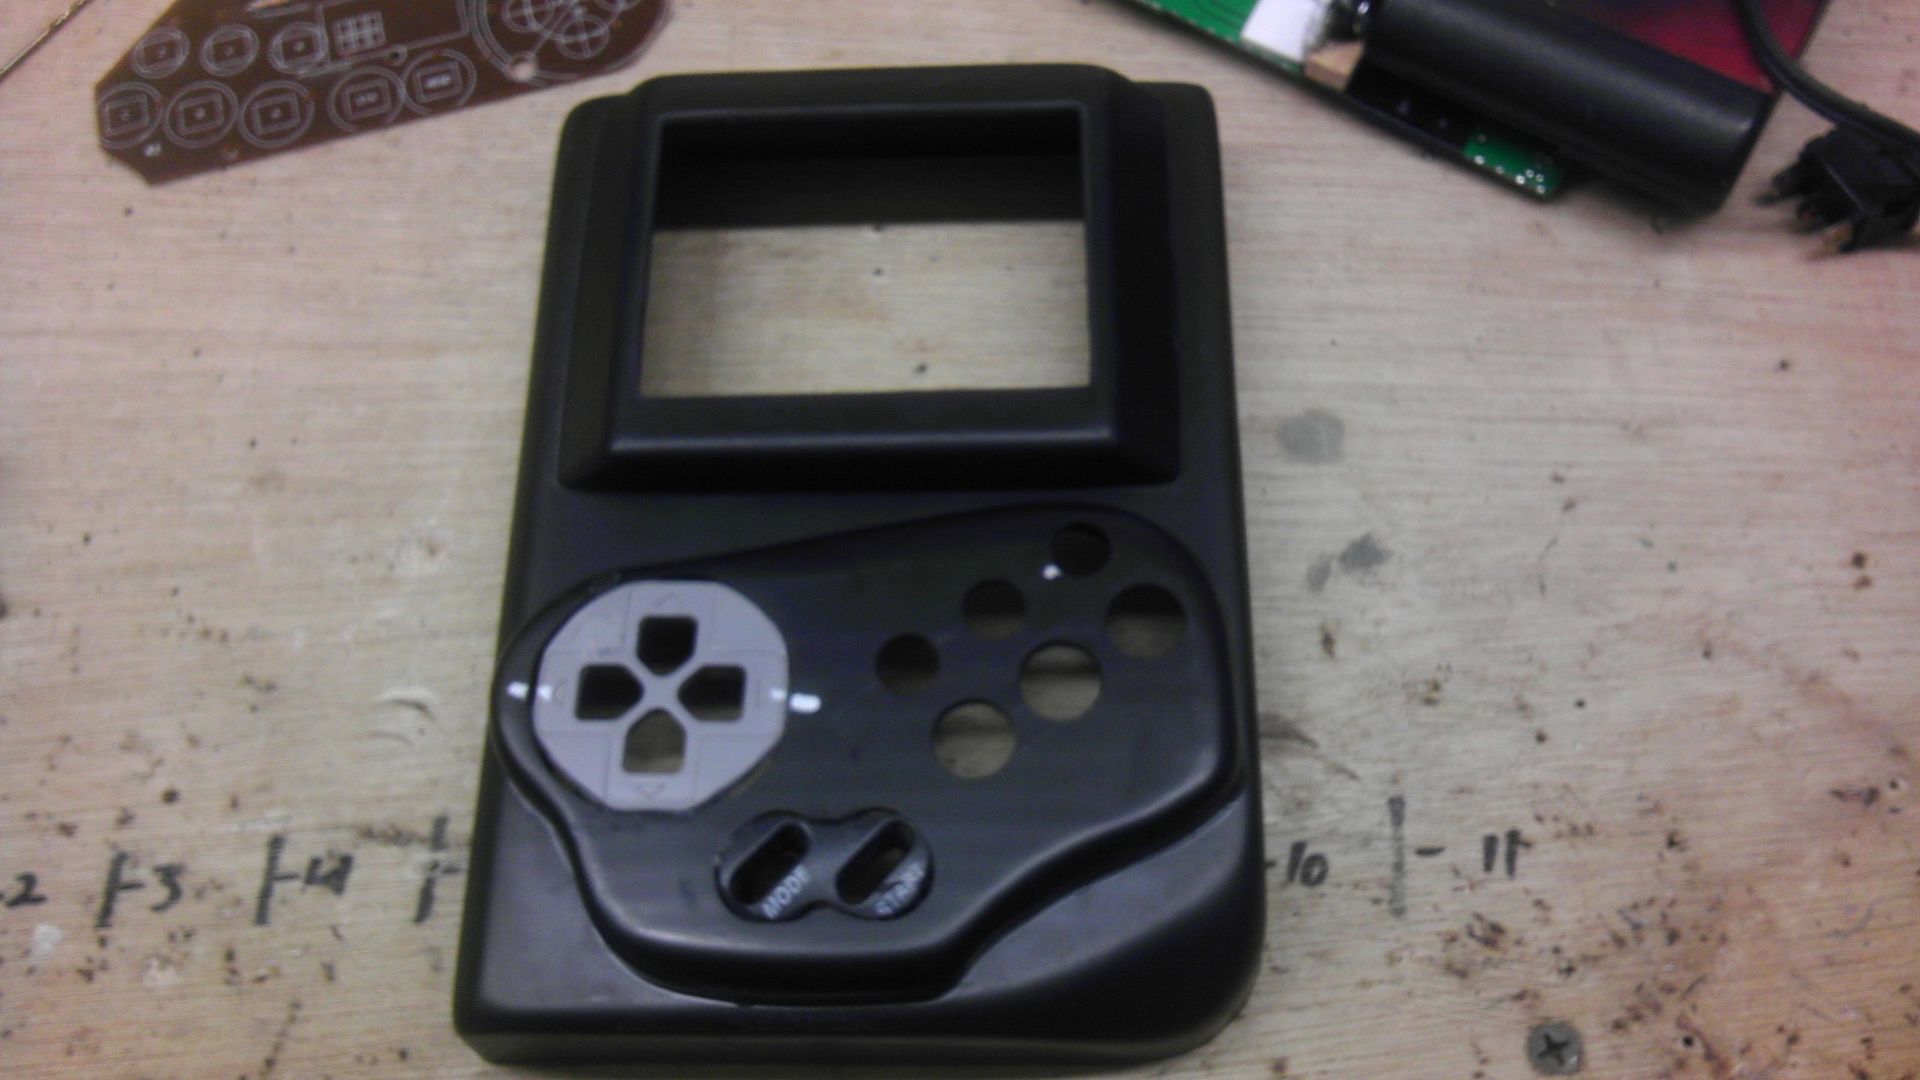
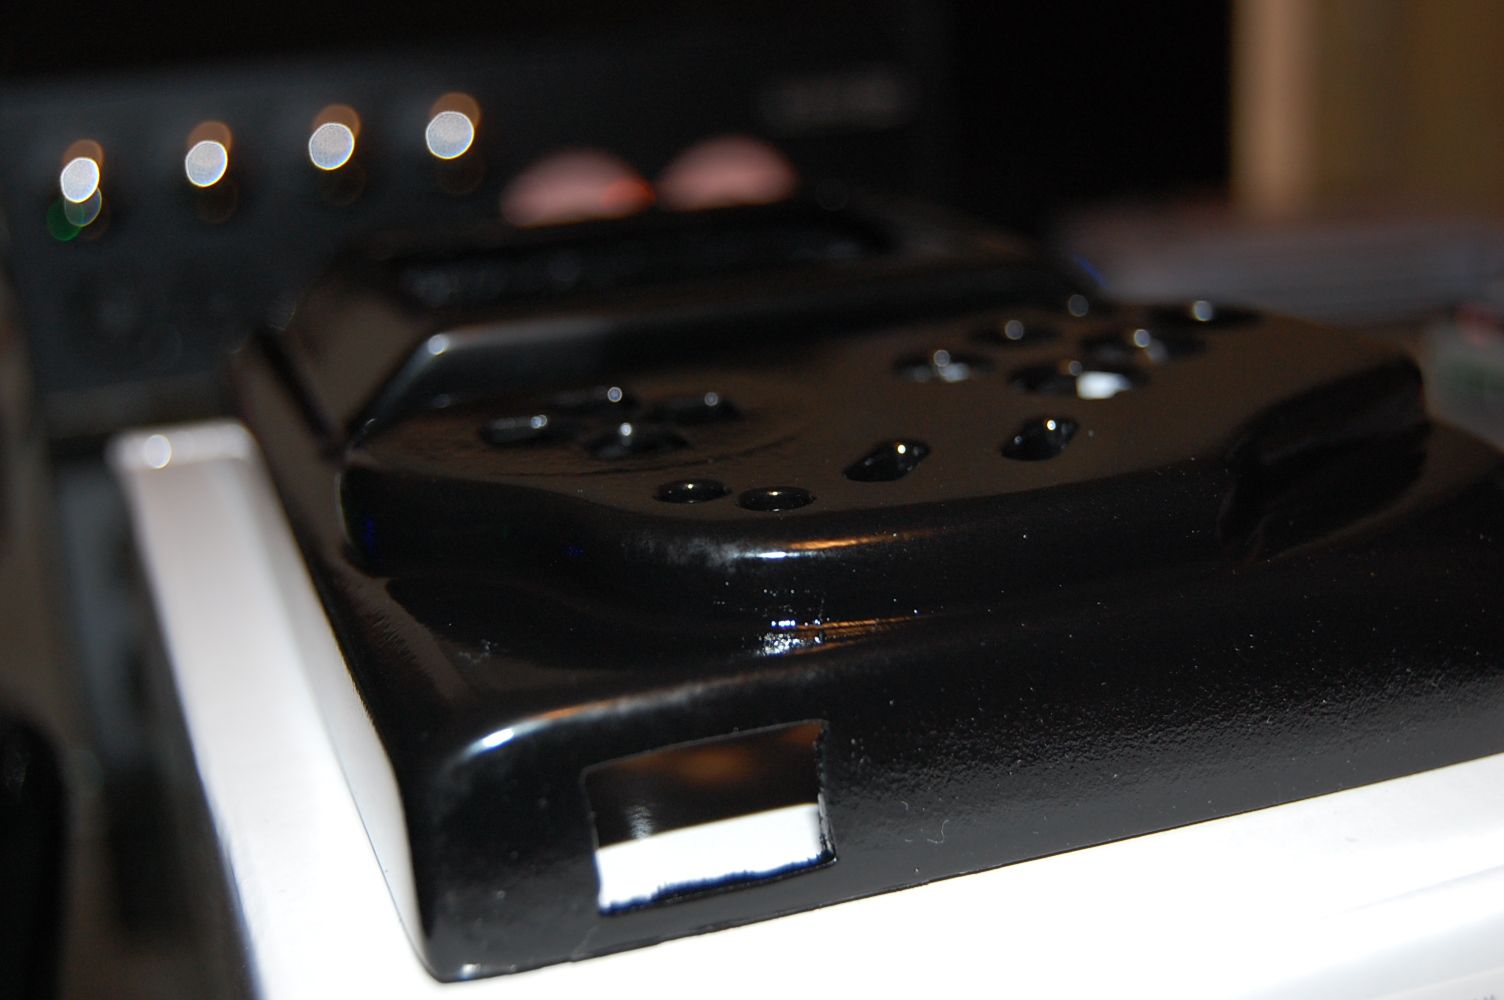
I reformed the control bezel because I wasn't liking the layout of how close the buttons were together. The big problem though was my drill bits attacking and snapping my plastic instead of drilling it. Well I found the answer to pretty much all my plastic hole drilling problems in the next photo. But as you can tell, the layout is much cleaner and more user friendly.
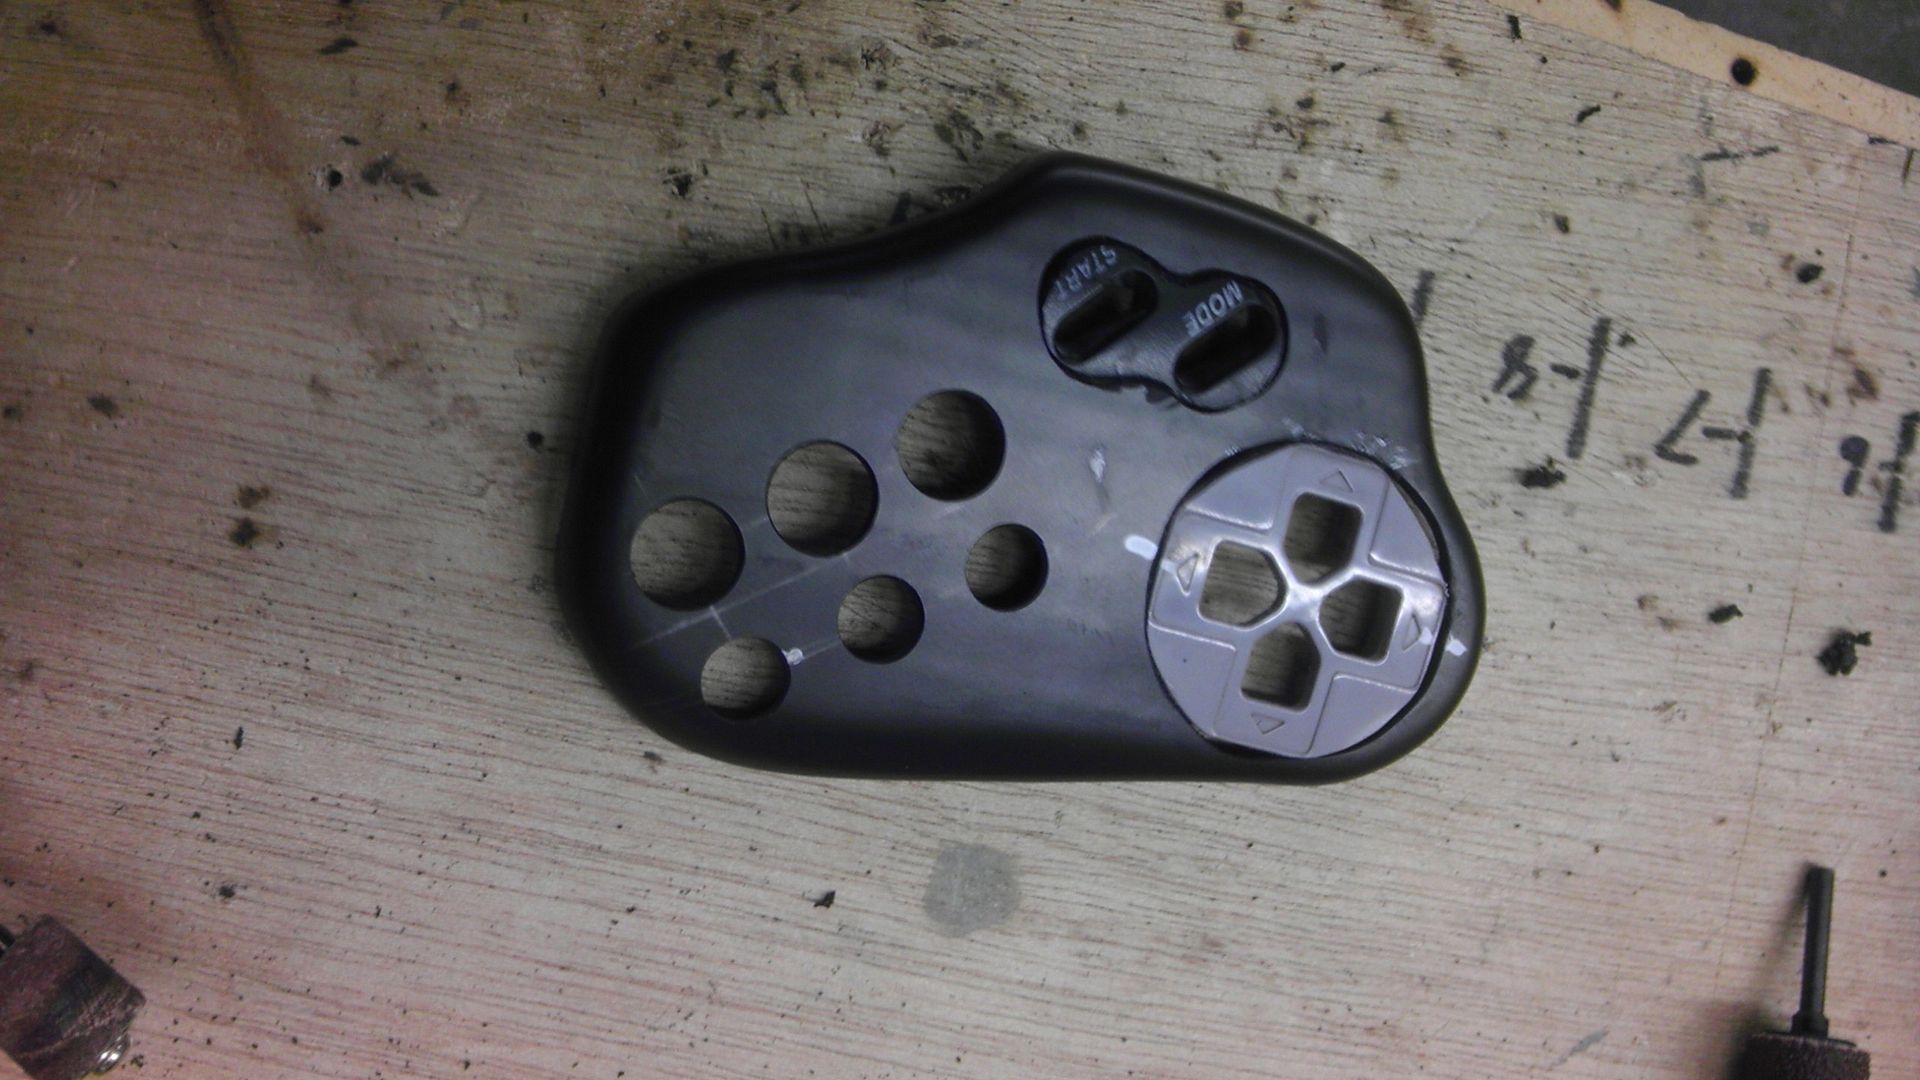
This is what's called a stepper-bit. This one goes from 1/8th inch to 1/2. By starting a small centering hole with a regular drill bit, placing this one in the drill takes just little shavings of plastic away at once in increments, smoothly and gently. Get one of these and you'll never have problems with making drill holes again!

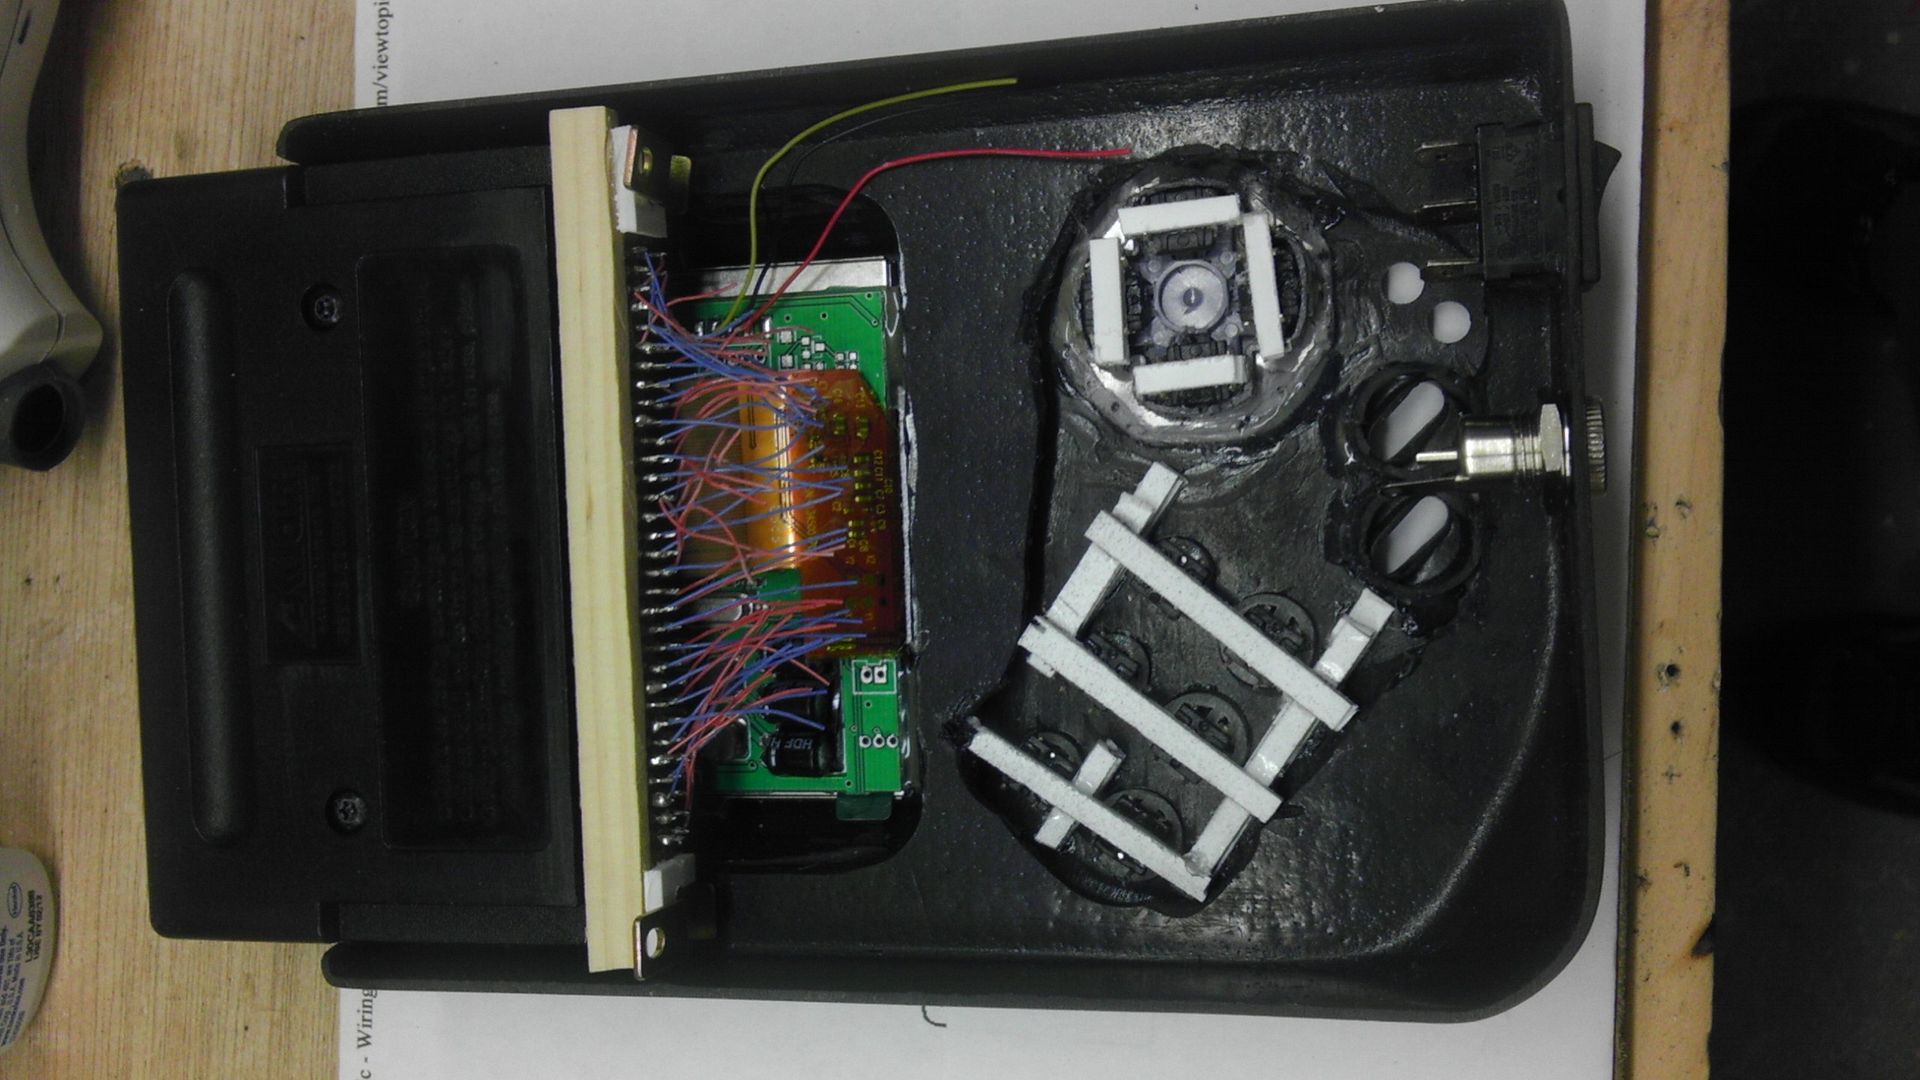
The Screen and Control Bezel PVC cemented in place. For this, I placed these on before I cut out the back sides of them. This allowed me to draw an outline of both bezels and load up on the inside of the line, a lot of PVC cement. This in turn allowed for a solid bond to the surface without the need for massive amounts of filler to fill in the edges because the bezels are actually sitting on a solid flat surface. This is how it looked "After" applying the cement and cutting out the back. Not too shabby.
The next two pics show the mounting system for the tact switches for the ABC XYZ buttons. Just little strips of styrene built up and super glued in-between layers to promise a tight and strong hold. The buttons will then be glued to the tact switch tips therefore preventing rotation and keeping them in place.
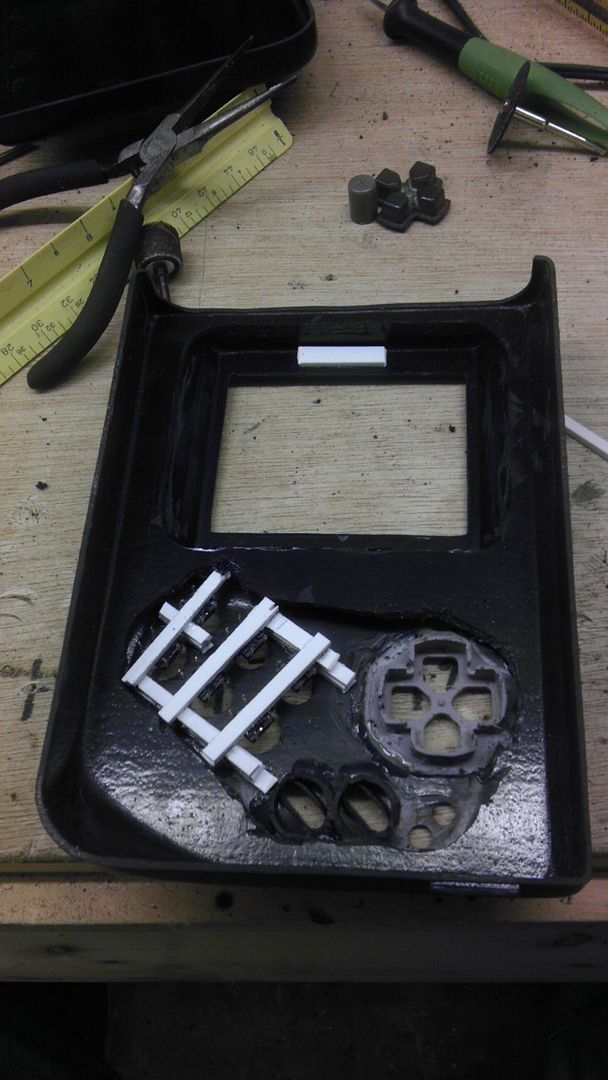
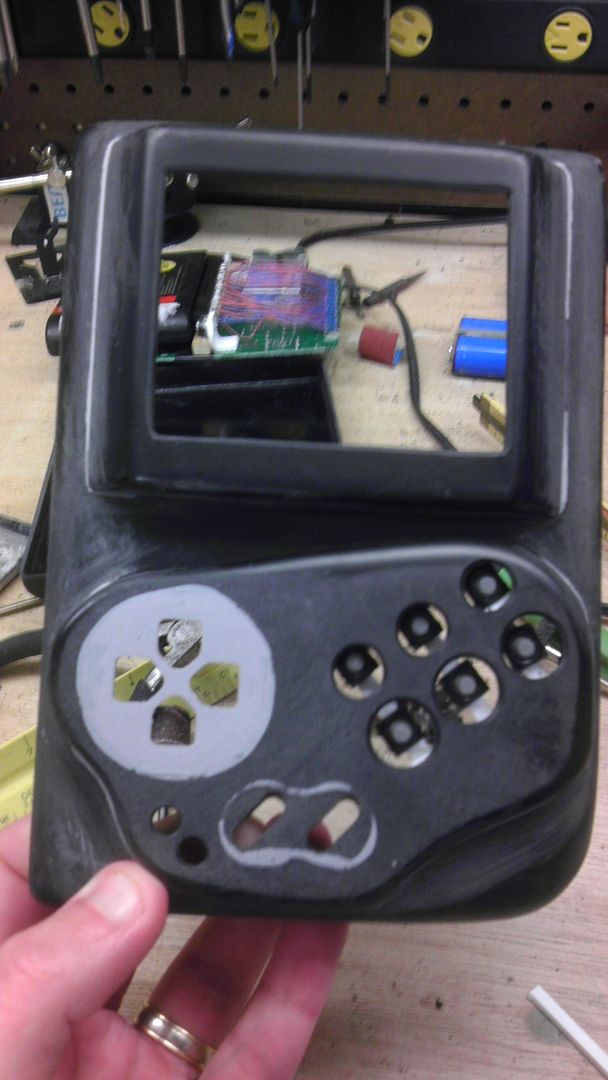
Readjusted the alinement as you can see in the later pictures so the tact buttons will hit center. The two small buttons on the bottom left are for volume control, using that mini amp that Hail showed us in the Reference Section.
The rest are all dark pictures of the paint job. I put three coats of Satin Krylon Fusion and three coats of clear. Once these harden it will prevent finger prints and hide some of the imperfections which are quite apparent, but still beautiful in my eyes!

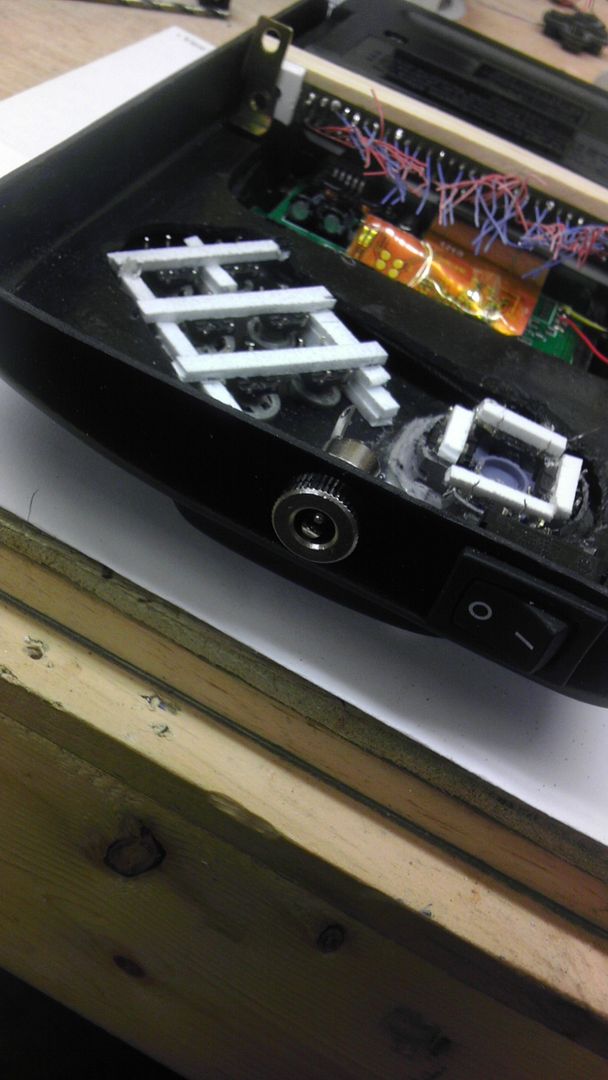
This is where the rocker power switch is going. Was a tight fit and will be again now that there is a few layers of paint, but that will clear up with a bit of filing.
And the top where the game is going to fit into the cart slot. Had to change my original design because of space issues, so the game facing the front now instead of the back is how it's going to work. But that's not a bad thing. I'm going to try and retro-fit the Genesis 3 doors into the system so the top isn't exposed when no game is in place, but we'll have to see if there is room.
Anyway, all that's left is to wire up they system, tacts, batteries and mount the system securely in place. Have a feeling I'll be redoing the cart slot again though because of how my batteries need to be laid out, but we'll see where that lands next weekend!