Downing's 4th Portable: The Mario & LOZ Tribute Portable!

Discuss all hardware and software modifications
Post Reply
Downing
24-bit
Posts: 138
Joined: Mon Dec 06, 2010 8:34 pm
Location: Capital City, NH
Contact:

Downing's 4th Portable: The Mario & LOZ Tribute Portable!

Post by Downing »

So alright! I've kept this one quite now for about a month or so, mainly because of real life and intermittent time to work on this. However, I feel now that if I let people know what's in the process, I can get a bit more motivation to work on it as much as I can again!

What we have here is making the best of an unfortunate mistake. Like many of you know, I had a project going called the Nintendo 4G which was a mini-arcade system which housed 4 generation of Nintendo in one machine. Used all original carts and a Yobo FC Twin for the NES/SNES system.

Well I screwed up on that, making the cart slots next to useless among other issues. So I was left with a maybe functional FC Twin board with no cart slots! So what to do...hardwire a couple of games to the system, throw some batteries and a screen in there and now we have (or will soon) a Mario & Legend of Zelda tribute portable! I'll give you the story in pictures.

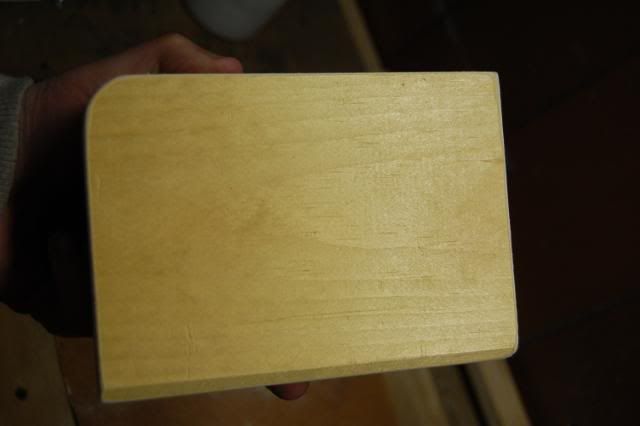
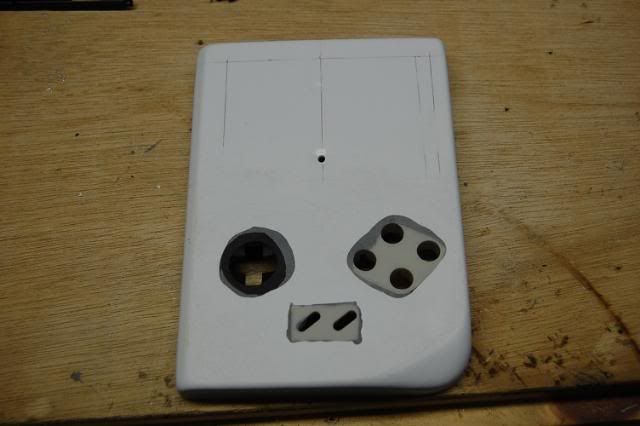
We start off with the vacuum mold. I had an idea that though I couldn't fit this project into a DMG case, I did greatly wish for this to have the feel and the vibe of a late 80's early 90's system as this tribute is to all the original Mario games up to and including Super Mario World.
Image

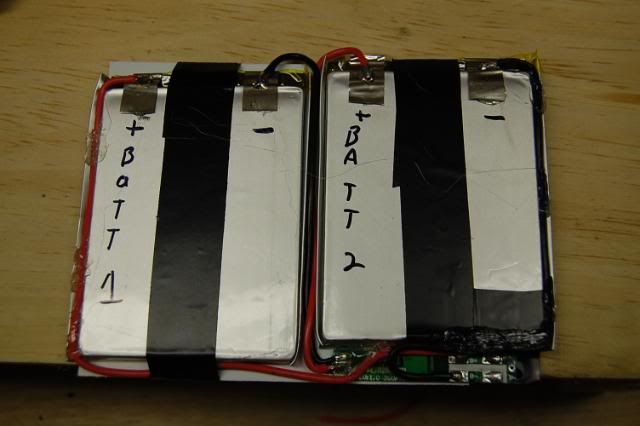
Because I had the space, I wired two 3.7V Li-Po batteries to give me 7.4V. Just have the standard protection circuit in place. I liked doing it this way because it made the whole battery pack clean and easy to move as a unit.
Image

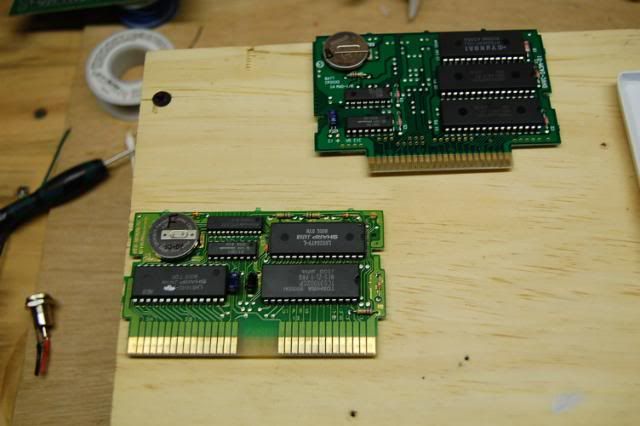
Here are the doner carts. A copy of The Legend of Zelda for the NES and a copy of Super Mario All-Stars + Super Mario world. I figured since I was making a system with no cart slot, I was going to have to have some sort of varity to play with. SMB All-Stars seemed like a great choice because it was technically 4 games in one including the lost levels game that never hit US shores. But, I also noticed that there was this game plus Super Mario World and I was just like hell yeah! $15 bucks on eBay is worth while to me. And for the Nintendo side of the FC Twin, I had to put in the original Zelda because why not? Few Nintendo games of any value had more than one game on it much less those add-ons needing the lazer gun. So Zelda it is!
Image

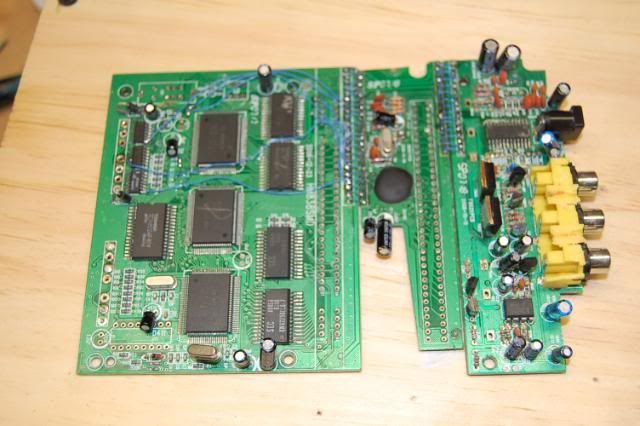
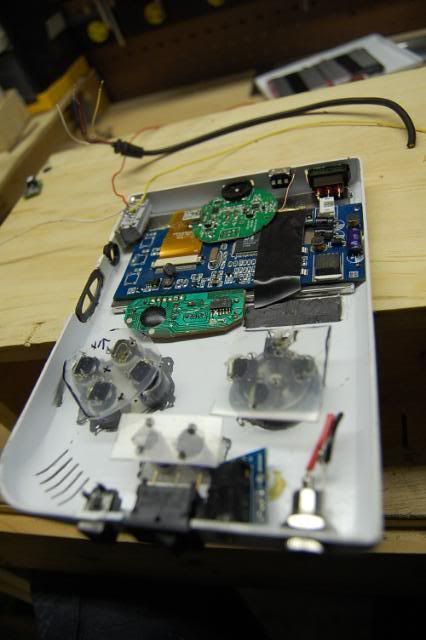
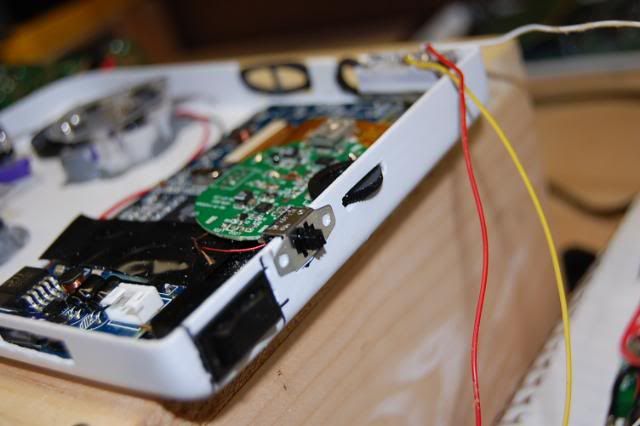
Because I made the tolerances so tight, I had to rewire the board closer together. That worked out fine though because the unit is now more ridged and stable. Those wires you see though going across the board are repairing traces that I had cut through by mistake.
Image

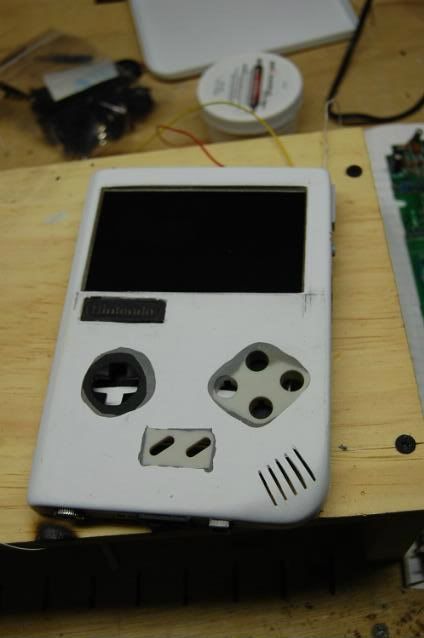
A rough outline of the front with the button holders from the FC Twin Controller in place.
Image

Now fast forward about a month. Most of the components are cut and in place now and ready for epoxy. I'm cramming more into this than any other project I've done. This includes an A/V out port which is wired to work with the standard PlayStation A/V out puts for composite and L&R audio. There is a switch to change video signal from the screen to that output so it can be played on a bigger screen. I also have a wall power and battery power switch so that you can switch between the two as well. Last for the switches, I also have the main power switch for the system on a SPDT rocker. Left it turns on the NES, Right it turns on the SNES. You'll also see an audio amp I robbed from one of those pop-up speakers you get from staples. I managed to get the pin-outs for the mini-usb and have by wired them up to the main batteries via a PTH8000 because it runs off of 3.7V. So now I don't need an additional port to charge the amp. Also includes headphone out port and a rotary dial for the volume. This has a 4.3 inch screen so there will be some stretching of the image, but I've rewired the screens menu buttons to the side and I have full control over the options settings.
Image

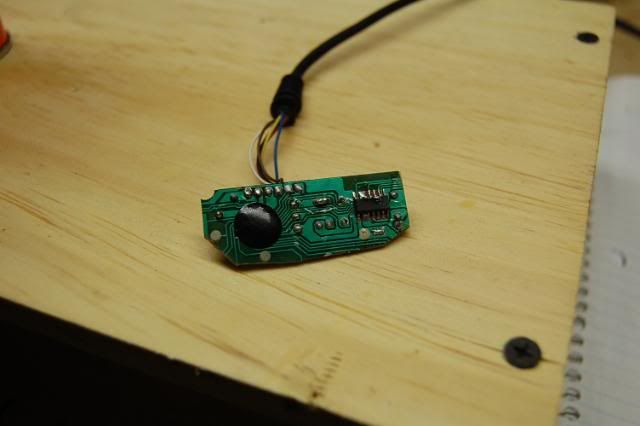
Believe it or not, this is the Yobo controller PCB hacked down to it's bare minimum. I have a guide I made that has all the traces routs so I can simply pretty much wire directly to the chip. A major space saver let me tell you!
Image

A closer shot of the buttons and the switches. I'm only using one speaker in this, but it still will have stereo headed to it.
Image

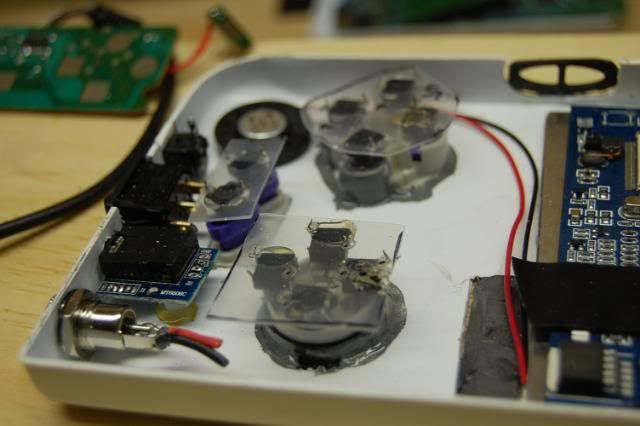
Closer views of the audio amp and screen.
Image

Closer view of the top of the unit.
Image

First view of the top and the file work around the screen. First time I've not used the actual bezel of a screen, so that was kinda tricky to get right.
Image

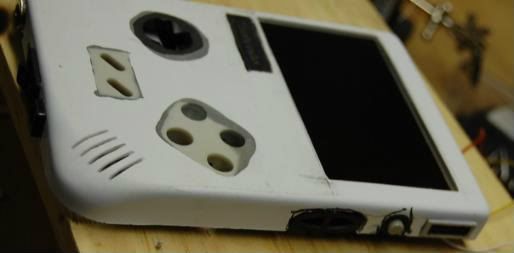
And another rough top view. I think it's starting to look good though!
Image

So anyway, this is my progress and I should be getting back to this shortly. I've actually just completed another project (not a portable though) that I will be releasing shortly. But until then, let me know what you think and I'll try and answer any questions if you have them. Thanks guys!
Image
Hey guys, check out my new website and project showcase!
Also this is where my Case Making Guide can be found!
fvgazi
Next-Gen
Posts: 1765
Joined: Fri Jul 24, 2009 7:16 pm
Location: Long Island NY

Re: Downing's 4th Portable: The Mario & LOZ Tribute Portable!

Post by fvgazi »

This is looking very awesome!

Not quite sure I understand the concept completely though. So you will be able to play any Nintendo games on it (NEs, SNES,etc...)? Will they be the actual carts or preloaded?
[ XBL: downedcity | PSN: biggry | Steam: Merchandise ]
Black Lodge Amplification: http://blacklodgeamps.tumblr.com/
Image
deathsled
128-bit
Posts: 580
Joined: Thu Feb 03, 2011 1:57 am

Re: Downing's 4th Portable: The Mario & LOZ Tribute Portable!

Post by deathsled »

fvgazi wrote: Not quite sure I understand the concept completely though. So you will be able to play any Nintendo games on it (NEs, SNES,etc...)? Will they be the actual carts or preloaded?
lol from the looks of it he's building the carts into it, meaning no swapping games, it's got Zelda and Mario, that's all :)

"I was left with a maybe functional FC Twin board with no cart slots! So what to do...hardwire a couple of games to the system"
User avatar
bacteria
Next-Gen
Posts: 1524
Joined: Fri Jun 20, 2008 7:05 am
Location: Hampshire, England

Re: Downing's 4th Portable: The Mario & LOZ Tribute Portable!

Post by bacteria »

Indeed, one NES game and a Mario multi-cart SNES game. System looking nice!
I am the Bacman
Downing
24-bit
Posts: 138
Joined: Mon Dec 06, 2010 8:34 pm
Location: Capital City, NH
Contact:

Re: Downing's 4th Portable: The Mario & LOZ Tribute Portable!

Post by Downing »

Yup exactly! I know it's kind of a hard concept and not one that is very pratical for putting all the expensive components into it like a screen and batteries, but at the same time this is still going to have 6 different games in it as Super Mario All-Stars + Super Mario World is enough to keep any old school gamer happy, on top of the fact the the original Legend of Zelda is only going to be a flip away!

Like I said, this is making the best out of a screw up and if I can make a $30 system live again in some fashion, then why not?
Image
Hey guys, check out my new website and project showcase!
Also this is where my Case Making Guide can be found!
Downing
24-bit
Posts: 138
Joined: Mon Dec 06, 2010 8:34 pm
Location: Capital City, NH
Contact:

Re: Downing's 4th Portable: The Mario & LOZ Tribute Portable!

Post by Downing »

Got a little bit more done today. Decided to redo the buttons and tact switches entirely. Stories below in pictures!

I found myself taking another look at how I had the buttons mounted after I had painted them. With that little bit of extra thickness, I was having a hell of a time getting everything to fit and rebound after a press. So I got to looking at it was like "wait a minute", if I'm super-gluing the tact switches right to the buttons, there is really no need to have those tabs on the bottom to stop them from rotating because the glue is going to prevent that anyway. All I have to do is anchor the tact switches and that's what I did. I was able to actually mount the tacts to the plastic button holders on the inside and then I just cut the buttons down to about 5MM each and when the time comes, I'll just glue the buttons to the tacts and all will be wonderful!
Image


Image


Image

This of course does not work in all places and the dpad and Start/Select buttons are those exceptions. I was able though to skim more of the dpad and S/S buttons so that the top mounting plastic will sit lower and hopefully cut a few mm's off the total thickness.
Image

But here you can see all the components laid out for the front half of the case and I think soon I'm going to have to vac-form the back side so I can start making the system and game carts fit.
Image

This is going to require some neat and careful wiring, but I have that drawn out already.
Image
Image
Hey guys, check out my new website and project showcase!
Also this is where my Case Making Guide can be found!
Post Reply