Downing's 3rd N64p, "The Nimbus II" Complete! Pg. 3!!!!

Discuss all hardware and software modifications
Downing
24-bit
Posts: 138
Joined: Mon Dec 06, 2010 8:34 pm
Location: Capital City, NH
Contact:

Re: Downing's 3rd N64p, "The Nimbus II"

Post by Downing »

Made some more progress today. I've been having an issue with an over cut on all 4 corners of the screen with the filler not holding well. So I attacked it from another point and put little plastic cut outs over them. Once fully sanded, it will look like a continuation of the screen bezel...kind of a long story, but it will make the cloud like feature that much more apparent!

Also fixed up the back for the cart slot. Not the way I wanted it, but it still came out alright! More to come on that later!

Image

Image

Image

Image

Image
Image
Hey guys, check out my new website and project showcase!
Also this is where my Case Making Guide can be found!
User avatar
Bradtemple87
Next-Gen
Posts: 4829
Joined: Sun Sep 05, 2010 8:18 pm
Location: Bay Area

Re: Downing's 3rd N64p, "The Nimbus II"

Post by Bradtemple87 »

That's coming along great.
thelolotov
32-bit
Posts: 298
Joined: Sat Jul 31, 2010 3:17 pm

Re: Downing's 3rd N64p, "The Nimbus II"

Post by thelolotov »

Very nice, can't wait to see the finished product, kind of tempted to try this myself, I just got my hands on a spare N64.
Downing
24-bit
Posts: 138
Joined: Mon Dec 06, 2010 8:34 pm
Location: Capital City, NH
Contact:

Re: Downing's 3rd N64p, "The Nimbus II"

Post by Downing »

Made quite a bit of progress today, even though it might not look it! But, I've sanded more today than I have on any project and I'm still not done!

Basically what's happening is that I cannot seem to find any mesh for a the protector that I wanted, so I got a bit creative and cut a new patch out of spare plastic that fit in the original hole, with the "N" logo cut into the patch.

I then put that into place and filled around/sanded the excess to it was flush and smooth. The fan still moves so that's good and I'll be using some of the screening from the PS1 screen speakers to go right directly behind the N logo so that it acts like a filter.

I also filled around the top of the cart slot so that there would be no gaps in the plastic piece that I had to put there. It's looking pretty good, but still need some more sanding.

I'm thinking this is going to have to be white...I dunno why, but I think that will make it look much better and will fit with the name.

Here are a couple pics so far!

The whole case with the rough sanding complete. Got a few more grits to go.
Image

A closer look at the logo. This was pain to cut, but I think it was worth the struggle!
Image
Image
Hey guys, check out my new website and project showcase!
Also this is where my Case Making Guide can be found!
Downing
24-bit
Posts: 138
Joined: Mon Dec 06, 2010 8:34 pm
Location: Capital City, NH
Contact:

Re: Downing's 3rd N64p, "The Nimbus II"

Post by Downing »

Moving right along, I got a few more parts of the case complete. I actually started with the rough placement of most of the components. In doing so, I realized that a bit more trimming of the board was needed.

However, I did not need to rewire anything on the board and in all actuality, I think I'll be using a different board all together for the final, this is just a good test board for sizing.

As you'll see, I got the headphone jack and power jack mounted. I had to cut out the 3rd and 4th player ports off the board to make room. I also found out where I will be placing the speakers, mounted on the back, one left side low and right side high. I had to do this because the control stick pot was going to be in the way on one side and the battery would be in the way on the other.

I still have to cut out where the power switch will go, I'm thinking right in the wall where the fan currently is, but that's not final yet. The only big concern I still have is with the Super Pad. If I don't have the right version, I may need find another controller as the caps on the board will be too high and traces will be a pain to reroute. We'll figure it out though. I need to order in some game cube controllers anyway, maybe while I'm ordering those I'll find some alternative to the Super Pad.

Anyway, here are some pics of the progress tonight. Keep you updated!

The Headphone Jack and Power Jack Mounted in Place
Image

The First Trimming of the Board and Rough Mount
Image

The Second Trimming to Make Room for The Speakers
Image

Back View of Case Before Black Mesh is Applied
Image

The Screen Roughly Mounted
Image
Image
Hey guys, check out my new website and project showcase!
Also this is where my Case Making Guide can be found!
Downing
24-bit
Posts: 138
Joined: Mon Dec 06, 2010 8:34 pm
Location: Capital City, NH
Contact:

Re: Downing's 3rd N64p, "The Nimbus II"

Post by Downing »

Hey all, very sorry I haven't been updating but honestly I hadn't had any progress to up you on! However, I've made a great deal these past couple of weeks so I figured I'd post it up!

Alright, major update! Like I said, I've made considerable progress in the past few days with this, including getting the case painted and the cart slot soldered among other things. But here are a bunch of pics and I'll do the story about each one as I go.

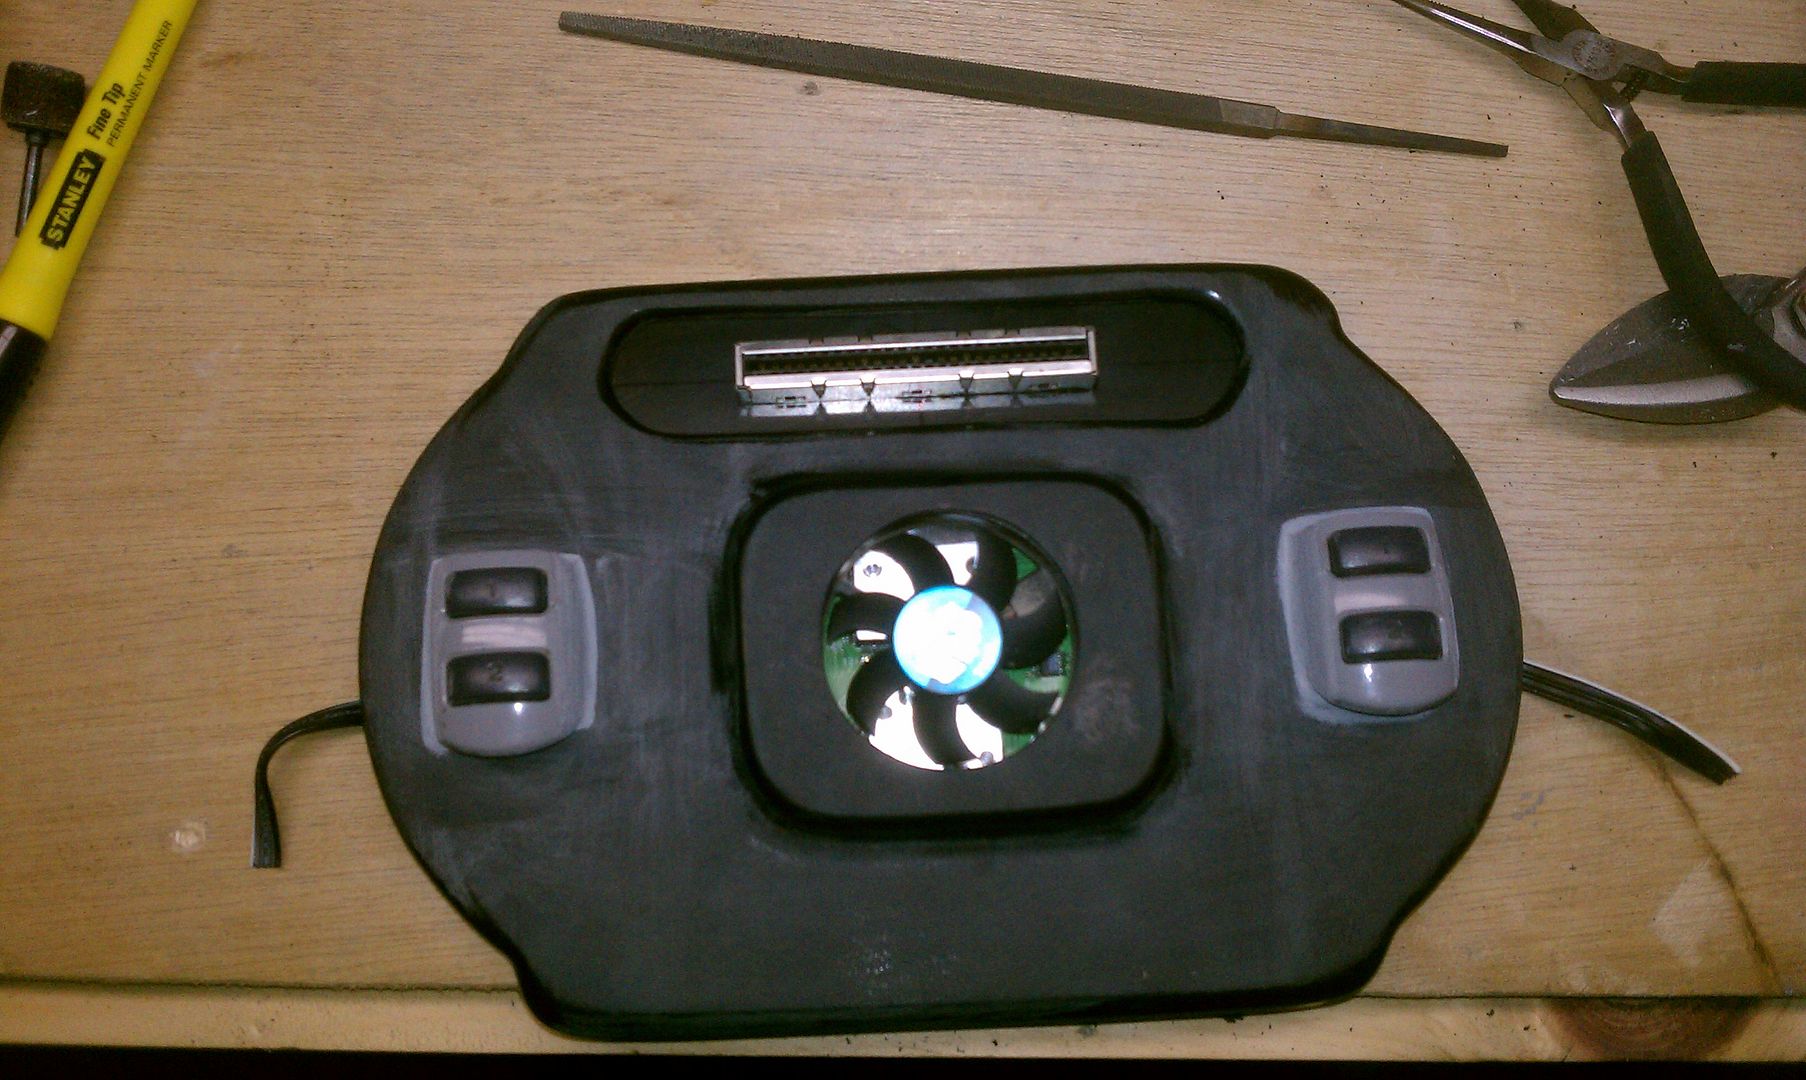
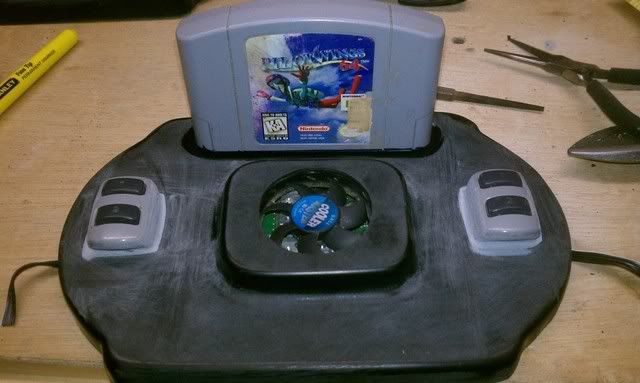
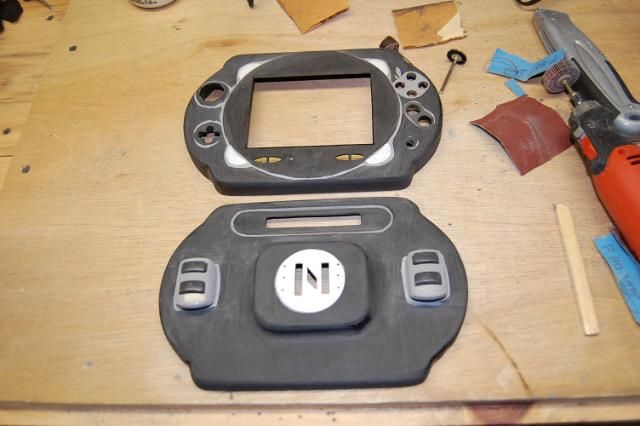
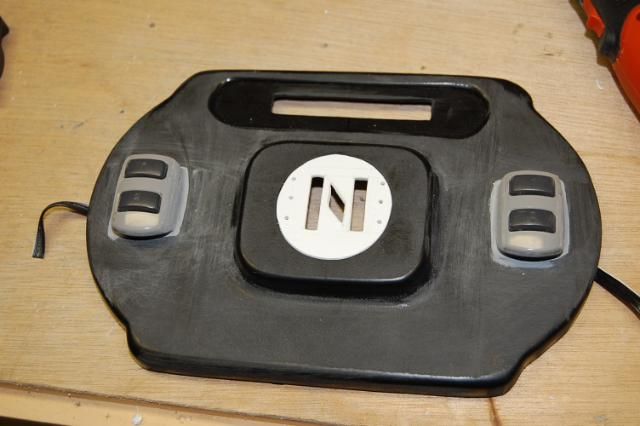
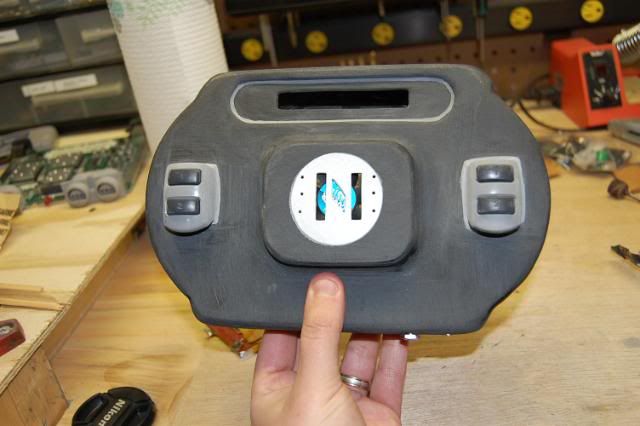
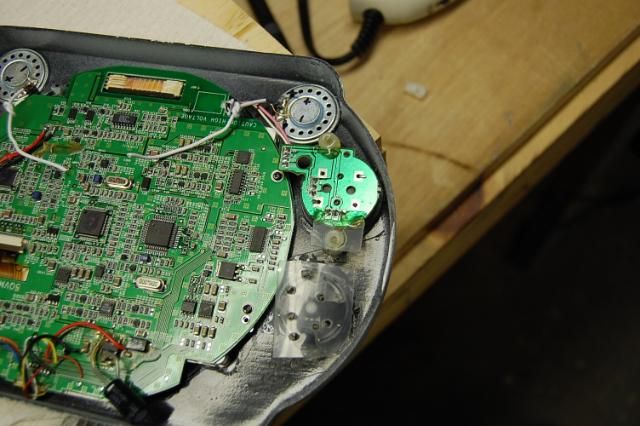
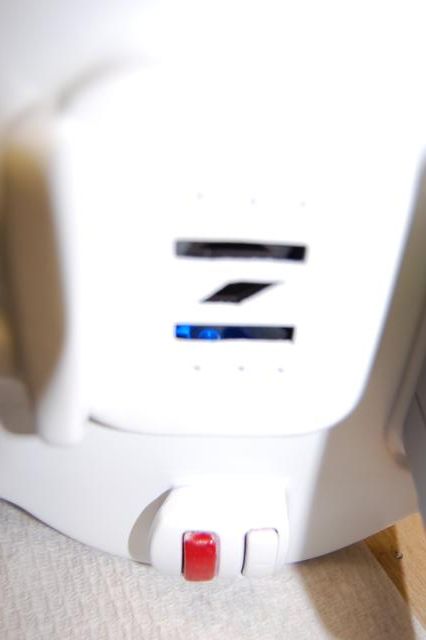
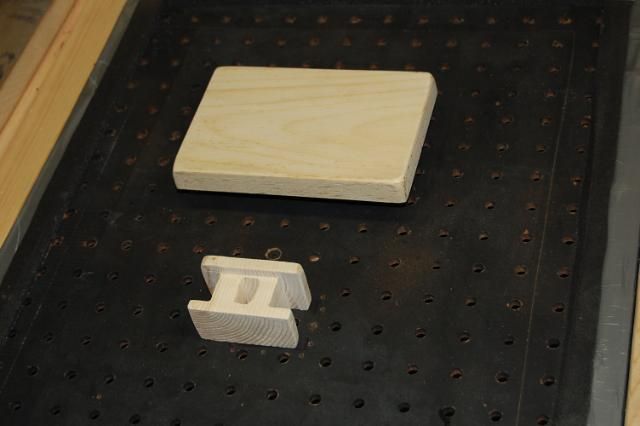
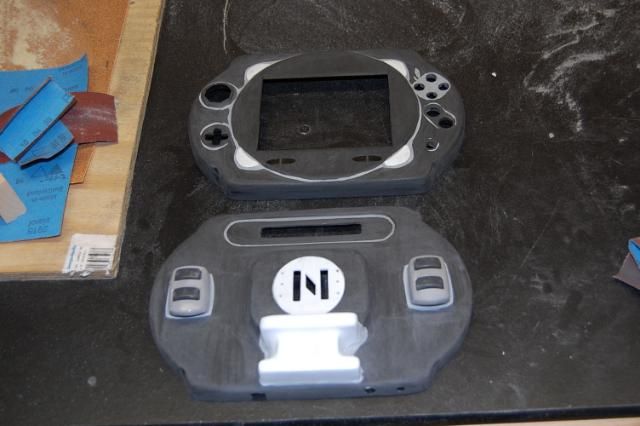
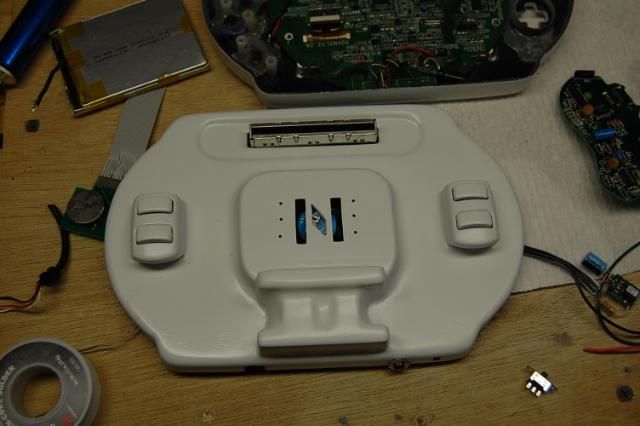
Due to the fact I didn't want to relocate the expansion port anymore, I had to find a place for the expansion port to go. This didn't prove to be an easy feat so I decided to get a bit creative and vac-form a new cover. Seeing how this is the Nimbus II, the roman numeral II seemed like an appropriate addition. Made the overall thickness a bit more than I wanted, but it didn't matter much because where you hold onto the system is still the same.
Image

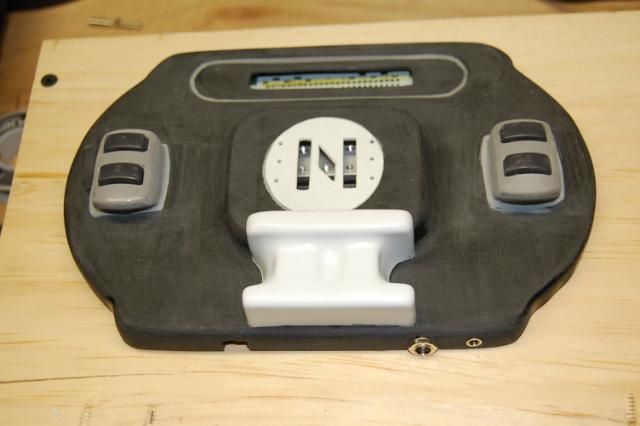
Here it is roughly mounted in place.
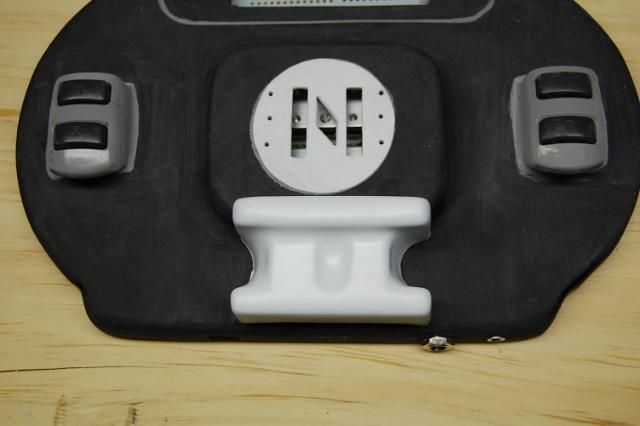
Image

Again
Image

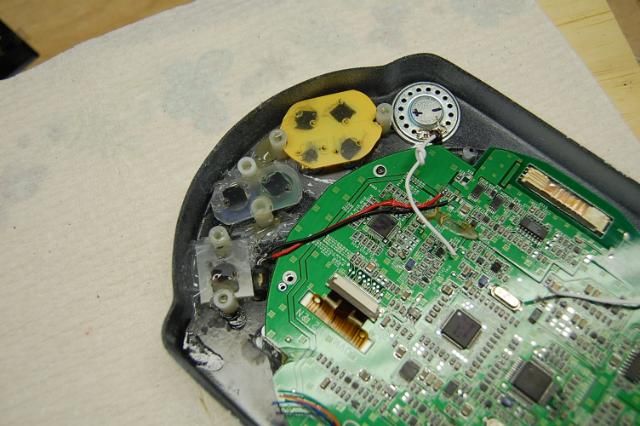
The buttons with the tact switches glued to the bottoms of them.
Image

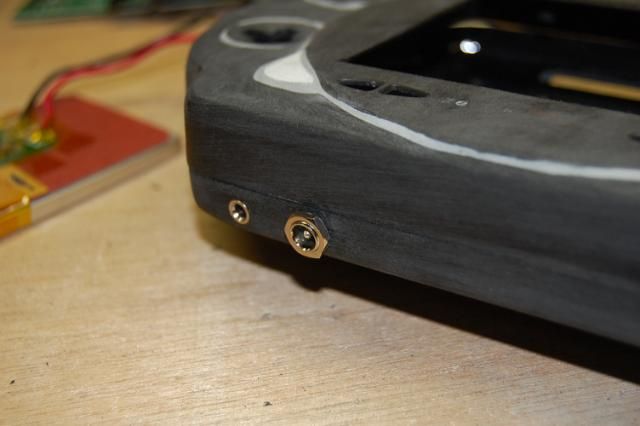
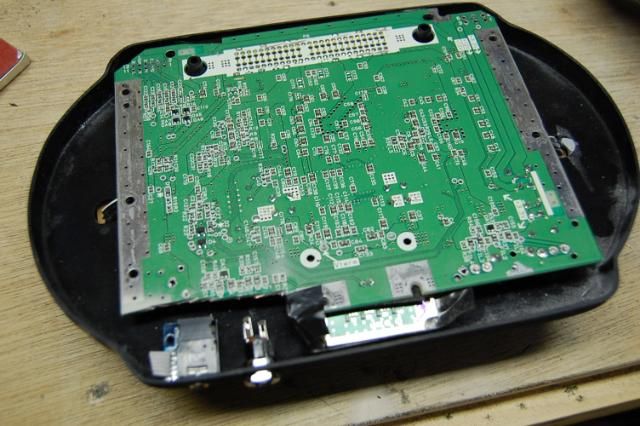
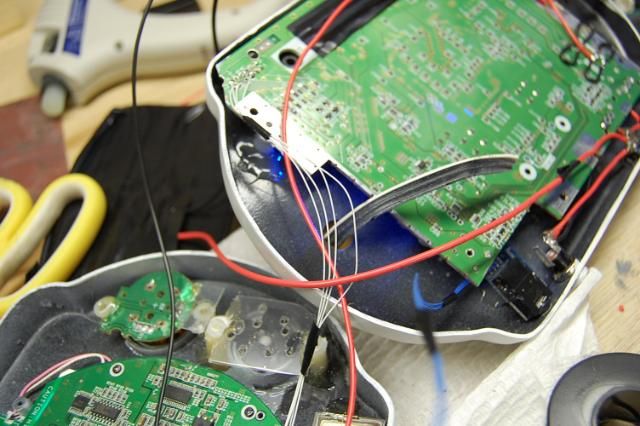
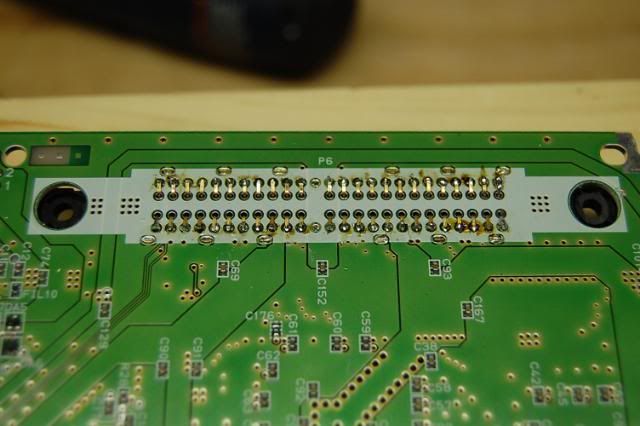
This is how my cart slot ended up being secured and soldered in place. Just bent the pins and soldered.
Image

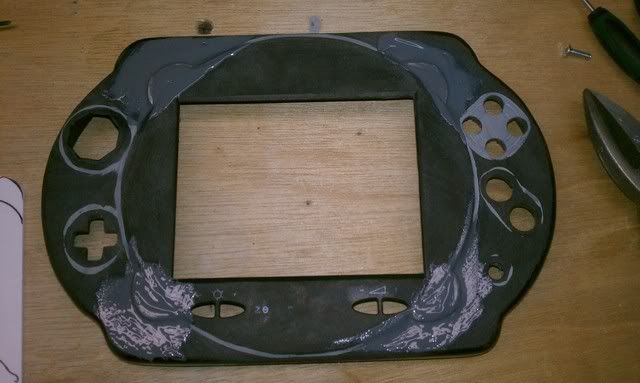
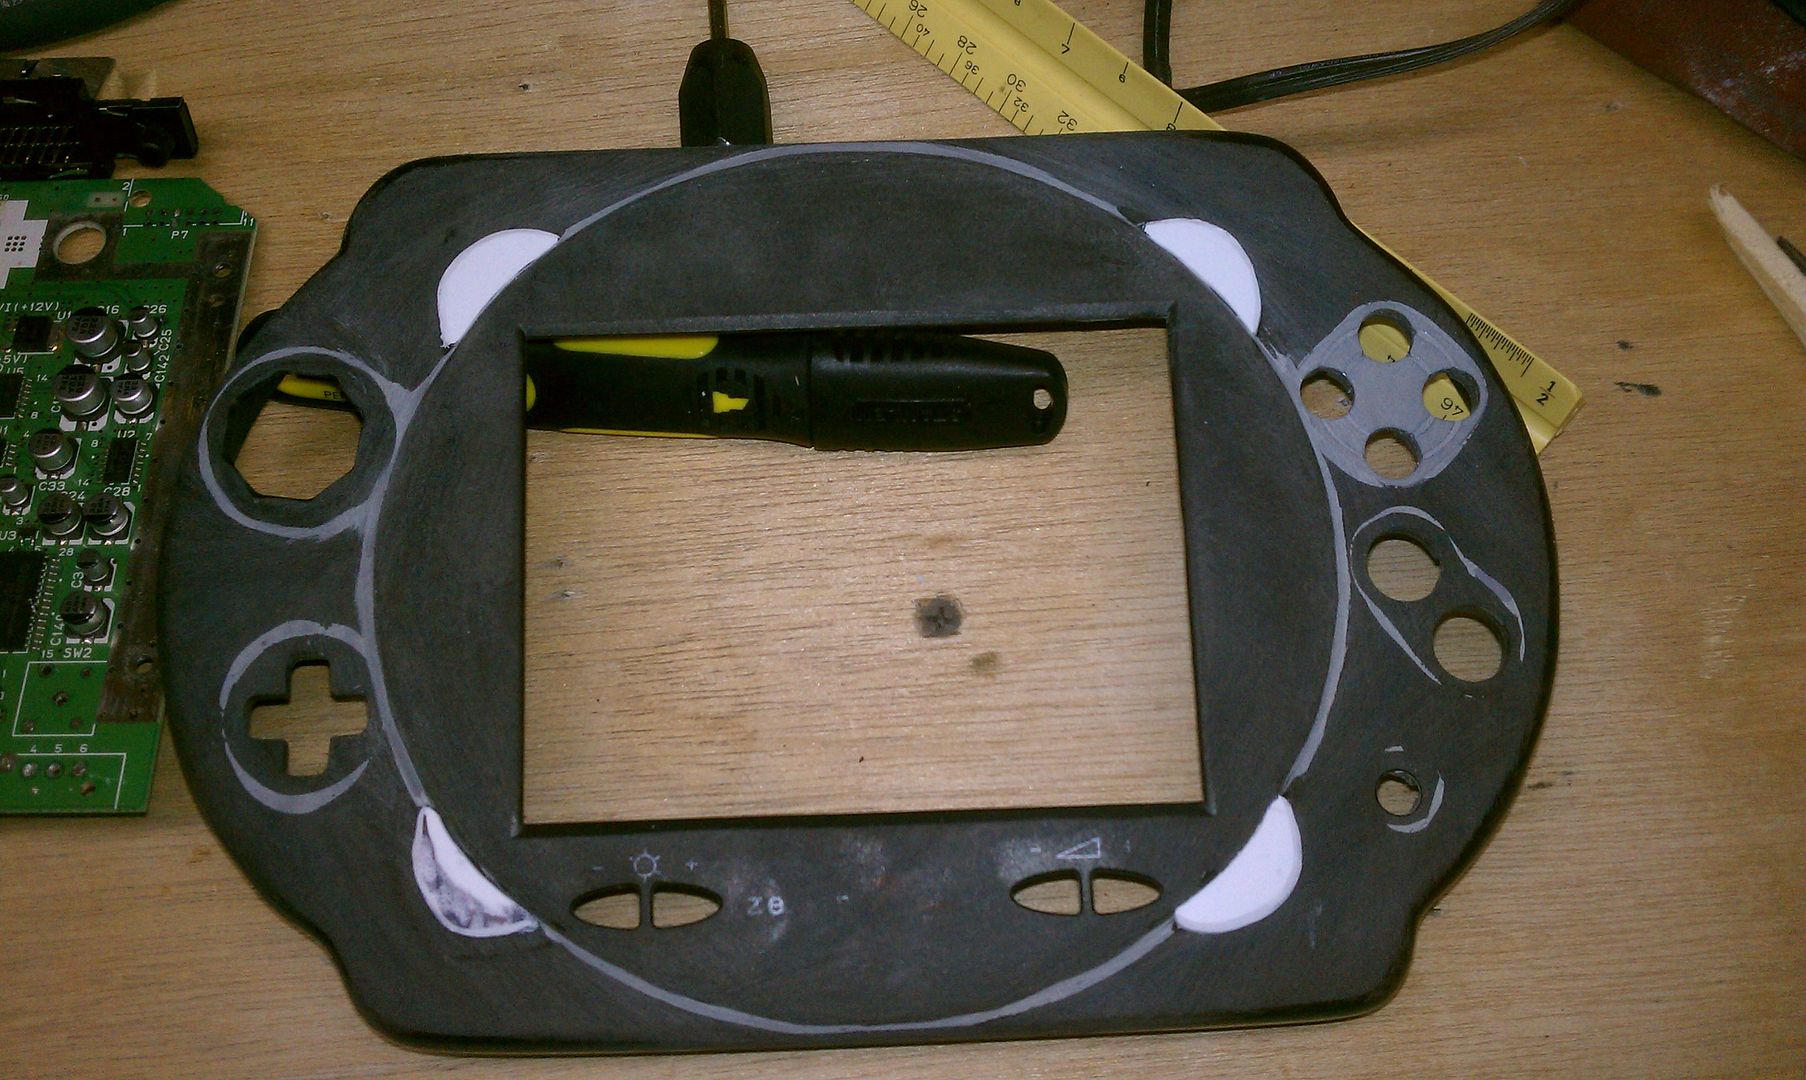
Here is the casing all filled and sanded, ready to be painted. Took awhile to get to this point.
Image

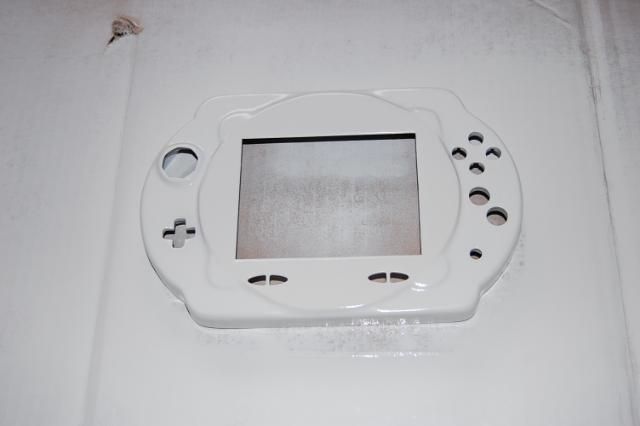
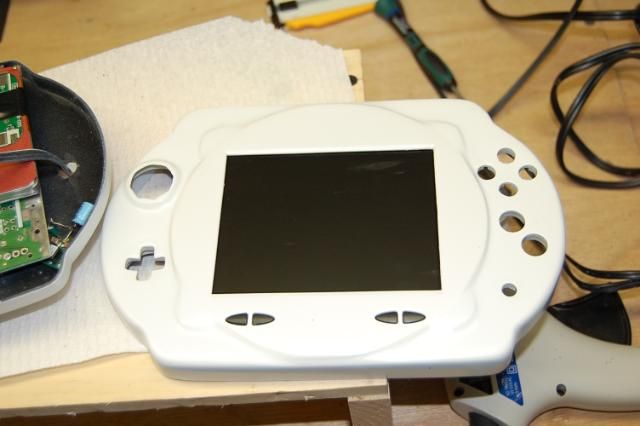
Front with the second coat of paint.
Image

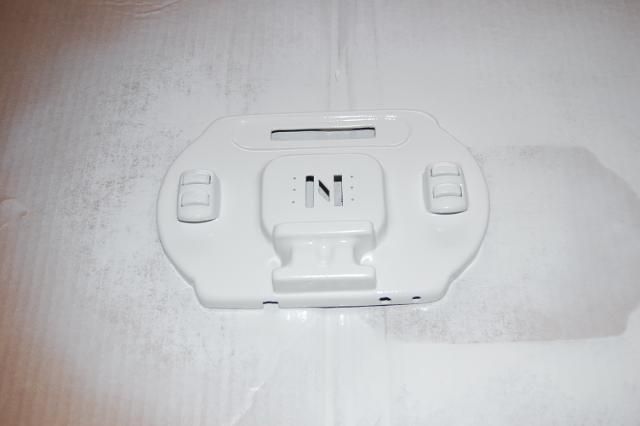
Back with the second coat of paint.
Image

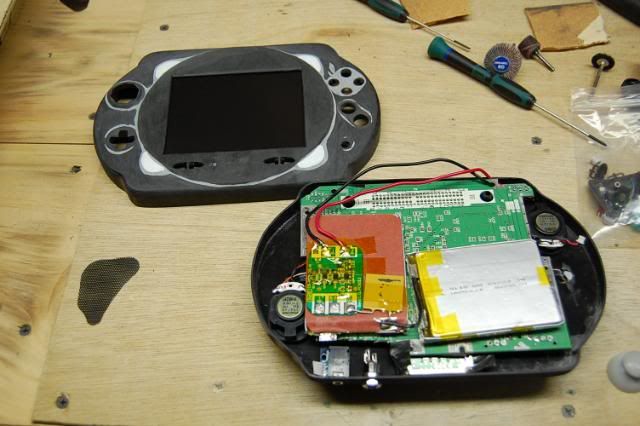
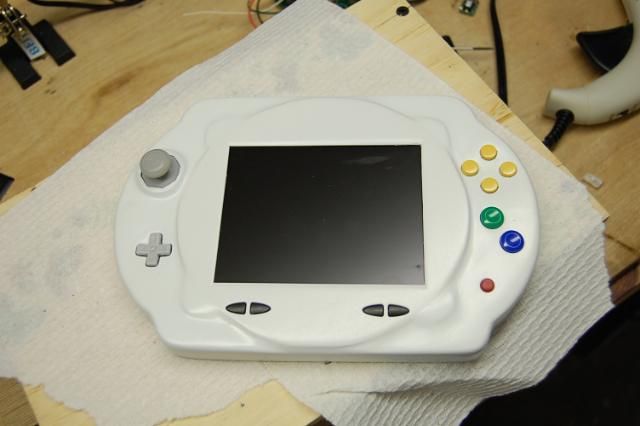
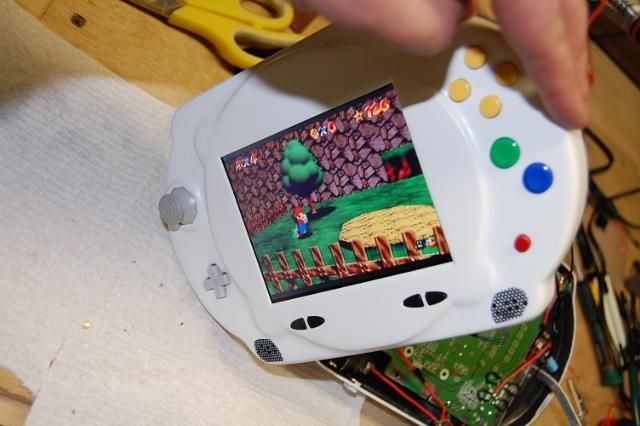
Front with the screen and volume buttons mounted.
Image

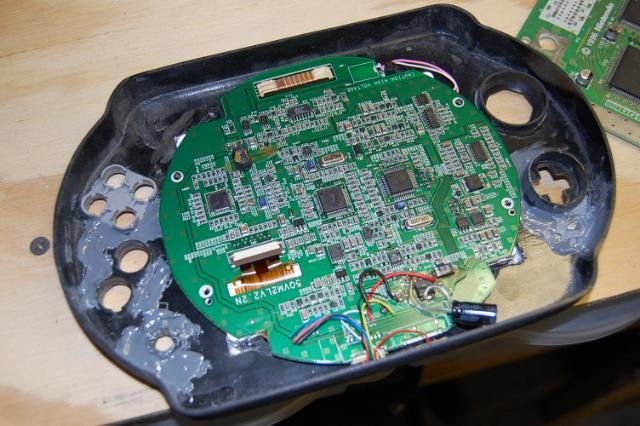
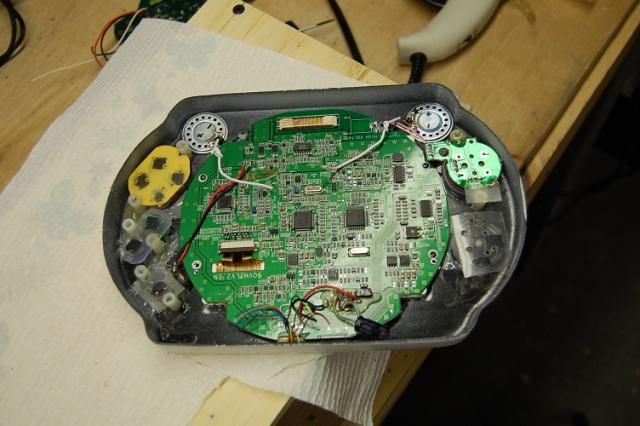
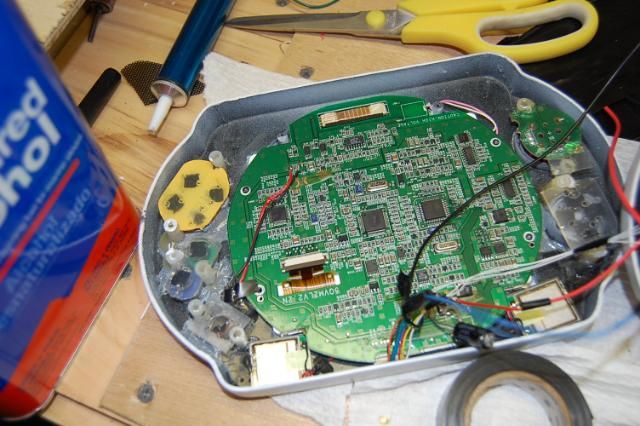
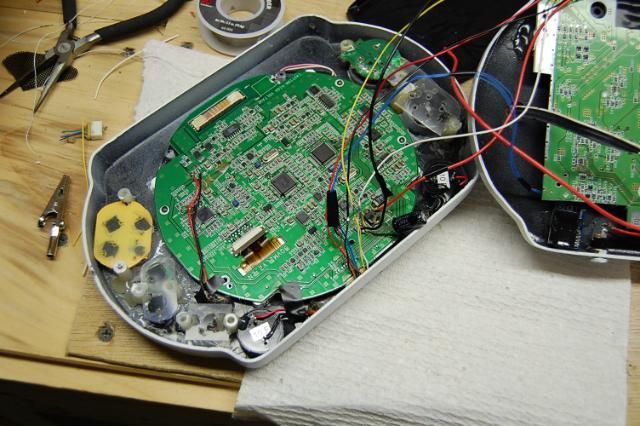
The Internals on the back.
Image

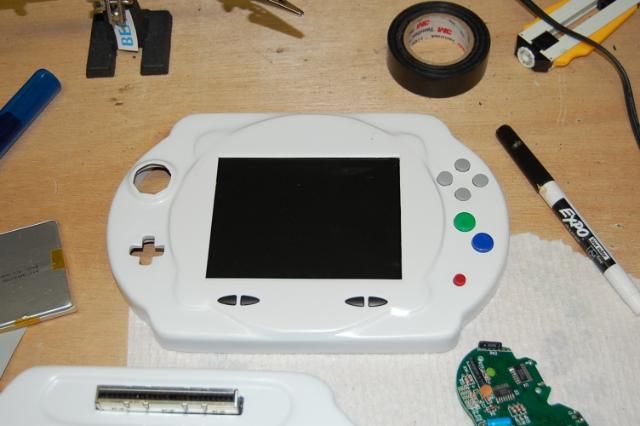
Front with the buttons mounted. I'm going to be painting the C buttons yellow though.
Image

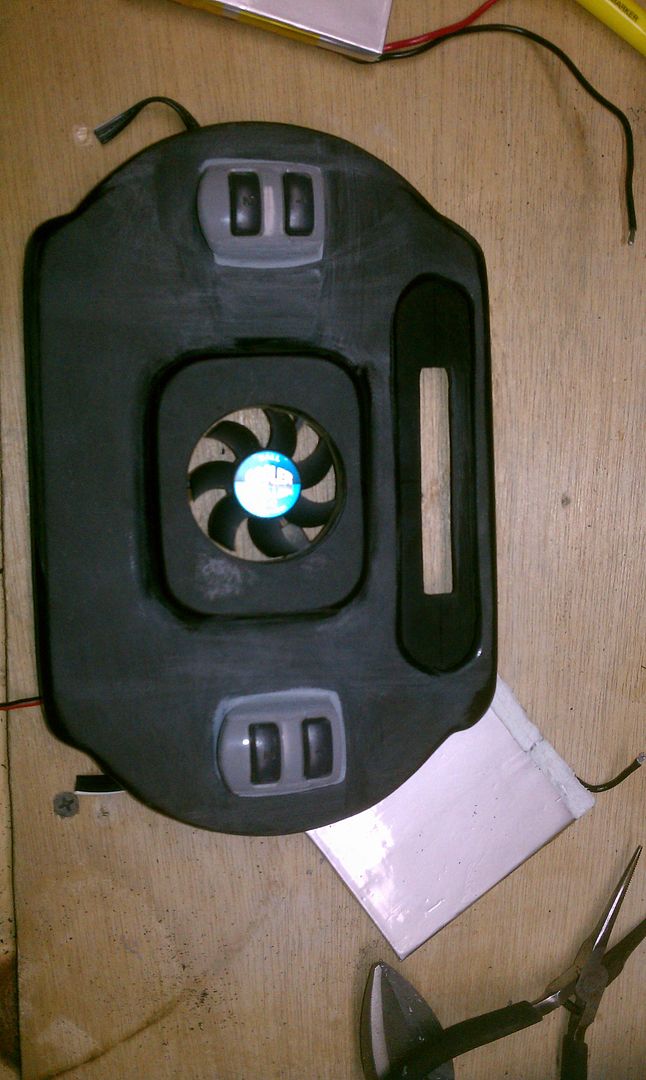
The back with the fan mounted. I'm going to be putting some black mesh behind the N to block the view of the fan.
Image

But all in all, it's been very busy but still have a long way to go. I'm not as happy with the paint job here as I was with the original Nimbus, only because the filler job was much more complex and hard to reach. However, it looks decent and I'm going to go with it. Let me know what you think!
Image
Hey guys, check out my new website and project showcase!
Also this is where my Case Making Guide can be found!
Downing
24-bit
Posts: 138
Joined: Mon Dec 06, 2010 8:34 pm
Location: Capital City, NH
Contact:

Re: Downing's 3rd N64p, "The Nimbus II"

Post by Downing »

Well, was home stick from work today, didn't get out of bed till almost 1PM! Must have needed the rest. Anyway, when I started feeling a bit better I went to the basement and found that my attempts at painting the buttons on the back of my case was failing. So I'm going to have to re-sand some spots and hit it with white again. Not a bit deal, but just another delay

As for other progress, I took some pics of the mounting job of the buttons and control stick. I found that using these little nylon spacers with a notch cut out of them where it meets with the plastic tact holders works great because you can fill the whole thing with hot glue and in doing so, secure it to the casing and the tact holder in one fluid motion. Looking below you can kind of see what I mean, but it was a lot easier and stronger than face mounting them to the bottom of the tact holder!

You can also see that I got new speakers that thin and fit perfectly...however the sound quality is terrible. They only cost a dollar to begin with so I got what I paid for, but I need something exactly that size (25mm if I'm not mistaken, or about 1") and sound clean. Any suggestions would be great!

Overall image of the front. Everything but the D-pad is mounted.
Image

You can see the spacers and how they stand up a bit above the tact holder, but it was simply cut in a bit. Very strong hold this way.
Image

Closer view of what I was talking about. Had to get a bit more creative with the stick because the stick cover would hit the spacers and stop it from moving the way it should. This method worked though and is holding nice and level.
Image

This is how the finished profile will look. Not to bad.
Image

The back with the fan mounted. Although you really can't see it, the buttons need some major work, which will involve some more sanding and such, but I have to wait for the coats to dry a bit more. We'll get it looking better soon enough.
Image

Feeling pretty good about this so far, but the real test is going to be getting the whole thing together evenly. I have a feeling some major controller modification is going to play a part in this which is unfortunate, but the way it is. More on that when I get to it.
Image
Hey guys, check out my new website and project showcase!
Also this is where my Case Making Guide can be found!
Downing
24-bit
Posts: 138
Joined: Mon Dec 06, 2010 8:34 pm
Location: Capital City, NH
Contact:

Re: Downing's 3rd N64p, "The Nimbus II"

Post by Downing »

OK!!! It lives and everything seems ready for me to start wiring up the controller tomorrow! This could possibly (with a little luck) be complete tomorrow as I've devoted the whole day to it!

Alright, well a few quick updates. The Pizo speakers were crap... :( They had no volume to them, which I really can't say I'm that surprised. So I swapped them out with the laptop speakers I got from digikey at the same time and those kicked ass!!! Tiny and loud!

I also fixed the power switch and put thicker wires from the PS1 screen to the board and now the picture and sound are crisp and clear!

I'm a bit bummed though about a couple of things and one being my silent fan is anything but! The thing sounds like a blender, but I think it's because of the way it touches the components on the inside and it's actually rubbing slightly against them. I'll live with it though. The second is that my LED is only showing through half the "N" and is not flooding it like I thought it would. I'm thinking of putting some reflective foil to maybe bounce back some light, but I'm not sure how well that would work.

But anyway, my wiring works, my light works, my fan works and my screen works! All in all it's been a successful day! Here are some pics below to illustrate my efforts!

The initial screen wire up before changing the wires and speakers.
Image

Right after the Blue LED turned on for the first time after I had bridged the power switch connections. You can see them on the right.
Image

The Blue LED not shining through that well, but I'll play with that tomorrow.
Image

After with the new speakers and the new wiring.
Image

A screen shot to show it's working!
Image

So hopefully I'll have this complete tomorrow or at least I should have it done this weekend! Fingers crossed!
Image
Hey guys, check out my new website and project showcase!
Also this is where my Case Making Guide can be found!
Flake
Moderator
Posts: 8075
Joined: Wed Dec 16, 2009 3:27 pm
Location: FoCo

Re: Downing's 3rd N64p, "The Nimbus II"

Post by Flake »

This is amazing me. I am astounded by how the rough outline of an idea in the early pictures is on its way to looking like a professional product. Well done!
Maybe now Nintendo will acknowledge Metroid has a fanbase?
Downing
24-bit
Posts: 138
Joined: Mon Dec 06, 2010 8:34 pm
Location: Capital City, NH
Contact:

Re: Downing's 3rd N64p, "The Nimbus II"

Post by Downing »

Thanks Flake, I really do appreciate it! It's not perfect by any means, but it's the nicest work I've done to date so I'm really excited to get this completed! Glad you like it!
Image
Hey guys, check out my new website and project showcase!
Also this is where my Case Making Guide can be found!
Post Reply