So long time no update. Geekhouse is still in progress, but wife getting a promotion and a couple family health problems have put the big projects on hold. But this weekend my wife was out of the house most of Saturday and Sunday so I got to clean up my workshop, finish some projects and get started on some new ones.
Since I do not have pictures for them, I finally fixed my Revere 8mm Silent projector. A couple years ago I got two of them, a mid 40s and an early 50s model, but both had issues. The 50s one has a bad lamp fixture, but good motion, the 40s one has bad motion but a good lamp fixture. I tried to swap the lamp fixture, but they are different sizes with reflectors so I had to swap the motions. Two months of tinkering later, the 40s one works, intermittently. It looks a bit like this:
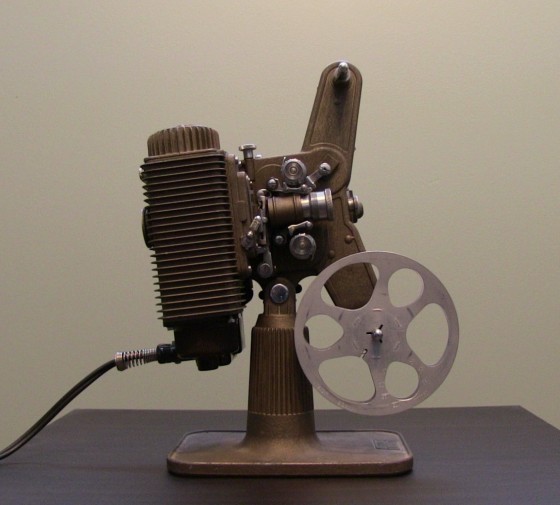
Sure it is a budget projector that takes 20 feet of throw to give you a 30inch image, but watching movies on film is just special. Now I have functioning 8mm, Super8, and 16mm, projectors, and a repairable Pathe, 9.5 - if I buy the specialized tools.
Server Radio Tower
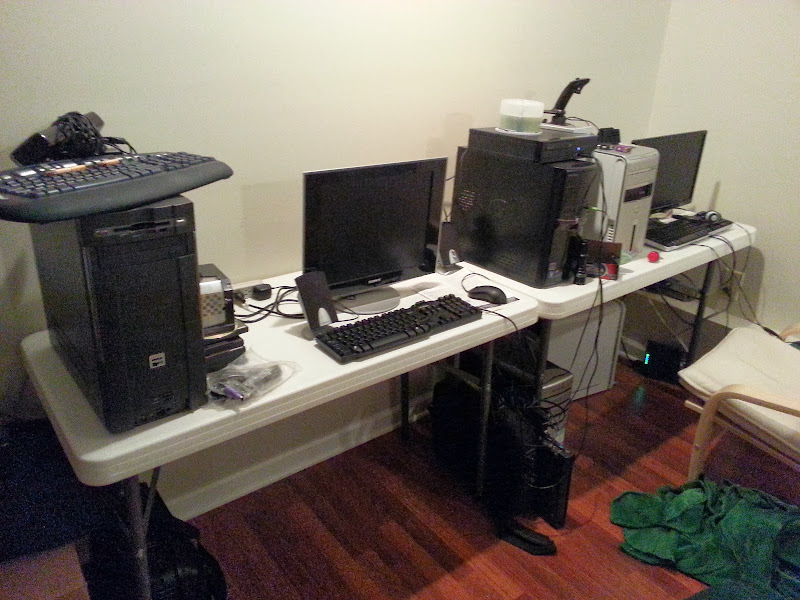
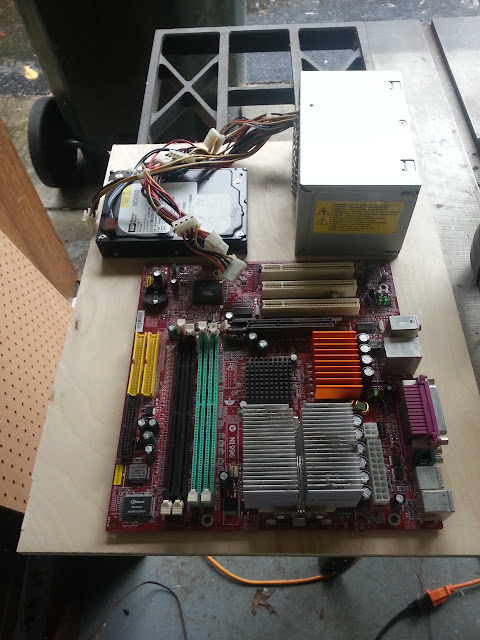
But on to something more important, in the PC build thread I proposed an ideal thought. Several weeks ago I picked up a Sony SUS-590 hifi equipment tower:

And I plan on adding some shelves and mounting pcs on sleds, much like how people with candy cabs add MAME pcs. But I cannot stop there. For those who don’t know, I am a huge fan of Cathedral and Tombstone radios and have several both functioning and retrofitted radios in my house. So I could not keep that big glass door on the front. So I decided to make a floor radio inspired by a radio I will never own, a Philco Model 16x:
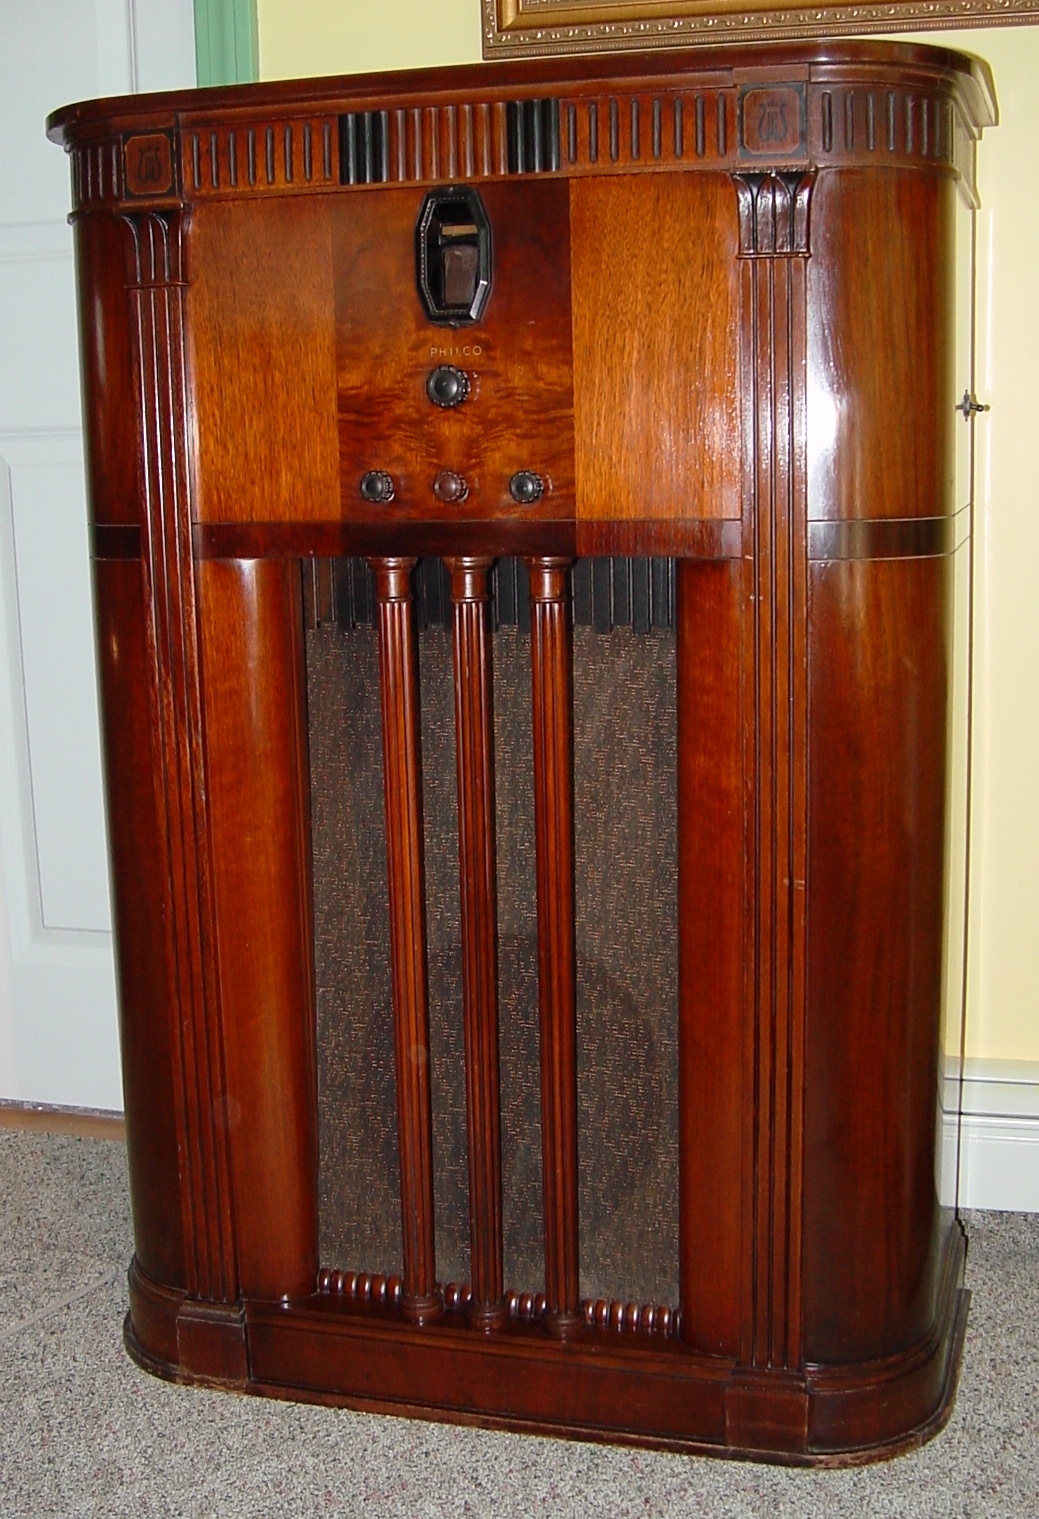
For those not familiar with the brand name, Philco was an inconic radio producer from the 20s. They dominated the cathedral radio area with the Baby Grand, created a battery bypass for the portable industry, and created the Predicta tv line, with their former employee Philo Farnsworth. They were huge, until the 60s when they filed for bankruptcy due to some bad government and highend private sector deals and got bought by Ford. History lesson aside, I spent a good bit of time theorizing how to make the cabinet look like a radio, atleast a toned down version of it.
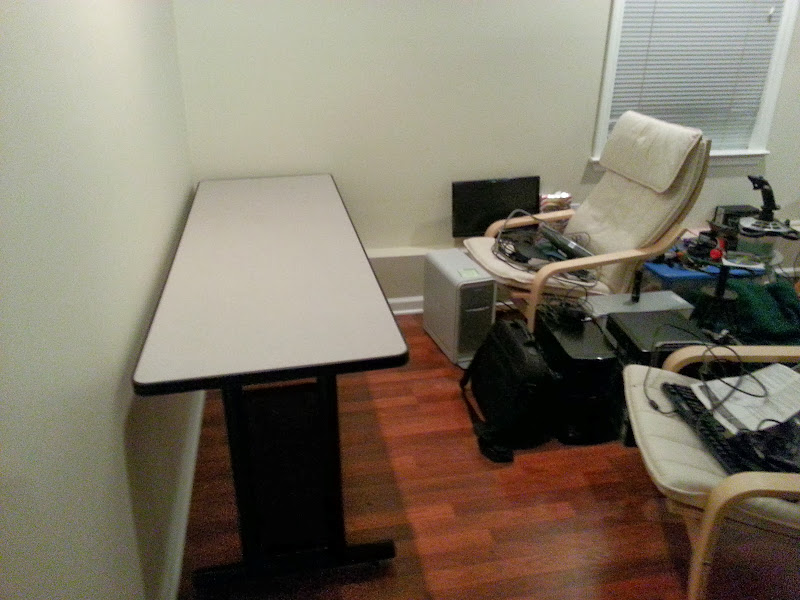
So to accomplish this, the first thing I needed to do was add a new shelves. So after about five minutes of math, this was finally accomplished:
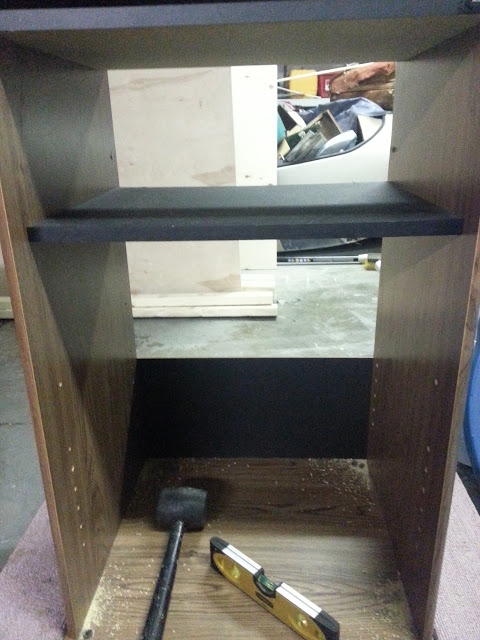
I can use existing holes for the other two shelves, I just had to add one much higher. Each pc has 7x13x17 inches of space (think of it like a mid tower case on its die), so there should not be any heat problems. Any time you do this kind of retrofit, you have a handful of invaluable tools. A good spirit level/bubble level and a rubber convincing device are my go to’s. Sadly, I did not measure the holes before hand, so I have 6mm holes, and all mounting pins for shelves are 5mm. So I am going to have to make all my shelf supports. But that’s down the road.
So when I had a gap in the rain, I fired up the truck and headed to Home Depot and did some damage. I am currently building some found object puppet for one of my wife’s friends:

So I had to buy pvc, and various bits and bobs. But a sheet of ¼ and a sheet of ½ inch Birch plywood headed home with me, along with some fancy trim, and eight (mostly straight) 2x4s. I booked it home and got the first sheet into the garage as the rain started up. So most of Saturday was spent doing work with the PVC while I let the wood dry back out. Sunday after church I got started. Table saw in place, I fired it up and the second the wood hit it the board jumped. For those who do not know, when a 4x8 sheet of wood jumps, it is bad, like could kill you bad. Luckily, it did not hit anything other than the saw horses. I looked at the blade, dull as dull can be. So instead of listening to the teaching of Norm Abram, or just making another trip to Home Depot for a new blade, I channeled my inner racketman and did what I had to:
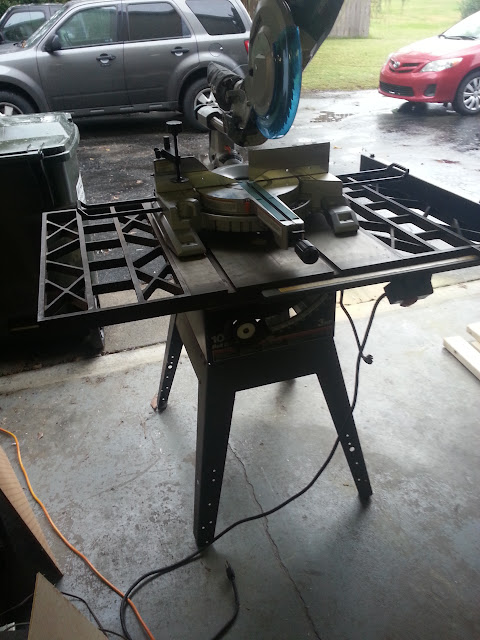
Ok so that is alittle bit of a lie. I cut the sheets with a circular saw, then used the sliding miter saw to clean it up and get it precise. And before anyone gets on me about it, there was a towel under it, and it was clamped down with pipe clamps when I used it.
So first to be measured up was the trim. This is basic pine chair rail/window trim, cut to length of the gap. When in place, you will get a feel for what it is going to look like:

I have a stain that matches the original wood, so it should look like one piece when it is done.
I then cut some of the ¼ inch ply into the sleds. Now I know what you are thinking, ¼ is going to be too flimsy. But for how often this is going to move, it should be fine. And remember, each of the sleds sit ontop of the ½ inch shelves. So a quick test fitting with old equipment, and we get an idea of how it is going to sit:
So I cut out the rest of the sleds and shelves, and a mock of the door out of ¼ inch. I am debating on using the existing hinge, but if I can find the proper height piano hinge, I will go that route. Right now I am debating on how to orient the motherboards, and if I need to mount the GPU horizontally above the other cards on its own small platform. If I rotate the Motherboard 90degrees, I can mount the Harddrive and SSD above the PSU and the GPU can just mount like normal. I will know better when my PCB feet get in.
So right now, I am tossing ideas around on the next step. Obviously I need to cut up the mock up door. I am planning on putting four arcade buttons in place to turn on the pcs (it will have two pcs from day one, then two more down the road. But I have no idea what I am going to do to replicate the dial. It will have a gap in space there that will look odd. A USB hub was suggested, but I don’t think it will fit aesthetically. The other Idea I have had is putting in a NZXT Sentry LX fan controller, while it is futuristic looking, I think it will fit.
https://www.nzxt.com/product/detail/78- ... ntrol.html
For speaker cloth, I will be committing a faux pa. Philcos used a chevron pattern as you can see in that earlier picture. I am not a huge fan of that pattern, so I am using reproduction Golden Wheat cloth from Richmond Designs:

I have no idea what radio had this pattern standard, none of my other radios have it, but I have seen it on radios in the past of all kinds. I just think it looks classy.
But for now:

And in a rare double whammy.
Mame Cab Prototype
So talking to mjmjr25, KalessinDB, Majors, and Aaron have been HORRIBLE influences on me over the past few months. But seeing Majors at AWA again made me realize how badly I want another candy cabinet. For those who don’t live in the southeast, Majors is a on and off member here who is the king of mobile arcades. At AWA, he had 21 candys setup, with about 200 games on rotation. He has forgotten more about candys than I know. But since MAME was added to the Internet Archive with a DMCA exemption – making it legaler, I have phased out a lot of my arcade gear and moved back to MAME. So while I would love another Astro (which is currently a MAME cab but has a 1 slot Neo just waiting for its new monitor), I decided to go another route.
MAME cabs are usually plagued by control panels from hell. It is as if most people do not think through that how it is going to look when they add a 4 way, two 8ways, a spinner, and a trackball on the same panel. The word in the BYOAC community is Frakenpanel and it has been a fear of mine for a while that I was going to create something hideous like that. So I have been tossing around panel ideas for years. Candy cabinets have a variety of panels that you can swapout, but they are costly and actually take a good bit of time to swap. So I was wondering how I could make a panel system that would be rugged, varied, protect the controls, and above all allow us to play games the way they were made to be played. When talking to Majors at AWA about his headless Astro it hit me. Make the entire control panel swappable, not just the controls area.
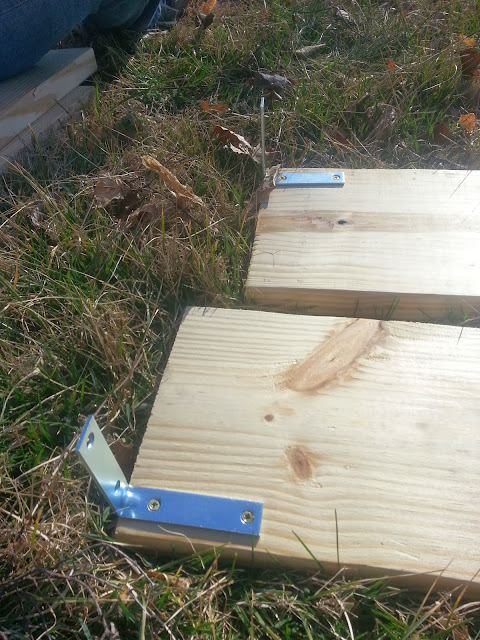
So after a lot more planning than I care to admit, I got my idea going. It is a box frame made out of 2x4s, with a gap in the front, so I can slide a panel into it to lock it into place. It is the same height as an the control panel of as a Sega Candy (26 inches), but with an exposed monitor. This way, if your monitor dies, you just grab another TV. Tating will take seconds, not minutes. And if you want to run a game on an LCD, then on an CRT, so be it. I will have ZD enconders mounted inside the cab, with molex connectors coming out to the CPs, and a pc at the bottom for now. Another advantage of this system is that if I hack up a controller (or get two Blissbox 4 plays), I can adapt it to any console ever made.
So enough talk without pictures, unlike mjmjr25, I don’t run out of clamps:

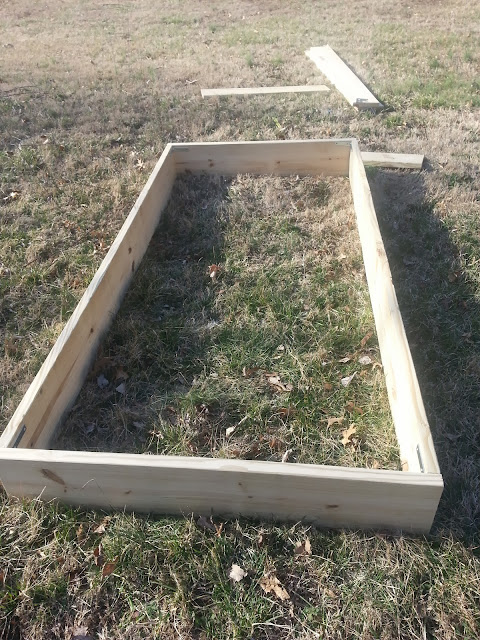
And in about half an hour I took three and a half 2x4s and made this:

Which quickly became this:

Soon it will have a top and sides made from that ½ inch plywood (once the tablesaw gets a new blade) and then the fun begins of making panels. This is the proof of concept version, sure it is held together with wood glue and screws, but the next version will get pocket holes (aka kreig jigged).
The big plan is to make two of them, with a dozen panels. But if this one holds up, I might end up with three and the 37inch 4:3 plasma I will never be able to sell, might get tated and attached to a 4x4 pole to hold it up behind this one. Can you say awesome Tempest setup?