It certainly is.
There is actually a fellow that makes such a device but it costs almost 40 dollars + shipping from England.
I made my internal converter for about 5 bucks (but not factoring in consumables like hydrochloric acid).
Most of the issue is finding female Saturn plugs. There are very difficult to actually find for a good deal. You can get extensions on eBay every now and then. Expect to pay 10 bucks for one of these.
One advantage of making a converter box is that you can avoid making the PCB and dealing with SOIC parts. If you have ever done an electronics project (and probably even if you hadn't) you could probably either use point to point soldering or pegboard to wire the whole thing up. The attiny2313 is available in a DIP package and the schematic is straightforward. This would simplify construction SIGNIFICANTLY if you don't mind a project box inline to your game system.
Making a Saturn Playstation PAD, help requested
-
kenster2001
- Newbie
- Posts: 4
- Joined: Sat Jul 17, 2010 7:49 pm
Re: Making a Saturn Playstation PAD, help requested
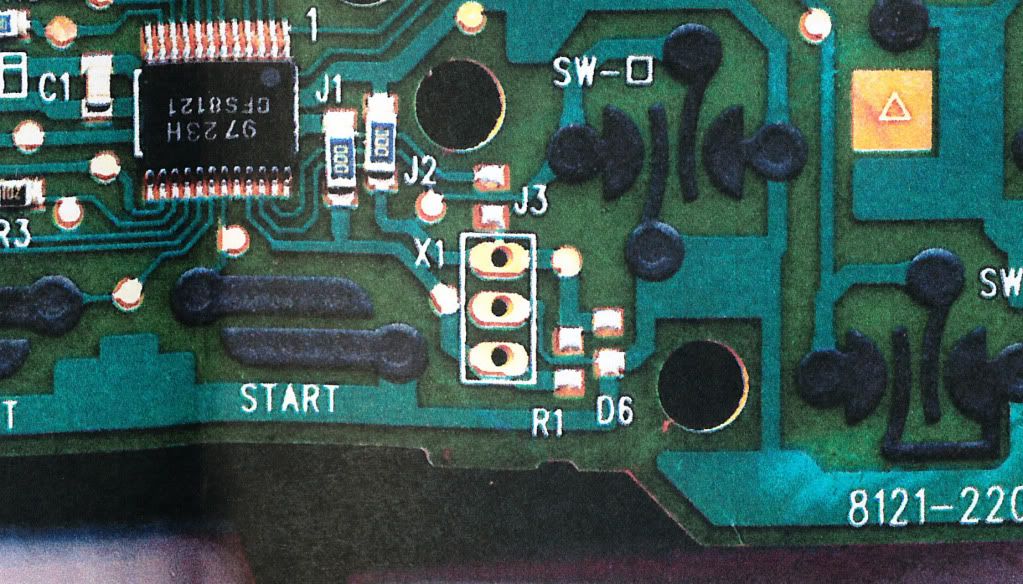
Long time, no update from me, eh? Sorry, with the Mrs.'s new job (as opposed to her old 40+/week job), I have virtually NO me time. I have decided to hack apart an old digital PS1 pad, as the internals are fairly simplistic. I have already cut up the Saturn PCB (not as much as I had said I would, left the traces to the chip, as the main guts of the PS1 PCB are small). I do have a question, though (remember, I am not overly experienced in this stuff). On the PS1 PCB just to the right of the Start contact there are some holes with traces around them and what appears to be just solder beads, running to the ground for Start, Select, R1, R2, and the 4 main buttons. Is it okay to hack this off? It would save a boatload of space. I have practiced a bit with soldering and feel comfortable enough with soldering to the small traces (didn't have flux before, I know it seems real noobish but I'm self taught in all of this).
PS1 internals are simple, but not NEARLY as simple as the Saturn. Kinda wish it was the other way around .
.
That project seems great, but I'm trying to do this with as little cash as possible and with as little knowhow as possible. I'm not an engineer. For total parts right now is at a mere $10 for both controllers ($5 each), and I don't want to go much over that.
I had an idea as I'm pretty darn good with a dremel and I want to know if this is possible. I want to incorporate the Start and Select buttons of the PS1 pad into the face of the Saturn pad. I could put the wires on the contacts, have rectangular and triangular holes cut in the front, and hot-glue it in place, but my problem lies in filling the old Start button. I was looking around at epoxies for plastics, but they would all have to be painted (unless someone can tell me where to find one that is black), but I figure plastic can melt, so maybe I can smash up the controller plug of the old Saturn cord, grind it up (surface area), and CAREFULLY with a heat gun melt the shavings to fill the hole, then sand and buff to a shine. Risky, I know, but if it for sure won't work I won't do it. But if it CAN then I'd love to. Look all professional-like, no?
PS1 internals are simple, but not NEARLY as simple as the Saturn. Kinda wish it was the other way around
That project seems great, but I'm trying to do this with as little cash as possible and with as little knowhow as possible. I'm not an engineer. For total parts right now is at a mere $10 for both controllers ($5 each), and I don't want to go much over that.
I had an idea as I'm pretty darn good with a dremel and I want to know if this is possible. I want to incorporate the Start and Select buttons of the PS1 pad into the face of the Saturn pad. I could put the wires on the contacts, have rectangular and triangular holes cut in the front, and hot-glue it in place, but my problem lies in filling the old Start button. I was looking around at epoxies for plastics, but they would all have to be painted (unless someone can tell me where to find one that is black), but I figure plastic can melt, so maybe I can smash up the controller plug of the old Saturn cord, grind it up (surface area), and CAREFULLY with a heat gun melt the shavings to fill the hole, then sand and buff to a shine. Risky, I know, but if it for sure won't work I won't do it. But if it CAN then I'd love to. Look all professional-like, no?
Re: Making a Saturn Playstation PAD, help requested
Anyone? I have some time Thursday to sit down and work on this, so any input before then would be awesome. Thanks!

Re: Making a Saturn Playstation PAD, help requested
As long as you keep all PS1 PCB traces going to and from:
1. PS1 Game cable
2. All internal chips/resistors
3. A contact point for each side of button
The rest of the PCB can be dremeled off.
Separate flux is not needed if ROSIN CORE solder is used. Easier to use for electrical too.
1. PS1 Game cable
2. All internal chips/resistors
3. A contact point for each side of button
The rest of the PCB can be dremeled off.
Separate flux is not needed if ROSIN CORE solder is used. Easier to use for electrical too.
CRT vs LCD - Hardware Mods - HDAdvance - Custom Controllers - Game Storage - Wii Gamecube and other Guides:
CRTGAMER Guides in Board Guides Index: http://www.racketboy.com/forum/viewtopi ... 5#p1109425
Re: Making a Saturn Playstation PAD, help requested
I'd been having some troubles with getting the solder to stick to whatever it was I'm soldering rather than the iron. Ruined three Satun modchips that way... Rosin core was use in every case, and I alternated between a 15W and 30W iron, both with fine tips. I figure the 15W iron is a safer bet, right?
My only concern is that those solder beads (near where it says J3, R1, and D6) might be there for a reason, but I can't for the life of me think of what could be there. Better safe than sorry, no?
If I have the time I think I will tomorrow, much soldering will ensue.
Oh, and any thoughts on the filling of the old Start button hole? I'll probably put Start and Select up where the Saturn logo is. Not much in the way of internals it can get tangled up with there. Getting a drill press-like attachment for my dremel this week, so that should help with the holes.
Re: Making a Saturn Playstation PAD, help requested
Rosin core flows better due to flux in the middle of solder.
Almost too well around pins of a chip. Fine for wires on scraped trace.
Be sure metal is shiny with enough heat applied for solder to flow.
15 watt is fine, if not near chips 30 watt is quicker.
No need to fill the bead holes, trace goes around fine.
Maybe a multi use PCB, had something there for another controller.
Those solder pads a great place to attache wires.
Your custom printed logo with clear plastic or laminate to cover that old Start hole?
CRT vs LCD - Hardware Mods - HDAdvance - Custom Controllers - Game Storage - Wii Gamecube and other Guides:
CRTGAMER Guides in Board Guides Index: http://www.racketboy.com/forum/viewtopi ... 5#p1109425
Re: Making a Saturn Playstation PAD, help requested
Yup, I'll keep em if I can afford the space. Not quite as tight as a frog's butt but it isn't terribly roomy in there either.CRTGAMER wrote:No need to fill the bead holes, trace goes around fine.
Maybe a multi use PCB, had something there for another controller.
Those solder pads a great place to attache wires.
CRTGAMER wrote:Your custom printed logo with clear plastic or laminate to cover that old Start hole?
BTW, any idea of what kind of place I could go to get a vinyl logo printed for cheap? Just call screen printing places? I'd probably fill the hole with Bondo like "portablizers" do before I cover the ugly mess. Maybe a white or blue/white SEGA logo right over the hole and a PS logo above that or something. Getting giddy thinking of it
Thanks again CRT, your insight is most helpful.
Re: Making a Saturn Playstation PAD, help requested
So here's what I've done today:
http://i965.photobucket.com/albums/ae13 ... C00014.jpg
http://i965.photobucket.com/albums/ae13 ... C00013.jpg
http://i965.photobucket.com/albums/ae13 ... C00012.jpg
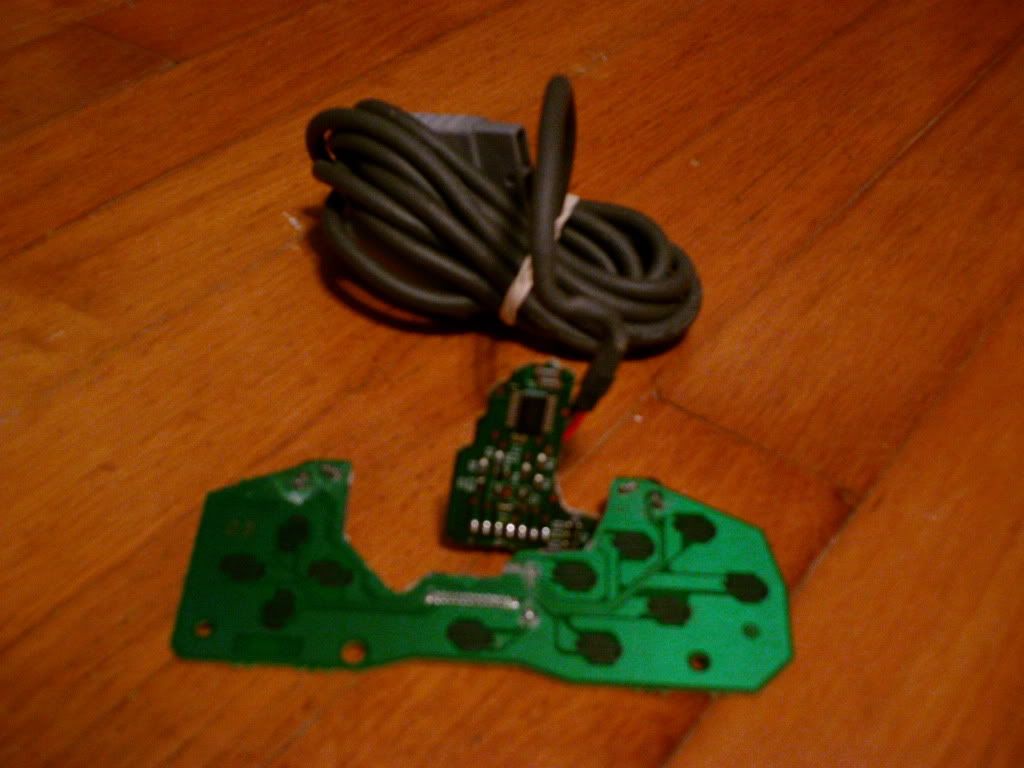
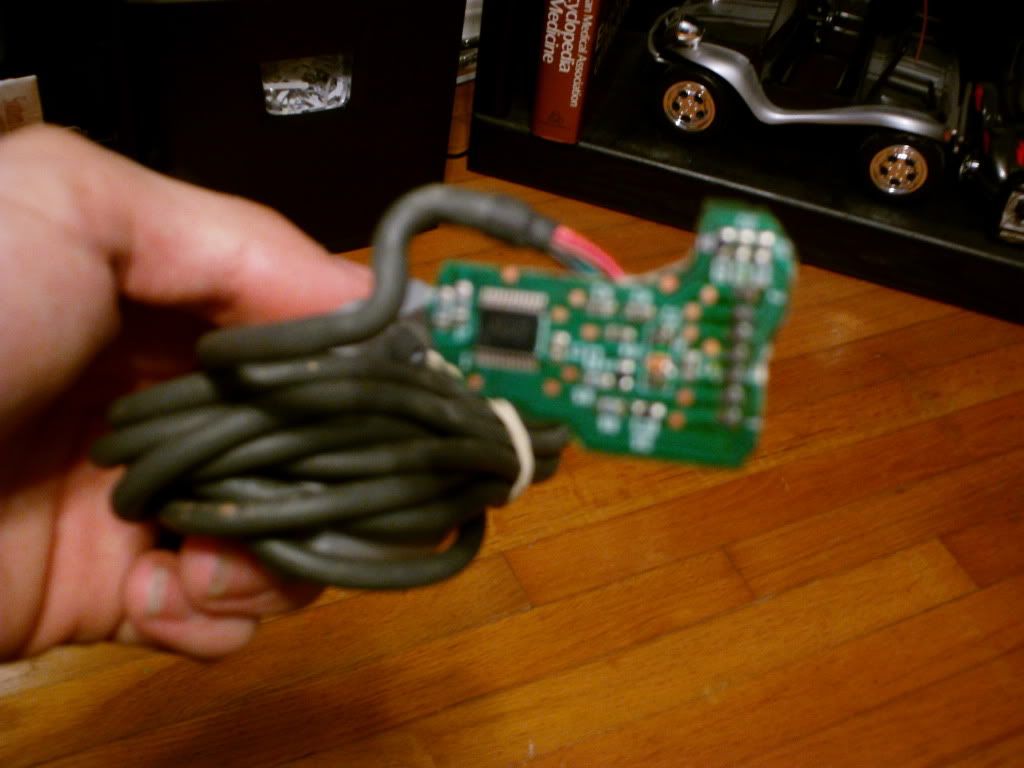
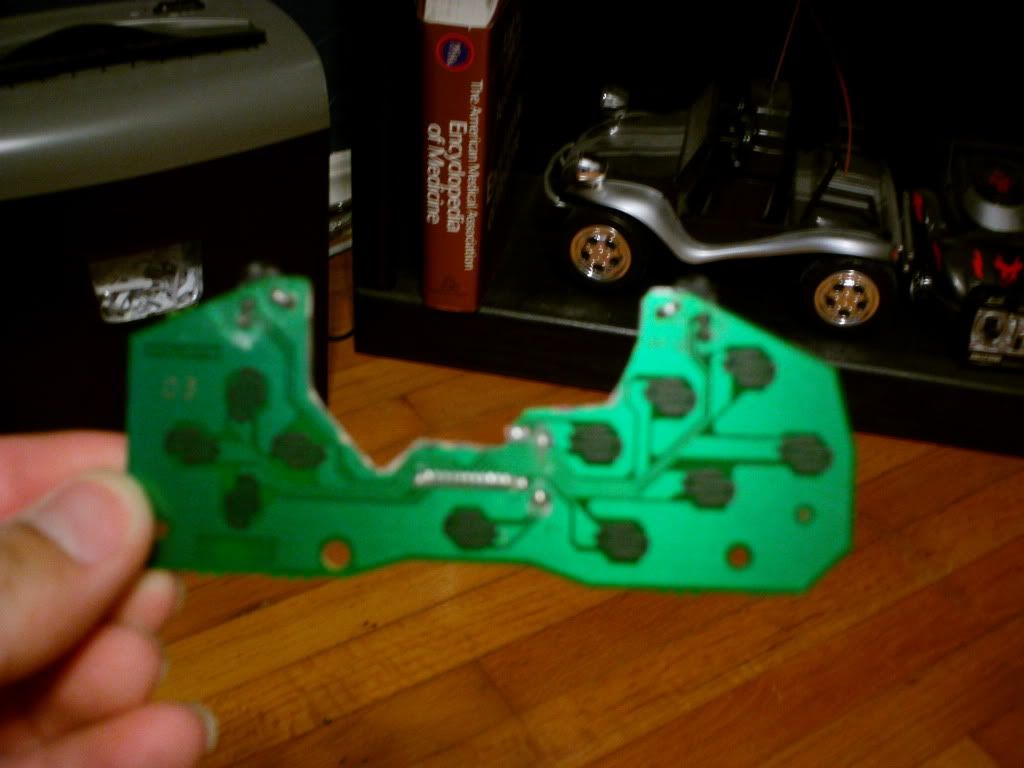
Stupid camera focused on the wrong stuff, but it's mainly for showing the sizes. I scraped off the green stuff over the traces on the PS1 pas as well. No need for the Saturn PCB scrape-age, I can solder to the beads left behind by the chip. Soldering is next. Fingers crossed here. Those pads are TINY.
http://i965.photobucket.com/albums/ae13 ... C00014.jpg
http://i965.photobucket.com/albums/ae13 ... C00013.jpg
http://i965.photobucket.com/albums/ae13 ... C00012.jpg
Stupid camera focused on the wrong stuff, but it's mainly for showing the sizes. I scraped off the green stuff over the traces on the PS1 pas as well. No need for the Saturn PCB scrape-age, I can solder to the beads left behind by the chip. Soldering is next. Fingers crossed here. Those pads are TINY.
Re: Making a Saturn Playstation PAD, help requested
Update: all soldering and testing done. All that's left is the Start/Select dealy-o. I have it as X-->A, O-->B, R2-->C, Square-->X, Triangle-->Y, L2-->Z, L1-->L, and R1-->R. Swapped my R's and L's from how I'd originally planned, and yes it was INTENTIONAL, not an accident. Why have it the exact same as the official pad? That's the glory of this project. I can make whatever config I want without nerd rage (hey, if I heard someone hacked apart an official PS Saturn Pad, I'd stick a soldering iron in their eye in a heartbeat). Right now the Start/Select chunk o' board is hanging out the top of the pad. Used the O and X portion of the PS1 controller board. Works just fine.
Re: Making a Saturn Playstation PAD, help requested
Quick question: can I use hot glue to better hold the wires to the boards, or would that cause a short? While testing two wires came right off, and only one was on a tiny trace. The other (ground) was soldered directly to a pin.