Xbox Hard Drive Upgrade - Slayer and Chimp Method

Guides to jumpstart your Retrogaming lifestyle
Post Reply
User avatar
CRTGAMER
Next-Gen
Posts: 11933
Joined: Tue Jan 05, 2010 11:59 am
Location: Southern California

Xbox Hard Drive Upgrade - Slayer and Chimp Method

Post by CRTGAMER »

Xbox Hard Drive Upgrade - Slayer Method
Chimp Method by Jagosaurus in the first Reply below

Image

This is for the original Xbox, a larger hard drive upgrade replacement for the purpose of installing disc games and homebrew utilities. Note that the Xbox will either need a Soft Mod or a Mod Chip in order to install the replacement hard drive boot configuration disc. Any game saves that are not locked can be backed up to the memory card. A second Xbox console or extra memory cards come in handy to backup all the game saves. See the References at the bottom that detail the mod chip.

I also posted a Guide for the Game Cube and PS2; running installed disc games.
Gamcube SD Card / PS2 Fat Hard Drive - viewtopic.php?p=322332#p322332

Tools and Parts

Only a few specialized tools are needed.
T10 Torx Driver
T15 Torx Driver
T20 Torx Driver
Slotted Screwdriver or Putty Knife
Pata (IDE) Hard Drive
Hard Drive Configuration Disc (Slayers EvoX Auto Installer 2.7)
Modded Xbox Console without Thomson Drive


Do not to use a Thomson drive due to reliability and read issues.

Original Xbox Revision Guide
http://www.racketboy.com/forum/viewtopic.php?p=755098#p755098


Image

Guess what disc drive is in each Xbox. Hint; the Xbox below does not have a Thomson drive.

Image

Disassemble
Unplug the Xbox, press the eject and power buttons a few time to discharge some of the internal capacitors. The hard drive change over can easily be done under an hour.
http://xbox.douglasstridsberg.com/2009/ ... your-xbox/

Before you unplug the power out of your XBOX, make sure you are able to do all the steps required within 4-5 hours. If the XBOX is without power for more than that time, its internal clock will lose power and you won’t be able to boot off a DVD until you’ve reinserted the old hard-drive and started the XBOX once.

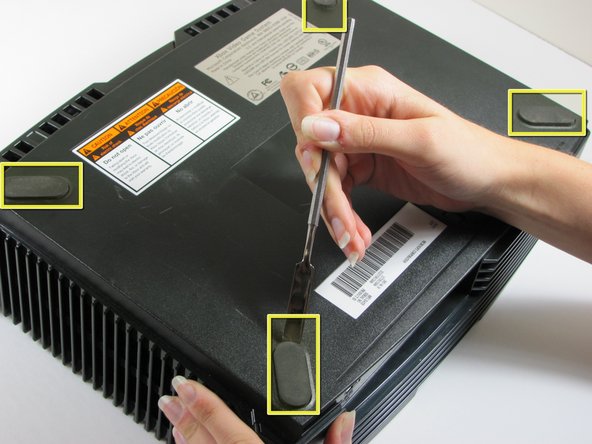
Turn console upside down. Use a slotted or putty knife to peel the four rubber feet from the outer corners. You do not have to completely remove them, just bend the rubber pad back to allow removing the screws.
Image

There is a screw hidden under the bottom silver description sticker and another screw under the white bar code left side of sticker. Both screws are to the left of each sticker when read right side up, use your finger to push in the labels to locate. Either peel stickers back or just poke a hole. The holes will not ruin any of the text on the stickers.

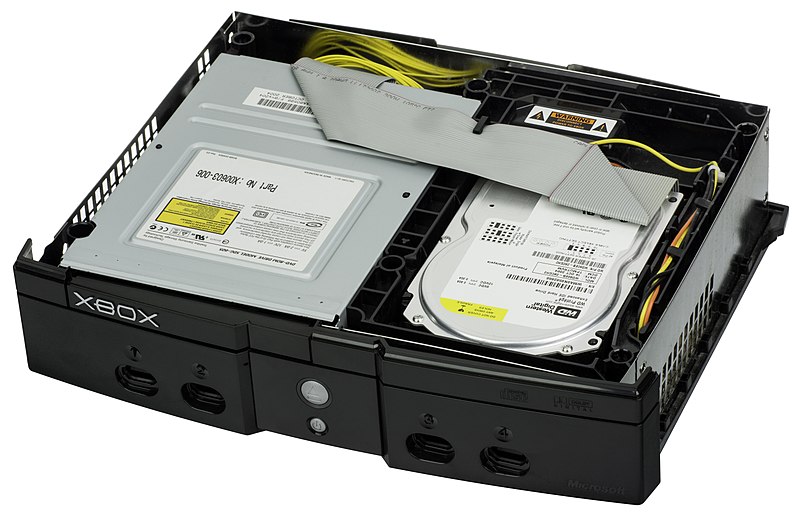
Remove the bottom six T20 Screws. Turn Xbox console right side up and lift the top cover. The Disc drive and the 10gb hard drive can now be seen.

Image

Pull the hard drive IDE cable clear of its hook near the back of the hard drive to expose the mounting screw. Unplug the IDE cable, but leave the power cable plugged in for the moment. Remove the one T10 Screw from the plastic frame securing the hard drive assembly. Unhook the power cable all the way around the frame to give slack. Gently lift the hard drive frame assembly; pulling the power cable free of the plastic hook where it feeds down to the main board.
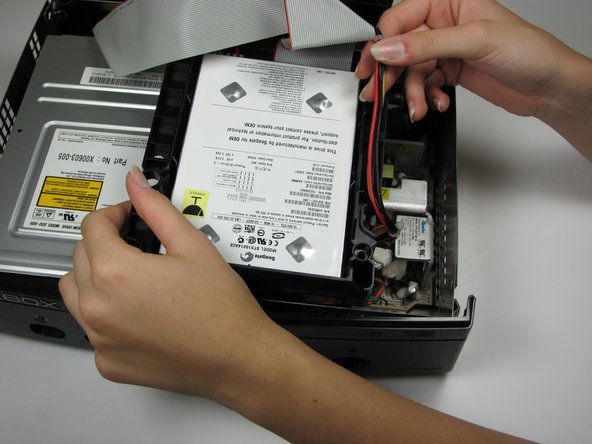
Image

Remove four T15 screws holding the hard drive to the plastic frame. Lift the hard drive clear, remove the power cable. To pull the disc drive, a long T10 driver is needed. Remove two T10 Screws buried at each front corner, remove IDE and power cables before lifting out disc drive assembly.

Be sure the replacement hard drive jumper is set to Master or Cable Select. I could not get my replacement to get recognized in Master, but it worked fine moving the Jumper to Cable Select. Plug in the replacement drive and reinstall into frame.

CRTGAMER wrote:Do not modify the original Xbox Hard Drive. Place it in a safe place in case you have problems getting the replacement drive to boot. The console internal battery might be worn and lose memory before the swap is completed. The original drive can be used to initially get the Xbox up and running before attempting the swap again.

Original Xbox Seagate hard drive is only 10gb, replacement Maxtor is 320gb. :mrgreen:

Xbox Hard Drive Upgrade 01.jpg
Xbox Hard Drive Upgrade 01.jpg (255.51 KiB) Viewed 67364 times

Do not reinstall the console top cover until after the new drive is configured. There is a chance the old drive may need temporarily swapped in to get everything working right.

Install Hard Drive Boot Disc
Google download whatever hard drive configuration boot disc to set up the new hard drive. Be sure to burn the ISO to a DVDR, sometimes Xbox disc drives cannot boot CDRs. I used Slayers EvoX Auto Install 2.7 which also includes a nice round of utilities including DVD2Xbox used for installing disc games to the internal hard drive.

Image

If for some reason the boot disc does not work, the console internal battery might have lost memory. Remove the boot disc, temporarily swap back the original hard drive, boot up normally and then swap back again to the replace drive. It is important not to install or change anything in the original Xbox hard drive since it might be needed to reboot the Xbox console.

Right Click for a larger view
Note the disc reader drive, a very uncommon Hitachi drive for the original Xbox!
Xbox Hard Drive Upgrade 02.jpg
Xbox Hard Drive Upgrade 02.jpg (244.61 KiB) Viewed 67364 times

Testing
The hard drive should boot to its custom Dashboard without any disc in the disc drive. From there look in Applications to find the Game Installers. The original Xbox Dashboard is also included to manage the memory cards.

Image

Under Applications, DVD2Xbox is so easy to use. Simply insert a game disc and choose the copy option to install to the hard drive. Once the game installs it can be ran without the disc directly from DVD2Xbox.
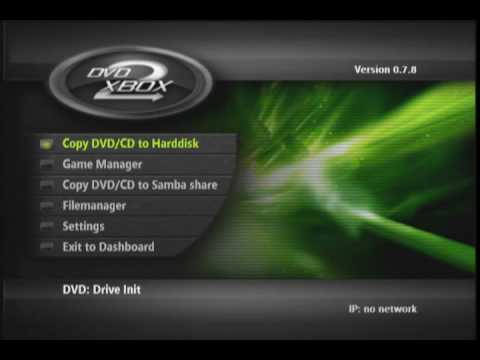
Image

Some games that I have tried are certain unique imports including Metal Wolf Chaos, N.U.D.E, Petit Copter and Taito Legends 2. Not only the hard drive menu driven convenience, but an opportunity to install rare imports. Unfortunately PAL Taito 2 does not seem hard drive compatible, but at least it can run on a NTSC Xbox once the region can be circumvented with the Mod Chip.

Image

There are also some Emulators that work very well, the Xbox console is a very good Mame console! :shock:
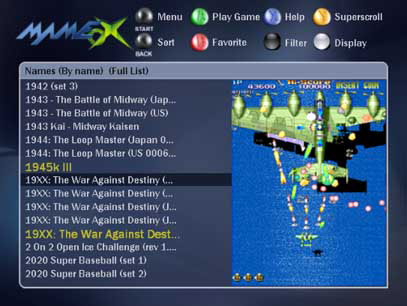
Image

I prefer a Mod Chip over the Soft Mod. I was fortunate to buy this console with an Aladdin Mod Chip already installed. This also allows ease of running any import disc directly such as PAL Taito Legends 2.

Xbox Hard Drive Upgrade 03.jpg
Xbox Hard Drive Upgrade 03.jpg (215.21 KiB) Viewed 67364 times
01toubib wrote:http://www.racketboy.com/forum/viewtopic.php?p=910841#p910841

So after much trial and error, I've finally found a winning combination of disks to successfully Soft Mod a Japanese Xbox. So for those of you with really cool Japanese Xboxs looking to turn them region free without opening them, here is your ticket.

Here is the final trial and error list list:

Softmodable Disks:
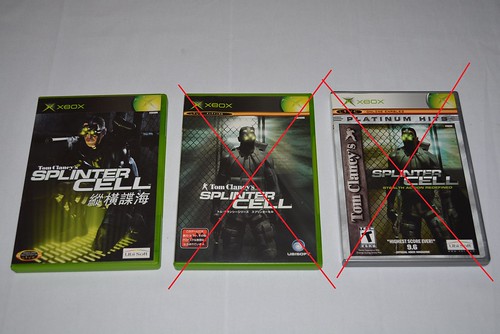
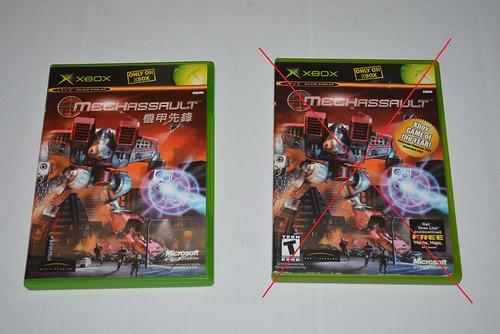
MechAssault (Asian Version, Not Japan Version!) Part Number X09-24634 (Front of Disk)
Splinter Cell (Asian Version, Not Japan Version!) U78-00001 US012A01 (Front of Disk)

Unable to Softmod: (at least in the traditional way)
MechAssault (USA Version) Does Not work, cannot get past region lock
(Unknown/Untested) MechAssault (Japan Version)
Splinter Cell (USA Version) Does not work, cannot get past region lock
Splinter Cell (Japan Version) Does not work, Freezes at save menu

Here are pictures for reference:
Image

Image

Proof:
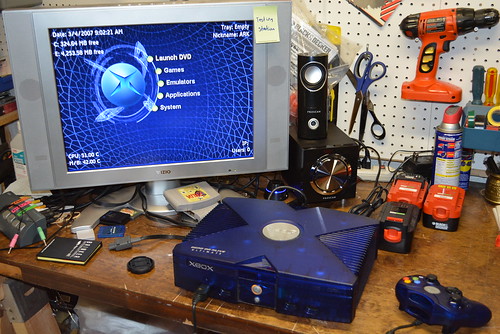
Splinter Cell Softmodded Kasumi Chan NTSC-J Xbox
Image

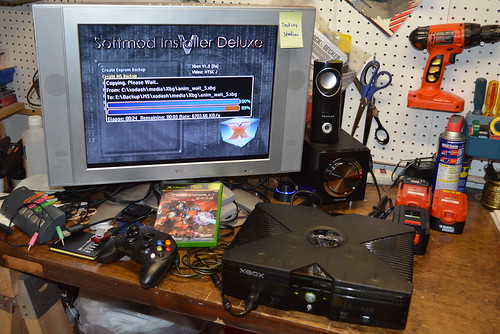
MechAssault Softmodded Skeleton Edition NTSC-J Xbox
Image

References
Xbox Drive Compatibility List - http://xboxdrives.x-pec.com/?p=list
Aladdin Advance XT Mod Chip Install - http://xbox.bula.nu/aladdin/xt/
Xbox Tweaks and Mods - http://xbox.douglasstridsberg.com/
Crack Open That Xbox - http://www.llamma.com/xbox/Repairs/crac ... t_xbox.htm
Xbox Hard Drive Replacement - http://www.ifixit.com/Guide/Xbox+Hard+D ... ement/1450
XBOX Hard Drive Upgrade - http://www.instructables.com/id/Origina ... /?ALLSTEPS

Slayers EvoX PDF File - http://www.elgen.net/evoxinstall.pdf


fumanchu wrote: http://www.epforums.org/showthread.php? ... L-DISC%29*

Well, here we go again, several years after coining the word "Auto-Installer" we have the latest version 2.7
Before you expect the world, please know that v2.7 is in essence a cleaned-up update from v2.6 and not a new product. It runs on the same good old EvoX but has the latest STABLE apps and scripts. There is ONE cool new feature that has been asked a lot so read on...

NEW! SlaYer's EvoX Auto-Installer v2.7:
* Ability to easely change the default dash between EvoX / XBMC / Ava / UnleashX(info) on any kind of HDD
* 137GB HD's and the G: Drive
* XBOX v1.0 - V1.6 Support through new v1.6 Bioses (possible future versions too)
* Ability to restore the retail Xbox HD to retail mode
* Ability to Format the C: E: F: G: or X:,Y:,Z: partitions independently
* Latest Stable Media Center XBMC Custom Configured with ShoutCast Radio and lots of cool Scripts
* Ability to flash virtually ANY v1.0-v1.6 XBOX MOD chip & some TSOPs with 256K or 1MB
* Ability to restore the latest v1.0-v1.6 compatible M$ dash
* Comprehensive Step-by-Step Instalation and troubleshooting manual, released as locked & encrypted PDF 5.0 for better compatibility

Software Included (some new, some cleaned up and updated versions from v2.6):
* boXplorer 0.96 G: Patched
* M$ Dash Live v5960 ( v1.0 - v1.6 compatible )
* dvd2xbox(info) v0.7.7 (with cool Project Mayhem III skin)
* EvoX Dash v1.8.3935
* XBMC 2.0.0 (10-26-2006 CVS T3CH build) w/ PMIII, X360 & Blackbolt Classic 2.0 Skins
* Avalaunch(info) 0.49.3.142 (auto-updatable on-line & can download the Qwix(info) PC ISO Manager)
* DVDX v2.0 Region Free
* UnleashX Dash V0.37.1218 Build 543
* Xboxdash dvd region free patch disc v1.03 (to be used on the older 4920 dash only!

Chimp Method in the next Reply
Last edited by CRTGAMER on Tue Aug 29, 2017 10:01 pm, edited 3 times in total.
Image
CRT vs LCD - Hardware Mods - HDAdvance - Custom Controllers - Game Storage - Wii Gamecube and other Guides:
CRTGAMER Guides in Board Guides Index: http://www.racketboy.com/forum/viewtopic.php?p=1109425#p1109425

Image
Image
User avatar
Jagosaurus
Next-Gen
Posts: 3910
Joined: Sat Mar 09, 2013 12:15 pm
Location: Houston area, TEXAS

Re: Xbox Hard Drive Upgrade - Slayer and Chimp Method

Post by Jagosaurus »

Chimp 261812 Method to Upgrade oXbox HDD:
__
2019 EDIT - Always pull latest CHIMP build & go to JRocky's YouTube channel for more info. Below will give you a great starting point into your HDD upgrade journey. JRocky has his own custom dashboard & softmod tool these days as well.
__

I will be posting the steps in detail to upgrade your internal oXbox HDD using the Chimp 261812 application. Until that time, this temporary summary should still help out anyone wanting to upgrade using the latest method (as of 11/24/2016).

Link to video by one of the creators below. I want to get a text guide up because you never know when a video will be taken down.

Dowload link for app is in the youtube video description. I have this file backed up on my PC, and I will post the zip file as well in time.

Important Precautions:
- Back up your system files/EPROM in udata folder onto your PC before starting.
- Use composite cables at 480i to ensure there is no odd HD resolution mishaps preventing you from seeing menus.
- Ensure your new HDD is lockable here:
http://xboxdrives.x-pec.com/?p=list

Summary:
Your system needs to be soft modded to begin! I used SID USB installer 5.11, an oXbox Controller to USB adapter, Xplorer360 PC program (to get files onto xbox formatted USB), & 007 Agent Under Fire. I then installed the UnleashedX dashboard.

First, no disc burning needed as with other methods. This will allow us to mod, revive, and repurpose consoles with a dead disc drive in the future!

>>> This section will eventually be a detailed, step by step guide. Until then, here's a quick synopsis. Read my input, then follow video directions: >>>

JCRocky5 Video Tutorial using Chimp 261812:
Follow directions exactly to ensure you don't brick your console.
https://youtu.be/lBC9599ww6I

12/17/2016 addition:
Newest build of Chimp is out:

https://youtu.be/Y4SkGz9eeQc

This Following Section is a Placeholder Until Step by Step Guide Posted:
>>>
FTP the Chimp app to your original HDD. Follow file path directions exactly from video. I use FileZilla as my FTP program. Stock username and PW are "xbox" and use port 21.

Chimp allows you to leave your stock HDD in (this drive is master), then put your new, larger HDD onto the ribbon cable in place of the optical disc drive (use cable select setting on new HDD, oXbox will automatically place it as slave). Run Chimp, clone HDD by following prompts in video directions.

Once complete:
Remove original HDD, replace with new HDD, plug disc drive back in.
>>>

Photos from My Mod:
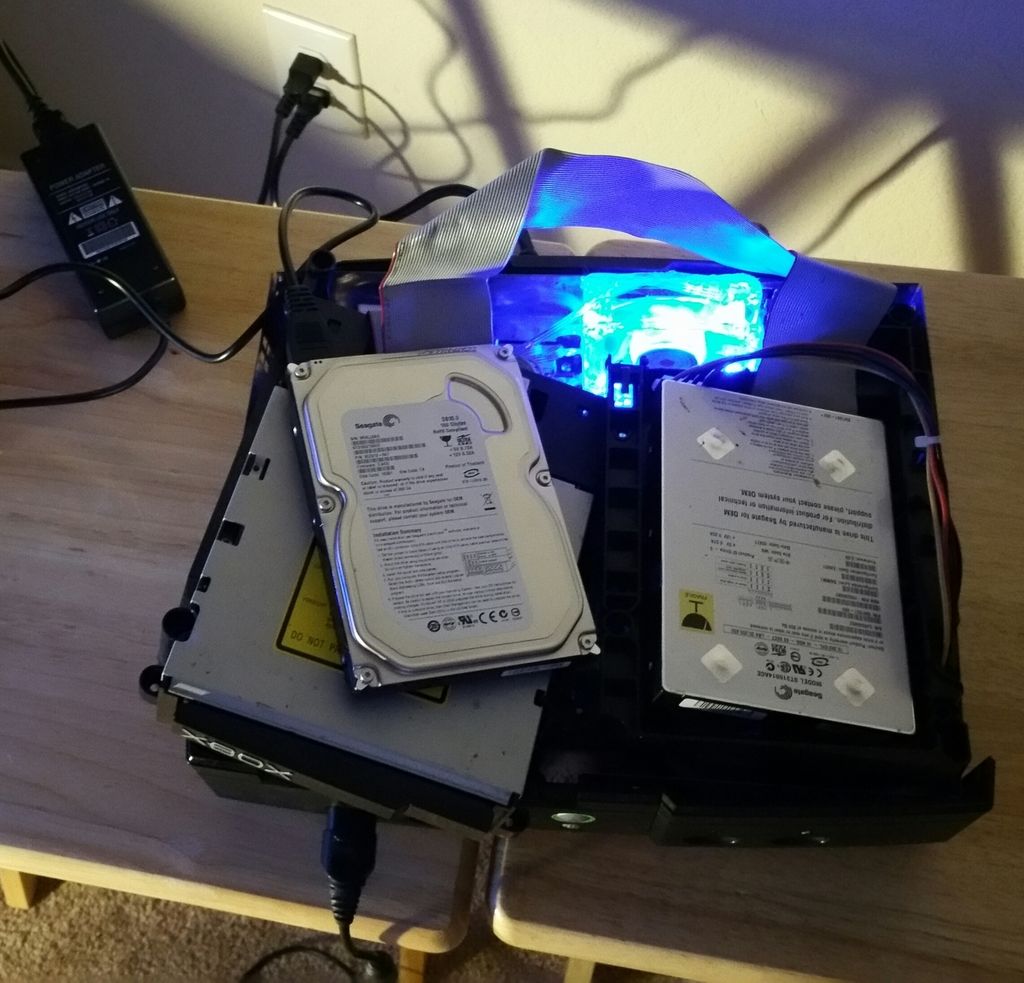
Original drive to right, new drive to left. I used an external power supply for the 160GB Seagate but if you have a molex splitter, the power supply will boot both drives. Yes, my cooling fan is replaced with a new 80mm LED model.
Image

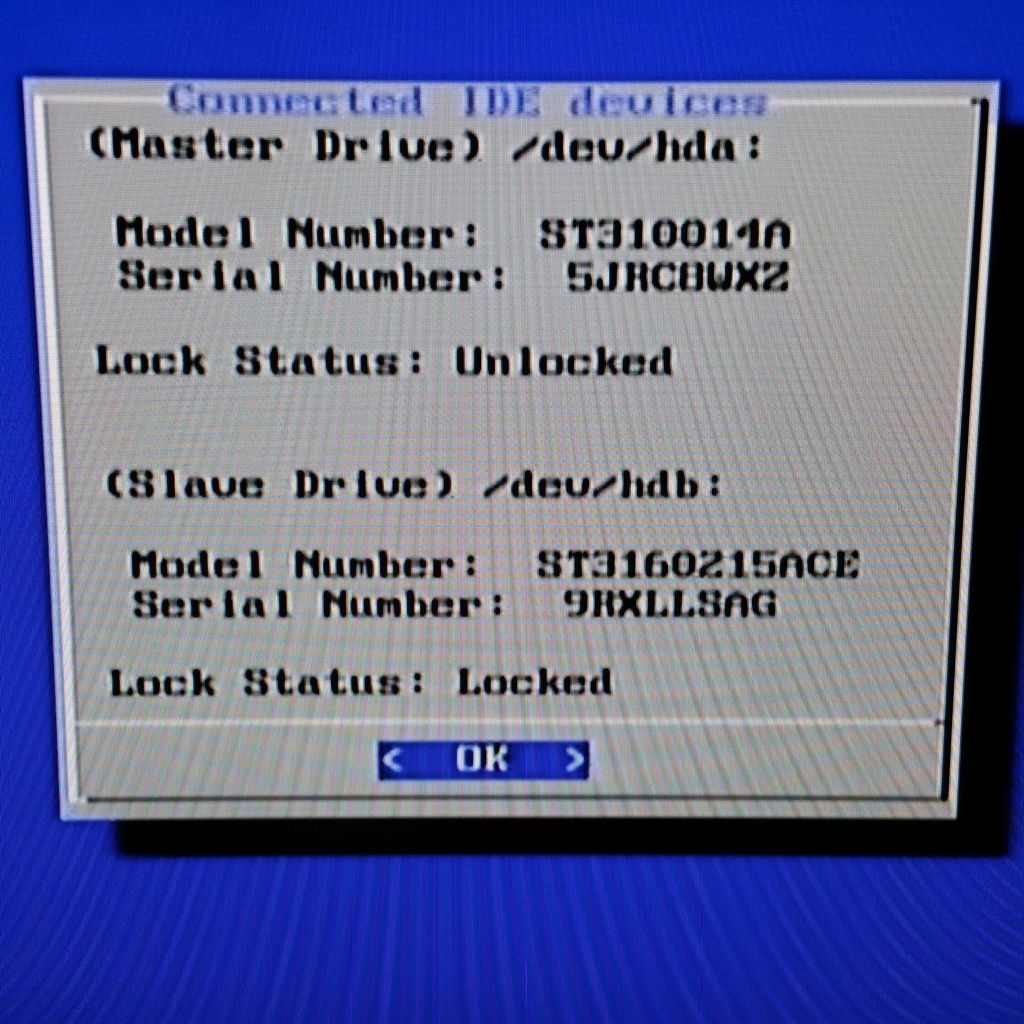
As you can see, my new drive (ST3160215ACE) is now locked to the console/EEPROM key. That HDD was still in place of optical drive so it shows as "slave." After swapping back, you'll see this HDD as master and DVD drive as slave.
Image

HDD Partitions:
Chimp does have the ability to customize partition options if you'd like, but normally most folks go this route:

- Roughly 8GB is stored on stock partitions (X, Y, Z, C, E), with majority on E drive.
- From E, up to 137GB is stored on F drive.
- Above 137GB is stored on G drive.

If you'd like to format the G drive for any HDD models over 137 GB, you need that option turned on in your soft mod setting options, then use Chimp to create partition. If you don't do this you won't "see" G:\.

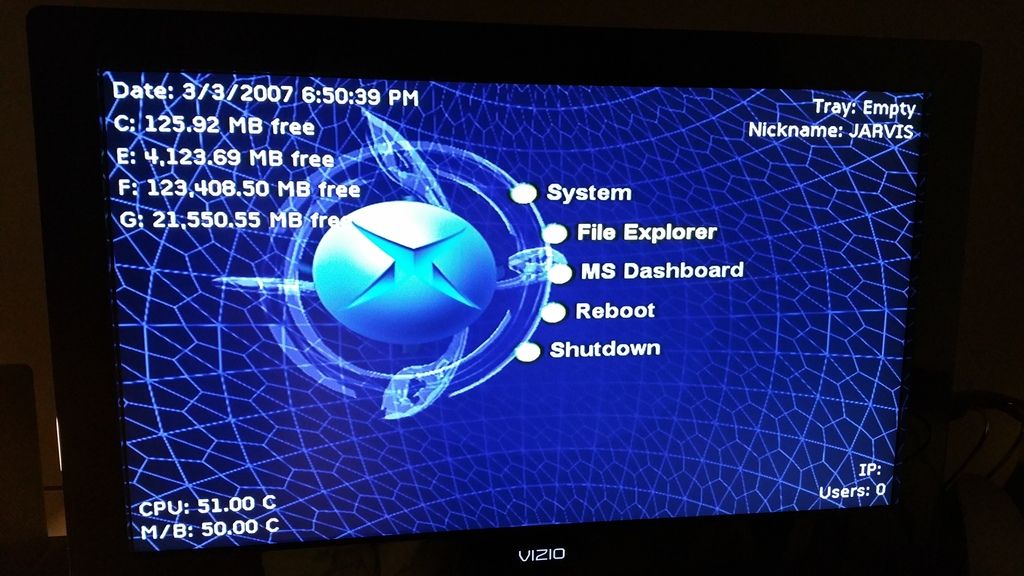
See partition size shown to top left in MBs. Note, I have several apps and games on my HDD already at the time of this photo, but you get the idea. From the stock ~8GB upwards to 137 GB on F:\, remainder on G:\ (to get to my full 160GB usable).
Image

Choosing a HDD Model:
I successfully upgraded my HDD to a 160GB IDE Seagate (model # ST3160215ACE) using the Chimp method.

While I don't want to promote a specific seller I don't personally know, this drive is currently available (as of 11-24-2016) new on ebay for $19.99 shipped.

It does seem the console can be touchy with different drives and even have varied results with the same drive model between different methods. I chose this drive specifically due to high compatibility reports with Seagate and it being listed on lockable chart linked above.
Last edited by Jagosaurus on Tue Nov 12, 2019 3:23 am, edited 1 time in total.

My Retro Achievements Profile | My Console Mods
"Victory and honor do not grow from timid seeds" -Arbiter, Halo 5
User avatar
nightrnr
Next-Gen
Posts: 1824
Joined: Thu Jun 17, 2010 5:56 pm

Re: Xbox Hard Drive Upgrade - Slayer and Chimp Method

Post by nightrnr »

So I decided to finally bring 2 oXboxes back to life last night (had bad hdd's). Already had made an eeprom reader from my last miracle oXbox, so I just had to solder it to 2 points on the board (3 if you count ground, but I just use a screw post to hold that wire).

Worked beautifully for the most part (despite my PC not wanting to lock the drives). But with some trickery it worked (plugged in the IDE ribbon after xboxhdm loaded up).

Anyways, haven't used Chimp yet (a Tsop flashed system does most of my magic), but Chimp is such a neat option. Too bad I can't figure out any other good way to mod without a disc drive though (at least some still work). Does it replicate the HDD locking code for the system, or can you choose a different locking code?

BTW, Taito Legends 2 is region free and works on my hard drive (I have the game, imported it back in the day).
The games I have trouble with is that JSRF/Sega GT combo. It just will not load up for me (reboots to menu).
...just another lost soul...
User avatar
Jagosaurus
Next-Gen
Posts: 3910
Joined: Sat Mar 09, 2013 12:15 pm
Location: Houston area, TEXAS

Re: Xbox Hard Drive Upgrade - Slayer and Chimp Method

Post by Jagosaurus »

Man, I love my modded oXbox. I just played some Halo 2 on my 360 right now but I just thought... I haven't ripped this to my oXbox HDD yet :lol:. I booted up some emulators on it last week. It'll be a sad day when that guy dies! Hopefully removing that time clock cap, increasing ventilation (cutting RF), & upgrading my fan will help prolong the life! Now, just to get it online with Xlink Kai this year. Back on track...

Chimp worked like a charm for me. I think some of the failures you'll see mentioned in the video comments are the result of people using drives that aren't lockable in the first place. I only used it to directly replicate the EPROM locked to the system. Doesn't mean there might not other options or some added since my original journey down this rabbit hole.

The gentleman that puts out chimp is now several versions ahead from when I posted this. I sub to his YouTube channel and he's consistently uploading vids on updates to Chimp and his dashboard GUI.

That's why I never fully updated this thread. By the time I got to it, he had already moved on to new build. I recommend checking out his YouTube video I linked above but then looking at his latest videos on the channel to get a better sense of where it's evolved to today. 8)

My Retro Achievements Profile | My Console Mods
"Victory and honor do not grow from timid seeds" -Arbiter, Halo 5
User avatar
Anapan
Next-Gen
Posts: 3903
Joined: Mon Nov 17, 2008 11:15 am
Location: BC, Canada

Re: Xbox Hard Drive Upgrade - Slayer and Chimp Method

Post by Anapan »

I use a "Platinum Hits" Splinter cell for the initial exploit.
ImageImageImageImage
User avatar
nightrnr
Next-Gen
Posts: 1824
Joined: Thu Jun 17, 2010 5:56 pm

Re: Xbox Hard Drive Upgrade - Slayer and Chimp Method

Post by nightrnr »

My copy of Mechassault has seen a lot of modding action. I feel bad abusing (it's a pretty good game), but it was just a better game choice for me at the time.

I will have to check out the latest Chimp for a couple of my systems, as they will need a bigger HDD some day and I tire busting out my beater (semi-working) DVD drive for the mod (most of the systems I salvage have bad disc drives).

I too have removed the troubled time capacitor on all but my 1.6 systems (have 2 or 3 of those).
I think my oXbox gaming future Iis fairly secure though; I've got options.

I do wish I wouldn't have accidentally wiped out the E drive on my Tsop flashed system though :evil: :roll: (while I was experimenting with the other systems). It had many arcade roms and settings that I need to reinstall.
...just another lost soul...
User avatar
Jagosaurus
Next-Gen
Posts: 3910
Joined: Sat Mar 09, 2013 12:15 pm
Location: Houston area, TEXAS

Re: Xbox Hard Drive Upgrade - Slayer and Chimp Method

Post by Jagosaurus »

Man, I understand that heartbreak. Getting the full MAME package running was a project. Not difficult but a time sink with multiple downloads and FTPing so many files. I think the total file sizes combined were something crazy like 8GB. Also, naming all the non arcade (NES, etc) ROMS to be under than character limit was it's own mini project. I had 100s of rejected ROMS I had to shorten the names for.

I've thought about modding a second oXbox for a buddy of mine but I would have a hard time going in half way. I'd want to go all out again. 8)

Let us know if you use a newer build of Chimp & how it goes.

My Retro Achievements Profile | My Console Mods
"Victory and honor do not grow from timid seeds" -Arbiter, Halo 5
User avatar
Anapan
Next-Gen
Posts: 3903
Joined: Mon Nov 17, 2008 11:15 am
Location: BC, Canada

Re: Xbox Hard Drive Upgrade - Slayer and Chimp Method

Post by Anapan »

I was started the rom renaming manually, but thankfully found a guide that used BRU (Bulk Rename Utility) to make all too-long filenames acceptable by the system.
ImageImageImageImage
User avatar
nightrnr
Next-Gen
Posts: 1824
Joined: Thu Jun 17, 2010 5:56 pm

Re: Xbox Hard Drive Upgrade - Slayer and Chimp Method

Post by nightrnr »

It's not quite as bad as it sounds.
I found a custom (mostly complete) set a while back for finalburn (forget which release, legends?).
I still have it and I wouldn't be too hard to throw it back on.

But, I had a bunch of controller and screen settings just how I wanted it for several games and now I have to start over. Not to mention weeding out the "adult" arcade games so that the nephews aren't corrupted when they play.

It's probably for the best though. I originally meant to put it on a smaller HDD and leave this 200GB drive for actual Xbox games. So now I can decide on a more appropriate capacity.

I hate how you can't swap out HDD's easily. Even overcoming the unlock codes, it reverts to stock OS when you swap the drives to another system (making you soft mod again). I swear there's a way around that, but stumps me.
Same issue when trying to build a hacked hard drive from the PC; builds a drive, but still need to soft mod.
...just another lost soul...
Post Reply