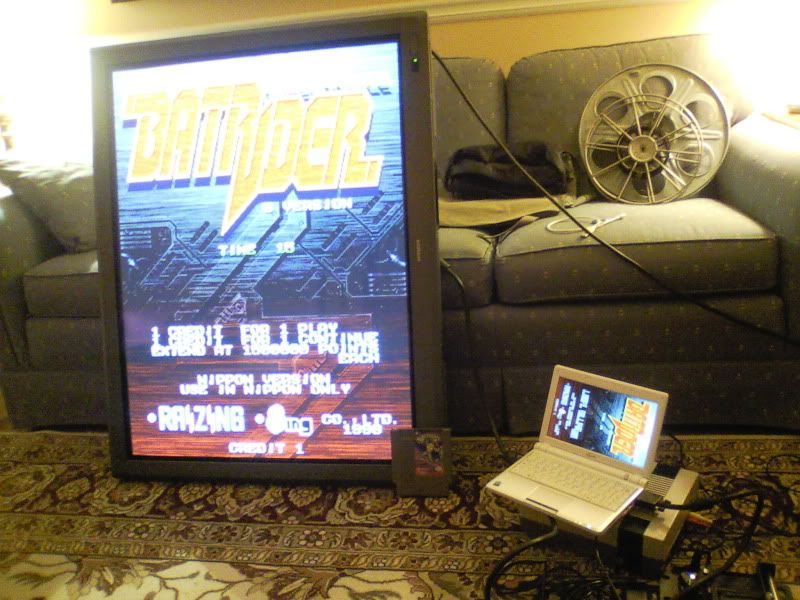
TATE set-up - finished! Thanks for the help!
-
fastbilly1
- Site Admin
- Posts: 13775
- Joined: Tue Apr 17, 2007 7:08 pm
Re: TATE set-up - finished! Thanks for the help!
Good work beatnix, though I would be way to tempted to disconnect everything and just spin the monitor on its own. How do you make it stay in place? Just gravity?
-
noiseredux

- Next-Gen
- Posts: 38148
- Joined: Fri Nov 14, 2008 1:09 pm
- Contact:
Re: TATE set-up - finished! Thanks for the help!
Great job! The N6 is nice huh?
Can you do a guide to the parts used and method for such a cheap tate?
I need to find the biggest 4:3 LCD i can now!
Can you do a guide to the parts used and method for such a cheap tate?
I need to find the biggest 4:3 LCD i can now!

-
fastbilly1
- Site Admin
- Posts: 13775
- Joined: Tue Apr 17, 2007 7:08 pm
Re: TATE set-up - finished! Thanks for the help!
If you are willing to go plasma, the biggest 4:3 I know of is 37 inches. It shows up randomly for sell and is heavy as hell. But it is possibly tate bliss:
Hitachi CMP307XE
They randomly popup for sub $500 on ebay. You just cant ship them.
Hitachi CMP307XE
They randomly popup for sub $500 on ebay. You just cant ship them.
-
noiseredux
- Next-Gen
- Posts: 38148
- Joined: Fri Nov 14, 2008 1:09 pm
- Contact:
Re: TATE set-up - finished! Thanks for the help!
that is amazing, Fast. But prob tooooo big for what I want.
For one of my several back-burner projects, I've been planning at some point to build a Dream-cab in my basement. 2-Player standup style. And I'm going to go LCD on it for easy TATE. I'm trying to figure what size I should go with though. I feel like 19" would be too small, yeah? And that 37" is overkill. Need the happy medium.
Also, when it comes to tinkering projects - I'm super cheap. Love finding stuff at thrift stores or yard sales, so wouldn't drop $500 on a monitor.

Re: TATE set-up - finished! Thanks for the help!
Thanks everyone for the comments. I'm fairly handy and a touch creative in my approach to problem solving, which led to my attempting the mod. I can put a guide together sometime over the next couple days that has pictures and what not.
But... Basically I just unscrewed the stand. Cut two boards from scrap to fit into the space for the stand. Put the lazy Susan between the boards and then sandwiched all that between the stand and monitor. The biggest obstacle was figuring out the order to screw everything together because it's all pretty tight quarters.
Here is a link to the exact lazy Susan piece I bought from Menards.
http://www.menards.com/main/home-decor/ ... -13091.htm
Fast... It's gravity, that's it. And yes, it has been given a good spin or two already! How could I resist prior to hooking it all up??
noise... The n6 is great so far and I am on the same hunt soon. This project all happened because I stumbled on the Japanese system and it was reason enough to piece this together. But I am definitely going to hunt out a higher quality monitor this summer. Garage sale season is nearly upon us and it's the most glorious of all the seasons in my book!
Last edited by beatnix on Thu Mar 13, 2014 10:26 am, edited 2 times in total.
Buy/Sell/Trade Thread http://www.racketboy.com/forum/viewtopic.php?f=22&t=33026
eBay Auction Thread http://www.racketboy.com/forum/viewtopic.php?f=48&t=33010
eBay Auction Thread http://www.racketboy.com/forum/viewtopic.php?f=48&t=33010
-
fastbilly1
- Site Admin
- Posts: 13775
- Joined: Tue Apr 17, 2007 7:08 pm
Re: TATE set-up - finished! Thanks for the help!
I got my first one for free, but it died shortly after (not terribly long after that picture was taken actually). Its replacement cost me a whopping $10 on Craigslist. Truth be told we dont know what to do with that monitor since it is so damn big and heavy. I am going to have to learn how to weld to make a stand for it.