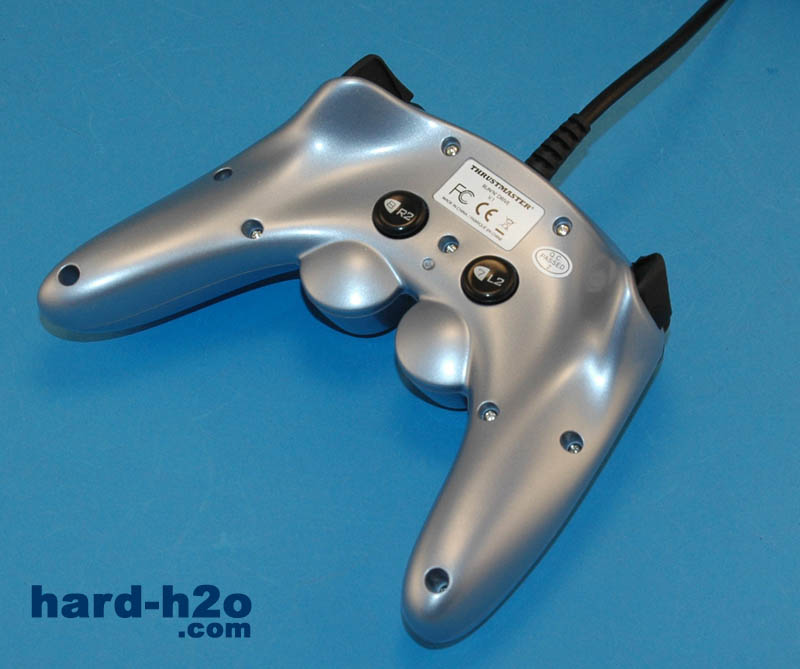
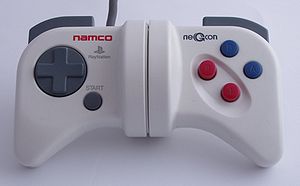
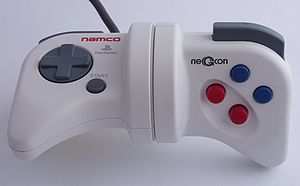
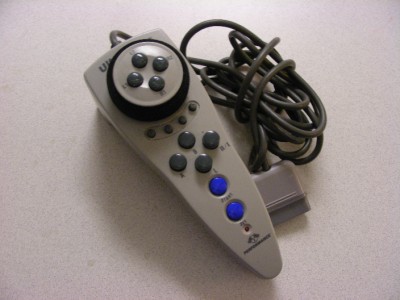
See Replies for Thrustmaster RunNGun, NeGcon, JogCon, NES Arkanoid Spinner repair and other obscure Spinner and Driving controllers
Don't want to build or mod a Spinner controller? Try a MegaRacer, Jogcon, UltraRacer or Gamestick.
Scroll down to the Replies for an unmodded route.
My other controller mods:
Tatsunoko vs Capcom Fight Stick Mod Stage One - Dual Stick Select
Arcade Controller Mod Guide: Home System Adaption
Twin Stick Mod Guide: Console Arcade Method
NES R.O.B Interactive Mod Guide
For a great FPS controller get an EdgeFX.
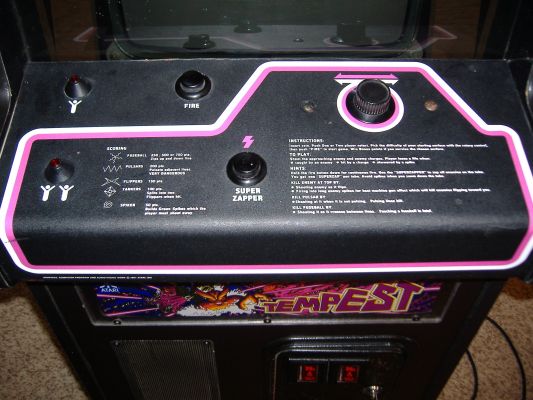
CRTGAMER wrote:A Spinner Knob enables an instant screen movement location depending how far the Spinner is turned. Turn the knob a little, the object on the screen repositions just a little and stops. Give the Knob a quick spin, the object controlled instantly jumps to the edge of the screen.

An older forgotten form of Arcade Control, the Arcade game TEMPEST is one of the more known Spinner games. There are others such as TAC SCAN, OMEGA RACE as well as Spinner combination Stick games such as TRON. The key word is control, a very accurate exact method of controlling the game sprite movement direction. This is an inexpensive mod using easily obtainable parts.

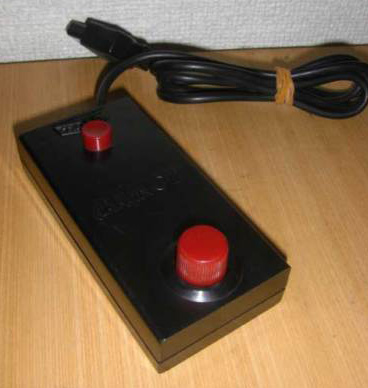
Of note one of the few consoles to support a Spinner besides all the Pong clones is the Atari 2600. The Paddles and Driving controllers supported games such as Breakout, Indy 500, Kaboom, Night Driver, Pong and Warlords. There is also a Home Brew Spinnerama cartridge for the Vectrex. These are converted games from the original Vectrex library to work with an Atari 2600 Driving Controller.
First a thanks to Nathan Strum. I already knew about using a ball mouse, the other parts with some changes inspired by his guide.
PARTS LIST
One Ball Mouse. Inexpensive at Thrift Stores and Swap Meets. I bought two for 50¢ each along with a Ninja Turtles DVD Player. Not the LED sensor ones, but the old ball mouse that always gets clogged with dust. Not using that ball, just need the mouse inside encoder wheels and PCB. LED mice do not have the mechanically activated encoder wheels.
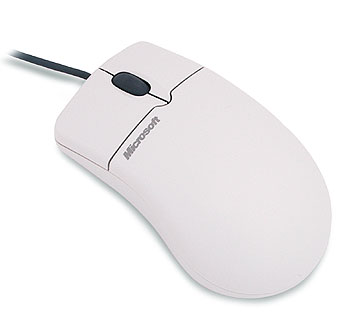
I install tested both an E-Machines mouse and a Microsoft mouse for this mod. The Microsoft mouse is a lot more sensitive, offering a faster timing response. PC ball mice are common with a PS2 connector, avoid the ones with a serial connector. There are adapters, but might be an issue when adding a PS/2 to USB adapter.

As an added benefit, using a mouse with a PC PS2 connector allows for DOS compatibility. You will need either a KVM or Y-Mouse adaptor to use two PC PS/2 mouse connections. Note that the Y-Mouse adaptor is also DOS compatible.

http://www.xkeys.com/ymouse/whym02.php
The PS2 to USB adaptor is an easy plug in for Windows and Mac systems. Be sure its an ACTIVE adaptor. USB allows a shared operation with the existing PC or Mac mouse.

HOME DEPOT PARTS
All the mechanical hardware including fasteners, mounting brackets and the spinner handle.
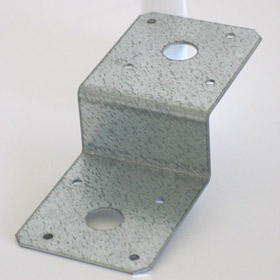
One Simpson DJT14Z Deck Joist Tie Home Depot SKU 464627.
This has the correct sized center hole as well as a side bracket for mounting the mouse PCB.

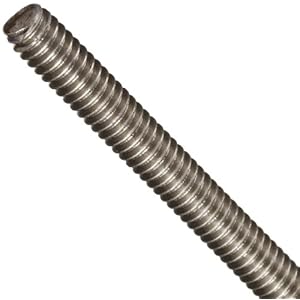
One ¼" Threaded Rod Home Depot SKU 670995.
Add in six matching ¼ nuts and washers.
Assorted fasteners as needed Various Home Depot 98¢ bags.

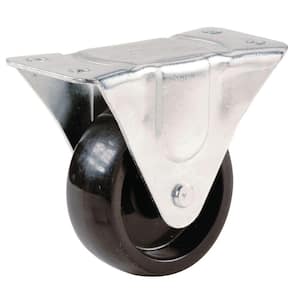
Glass Door All Metal Roller With Roller Bearing Home Depot SKU 298736.

One 2" Rubber Caster Wheel Home Depot SKU 168513.
OPTIONAL - Round Electrical Steel Cover Plate Home Depot SKU 562523.
To be used as a weighted end to give a heavier fee of the spinner. Might be a clearance issue.

One DVD Case Can be old, just need the plastic.

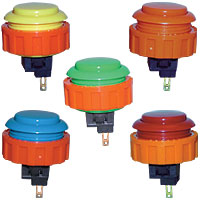
Your Choice of a Custom Arcade Project Box and Arcade Buttons.
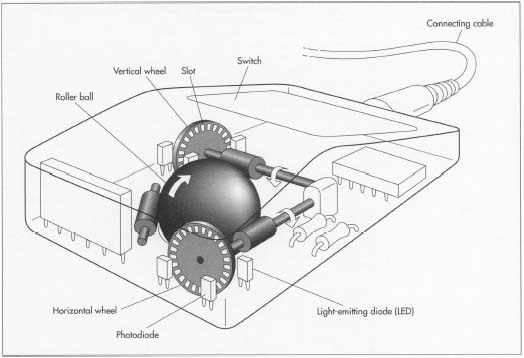
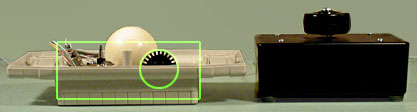
The Ball Mouse
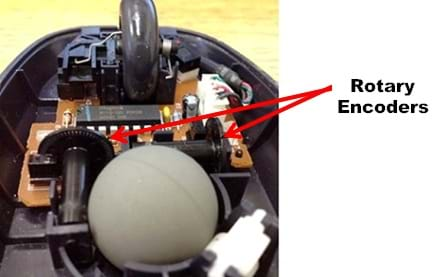
The ball mouse encoder wheels spin whenever you move the mouse. The ball spins the internal plastic encoder discs causing a shutter effect on internal light emitters and photo diodes.
Paul Phamdu wrote: https://www.teachengineering.org/view_a ... ivity1.xml
A rotary encoder is an electro-mechanical device that converts angular position to a linear translation. This might sound complicated, but you are more familiar with the work of rotary encoders than you realize. In the 1990s, transmitting information from a person's actions into a personal computer using a computer mouse became a common use of rotary encoders. The computer mouse can be used to accomplish a great deal of work on the computer by working in a two-dimensional virtual space. Surprisingly, the mechanism of a computer ball mouse, the type of computer mouse with a rolling ball in the base, is simple, having only two rotary encoders. One rotary encoder is for the up-and-down movements on the computer screen and the second is for left-and-right movements.
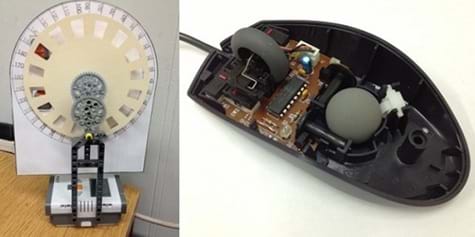
Custom Encoder Wheel
The mouse encoder wheels are way to small for an accurate alignment with a spinner. So a custom sized large wheel is in order. Here are four different toothed wheels. More teeth are harder to make but give a better response if the mouse sensors can accurately read the light openings. Too many teeth may produce a strobe effect, causing a game sprite jitter. To get the best sensitivity, I went with the 48 tooth encoder wheel.
My printer margins only allowed a 94% sized printout. I went smaller anyways at 75% to fit a tight area. A full sized printout will be too large for the Simpson bracket. be sure to maintain the Aspect Ratio when reducing the JPG. An egg shaped encoder wheel won't work. The smaller the disc, the trickier to cut and aligning to the mouse diodes. You could copy and paste multiple images of the size you decide on, may come in handy in case of errors in cutting.
Nathan Strum wrote:http://www.cheeptech.com/
Basically, the rule of the thumb is: the more spokes, the more sensitive the spinner will be. However, it may also be more prone to the strobing effect. Too few spokes though, and you'll have to spin the knob farther than you would like in order to get any movement.
- Spinner Encoder Wheels.jpg (102.37 KiB) Viewed 55753 times
An Essential Tool
Hand cutting with scissors and a X-Acto knife will work if the plastic is softened by heating with a hair dryer or lamp. A tedious effort that can be more easily be done with the right power tool. Buy or borrow a Dremel or even better, a Rotozip. Be sure it is not cordless with a limited battery run. The Dremel type tool is not as powerful but only cutting plastic here. Be sure to get one that has a cutting guide and a collet to take standard ⅛" bits.


The Rotozip uses ¼ bits but can also fit a ⅛ collet. Use a ⅛ non guide point wood bit for cutting out the plastic and a fine set of bits for notching out the teeth of the encoder wheel.
Non Guide Point Sabre Cut Bit Wood cutting bit
Don't get the guide point bits, a sharp tip is needed for poking the hole.
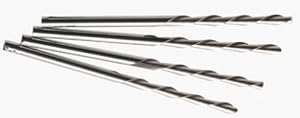
20 Piece Solid Carbide Micro Bit Harbor Freight 44924
Not diamond, but the tiny wood cutting set with the color plastic bases

Of note is Harbor Freight Tools. The proprietary Chicago Electric brand are not the big contractor brand but averaging half the cost. Perfect for the weekend projects.
Cutting the Encoder Disc
Okay, here is where the DVD case comes in, the front side will be used. Rip the clear liner notes plastic off and toss. Cut or rip the front half off, it tears right at the spine fold. You can use regular metal handled sharp scissors to cut the front off. Cut the edges away to give a flat plastic sheet. The front half has enough material for two encoder discs.
Select the wheel template from the above pic that you printed out. Just cut a square around the printed circle. Stick non foam double sided tape or carpet tape on the back. Cut out the circle but not the individual notches. Notice the DVD plastic has a dull and a shiny side. For better adhesion, stick the template on the shiny side.
This is the hardest part to make. Take your time, going slowly, material can be removed but not added. Its better to take off a little at a time.
Carve the teeth
You can hold the Dremel and carve out the plastic, but there is a better way for precise controlled cutting. This is where the cutting guide comes in handy. Chuck the Dremel or Rotozip upside down in a vice gently. You don't want to crush that motor housing. With the guide in place adjusted to the right height, you now have a miniature router table for the controlled cutting. The idea is to hold the plastic, not the tool for precise cutting. The guide helps to keep the plastic level while cutting.

Start off with the regular ⅛" sabre wood bit. Cut out the circle pattern. Be exact in the circular cut, all the edges have to be the same distance from the center. You could leave a slight amount extra that can be touched up with a hand file. Save the extra scrap plastic to use as shims later.
Drill out the center hole. This has to be exact center, so use a center punch and tap not pound a small dent in the center. Use a small drill bit as a starter hole. Follow up with a ¼ drill bit. Be sure of the final size matched to the threaded rod. The DVD plastic disc should fit snug in the metal threaded rod. If the hole is too big the disc will wobble when spinned and not stay aligned with the mouse diodes.
Mount the disc temporarily to the rod. Lay a file or piece of sand paper on the bench or a concrete surface. To finalize the edges to sure an accurate circle. Spin the rod by hand, buffing the edge of the disc on the file or even the bare concrete. A slight pressure just drag that wheel.
On to the notches
The ⅛ bits are too aggressive, ends up melting and chipping the teeth. Use the miniature wood bits with the colored plastic for a fine steady control. Practice on that scrap plastic you cut away earlier. Take it slow and cut out all the white out of the teeth. A patient cleanup with a small hand jewelers file to get rid of the burs between the teeth. Any plastic "hairs" left between the teeth will scatter the sensor light. An edge ring is only needed if the plastic teeth are very narrow or thin. The edge ring may get in the way of the mouse diodes.
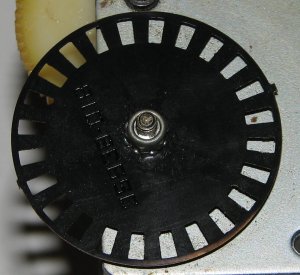
After the encoder wheel is done remove the paper template. The double sided tape is difficult to remove. After all that work, you don't want to break the teeth now. Use a putty knife and scrape from the center to the edges to lessen the risk of damage. Clean off remaining tape glue with Lift Off or Goo Gone. The shiny plastic surface may scatter the diode light so rough it just a little to get rid of the shine with the jewelers file or fine grit sand paper.
Lube the Sliding Door Roller
The grease inside is great for a heavy glass door, but too much drag. Temporarily install the threaded rod with two nuts. Spray WD40 inside the roller bearing to flush out the grease. Now the roller has a nice spin when you give that rod a twirl. Remove the rod.
Simpson Tie Mounting Bracket
Cut the metal bracket in half with a hack saw, right along one of the angles. When you are done one half will have the angle, the other side will be a flat piece of steel. The angle is for mounting the mouse later on. The sliding door roller will be sandwiched between the two pieces of steel right at the large holes. Four screws are needed to keep the roller from shifting around between the steel plates. Its tempting to use the existing small holes, but the roller in the middle might still shift around. I use one inch long #8/32 screws and nuts here. Length is critical to clear the encoder wheel. Place the sliding door roller under the flat steel centered at the large hole. Holding both the roller and steel plate flip it over, being careful not to shift the two pieces. Center punch the steel plate for the first screw. After drilling the first hole put the screw in to assist guiding the roller for the remaining screws. You are looking for a snug clearance between the roller edges and the four screws.
For the arcade housing mounting screws I went with one inch long #5/16 stainless. After all, these will be visible from the top of the arcade panel. Drill an additional four outer edge holes evenly spaced at each corner. Install the long threaded rod with a nut on each side of the roller. Note that a regular washer won't fit, will interfere with the bracket. Not critical yet on the length, the threaded rod will be cut towards the completion of this mod. Since the roller shaft has a small surface area for the nut to bite, a smaller diameter lockwasher is a good idea to prevent the nut from backing off. Not too tight yet on the nuts, some adjustments will be made. Install the plastic encoder wheel with a nut and washer on each side hand snug on the angle bracket side.
Mounting screw length is critical to clear the encoder wheel. Screw heads will be at the other Knob top end to allow for a flat surface mounting.
The Mouse
Carefully take apart the mouse. Before removing the wheels verify which is the left right direction sensors as well as which direction spins the wheel which way. You can watch the mouse arrow on the computer screen while moving the exposed bottom mouse half with the ball in place. In the computer settings screen, be sure to have the mouse sensitivity and acceleration settings cranked all the way up. Visualize the small mouse wheel replaced by the large custom encoder. Looking down from the top, clockwise will move the mouse arrow to the right.

Testing
Carefully remove the mouse PCB and separate from the ball housing and ball encoder discs. Plug the mouse PCB into the computer for testing. Hold the bare mouse PCB in a way that the encoder wheel can be spun without rubbing against the diodes. The Mouse arrow on the screen should move slowly to the right or left. If up or down you are using the wrong sensor, try the other one. Spin the disc the other way for the opposite direction. No worries if that mouse arrow doesn't zip across the screen, you are looking for continual movement thru the entire spin of the encoder wheel. The hardest part is done!
Large fender washers on either side to the encoder wheel will help flatten out any warpage.
You will now see how much space you need between the angle and encoder wheel. The height can be compensated by adjusting the nuts on the threaded rod. To avoid solder damage risk to the fragile sensor diodes, its best to mount the entire mouse PCB as a unit. Go even further by using the bottom part of the mouse shell itself. Cut excess plastic off the mouse housing to allow for the encoder wheel to spin in between the light emitter and sensor diode.
Mounting the Mouse
Before mounting the PCB, presolder wires under each mouse switch solder pads for attaching to your custom Arcade buttons later. There are three buttons including the scroll wheel click button. Most Spinner games use the right and left buttons, but might as well have all three buttons soldered up with wires.
Leave enough of the mouse housing plastic for the mounting screws. I use one inch long #6/32 screws with nuts here. The extra scrap DVD plastic or extra nuts and washers can be used to shim the mouse assembly. Use at least two screws to hold the mouse in place. The screw heads may have to go under the mouse PCB so scrutinize that the electrical traces are clear. A couple dabs of model glue will keep the PCB in check with the housing, Don't forget to presolder the switch wires and have the screws in place before gluing! Be sure to mount the mouse so the sensors are at the high spin arc point of the encoder wheel.
Don't force the encoder in place to clear the sensors. Place the plastic wheel where it needs to go between the diodes and then spin the threaded rod thru the bearing and encoder. Be sure the bracket mounting screws clear the encoder wheel.
- Arcade Controller Mod 14_1.jpg (248.18 KiB) Viewed 55737 times
This will take a few adjustments with shims and moving the nuts up and down on the rod. Depending on the light emitter and sensor diode, the wheel may work better slightly closer to one or the other. Be sure to test before mounting the encoder housing in your custom Arcade housing. Take apart the caster wheel assembly, this will be the Spinner knob. Extra nut on the bottom to set the height of the knob and a nice stainless cap nut and washer on the top.
You can also add an optional round steel plate at the bottom to give a heavy solid feel. The weight should be round to avoid wobble. Do not cut the threaded rod yet. The height and clearances inside your Arcade housing will determine that later. Some white (not yellow gas) teflon tape can smooth out the threaded rod from chafing any electrical wires.
The Spinner does not have a housing yet. Okay if you can't wait, load up your favorite Mame Spinner game and give it a try. The TAB key in the Mame game screen will bring up an Analog control option. Set the sensitivity all the way up to 255. A good game to verify that the Spinner is the right direction is TAC SCAN. The ships will spin to the right when rotating the spinner clockwise. A driving game should turn to the right as you spin clockwise. If backwards you can flip the mouse housing for another painful alignment or just reverse the direction in the Mame menu.
To emulate Pong, the up and down diode sensor could be cut away and resoldered on a separate mounted board along side the right left diode. A simple toggle switch can be used to select either up and down of Paddle Pong or left and right for the majority of spinner games.
Arcade Housing and Switches
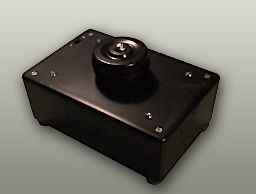
You can use a ready made electronics project box or custom build one.
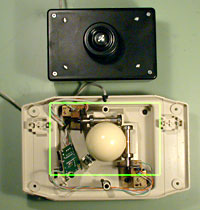
Nathan Strum 's Spinner:
For the fire buttons Happ Controls have some great ones.
http://www.happcontrols.com/pushbuttons/pushbuttons.htm
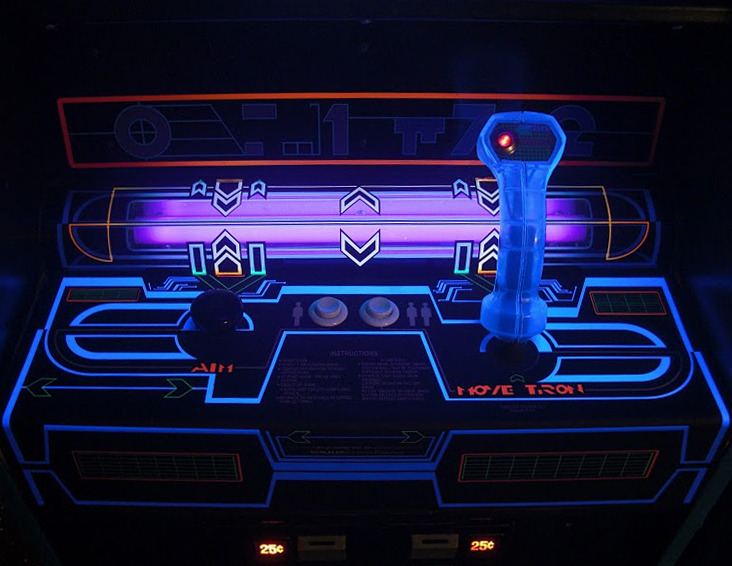
But what of combo Spinner Stick Arcade games such as TRON? The keyboard can be used for the stick or a separate Arcade stick. The best method is combine both on one board in a way so the stick is not in the way for Spinner only games. At the same time the Spinner should not interfere with Arcade stick only games.
For large holes, a step drill works great.

Since I already have a modded Zaxxon Arcade controller, a simple matter of adding the Spinner assembly here. Clearance is an issue, the reason why I cut away the mouse PCB button sections. This would be an issue if there were many mouse only type games that only have left and right movement as in Spinner Games. Since the Zaxxon setup already has the Mame keyboard encoded fire buttons, not a big deal losing the mouse buttons.
In the case of the Arcade TRON control panel, a close proximity!
- Arcade Controller Mod 22.jpg (216.15 KiB) Viewed 56702 times
The Zaxxon Arcade Mod for Atari, Mac, and PSX.
With PSX adaptors also works in Dreamcast, Gamecube and XBox:
http://www.racketboy.com/forum/viewtopic.php?p=292283#p292283
This will run in both the PC and the Mac with a simple USB Active adaptor cable. PC Mame has a better front end, listing by game type and especially by control. Look for games under the Trakball section, quite a few are for the Spinner. Most driving games also work great! Some games such as PUZZ LOOP will have to be set through the Dip Switch menu to work with the mouse or spinner.
Some Spinner games to try, there are many more to discover.
ARKANOID
BLASTEROIDS
CENTIPEDE (Just side to side)
CHAMPIONSHIP SPRINT
DISCS OF TRON (Combo Stick)
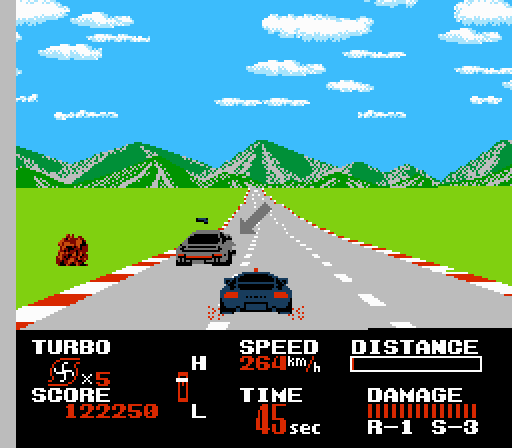
HARD DRIVING
NEW RALLY X
OMEGA RACE
POLE POSITION
PUZZ LOOP
SPEED FREAK (Yes!)
SPY HUNTER
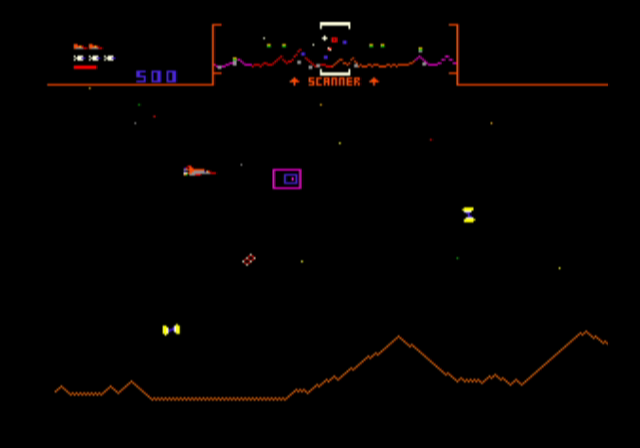
TAC SCAN
TEMPEST
TRON (Combo Stick)
WACKO (Combo Stick)
WARLORDS
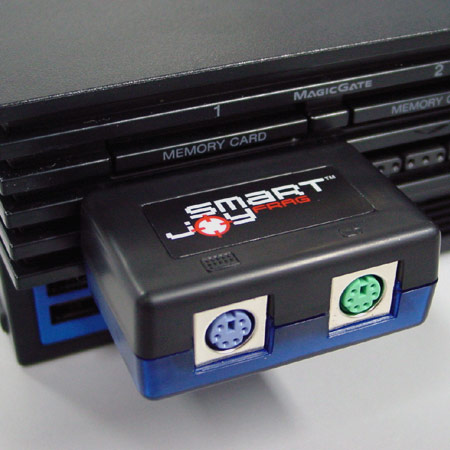
This mod can also work on the PS2 with a Smart Joy Frag. Imagine all the PS1 and PS2 games now played with a Spinner!
PS1 and PS2 - MOUSE - TRACKBALL - SPINNER GAMES
Activision Anthology - Kaboom
Arcade's Greatest Hits Atari Collection - Asteroids, Centipede, Missile Command, Super Breakout and Tempest
Atari Anthology - Asteroids, Centipede, Missile Command and Tempest
Command and Conquer (Only Red Alert had the PSX Mouse option)
Luxor Pharaohs Challenge
Magical Drop
Pop Cap Bejeweled
Pop Cap Zuma
Puzz Loop
REZ
Sega Genesis Collection - Tac Scan Arcade (Unlock)
Tempest X
Note that I have Asteroids listed, control the ship like Omega Race.
http://www.racketboy.com/forum/viewtopic.php?p=400265#p400265
What I really like about the Spinner is the very ACCURATE pixel by pixel control. The spinner can keep going when let go and instantly stop at the touch of a finger. No more joystick or mouse cramps from marathon sessions.
A great site of different Spinners. Mod or buy one:
http://arcadecontrols.com/arcade_spinners.shtml
Rotary Encoders https://www.teachengineering.org/view_a ... ivity1.xml
mst3kpimp built a Spinner out of a TV Games Atari paddle
http://www.racketboy.com/forum/viewtopic.php?p=439100#p439100
Wiki Spinners: http://wiki.arcadecontrols.com/wiki/Spinners

Emulation Advantages
Nothing beats the original Arcade, but sometimes the original is hard to come by. Anyone see a Space Wars cabinet in the Arcade anywhere? Emulation is not always a bad thing. Sometimes custom controls can be utilized. Not a surprise here right? Custom controls are a taken for granted option in Mame. But actually this one is a Hidden Discovery thru the TAB menu. I couldn't get my mouse to work in this game, even though Mame had the option.
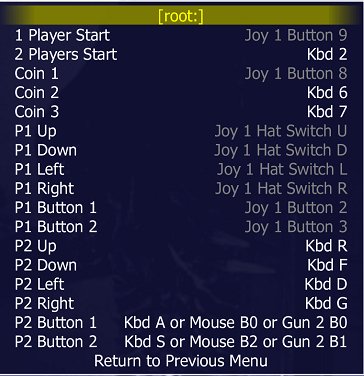
Imagine my surprise when I went to the in game Service Menu of Puzz Loop.
The Arcade game Puzz Loop is a Stick type game. Hidden inside the Dip Switch Service Menu allows for a Knob Controller. The Mouse or a custom Spinner can be utilized! The Arcade I played had a stick, Spinner versions I didn't know about until I discovered this with the wonders of Mame Emulation.
Perhaps there are other "Hidden Gems Controls" waiting to be discovered.

.png)


-1476521649.png)